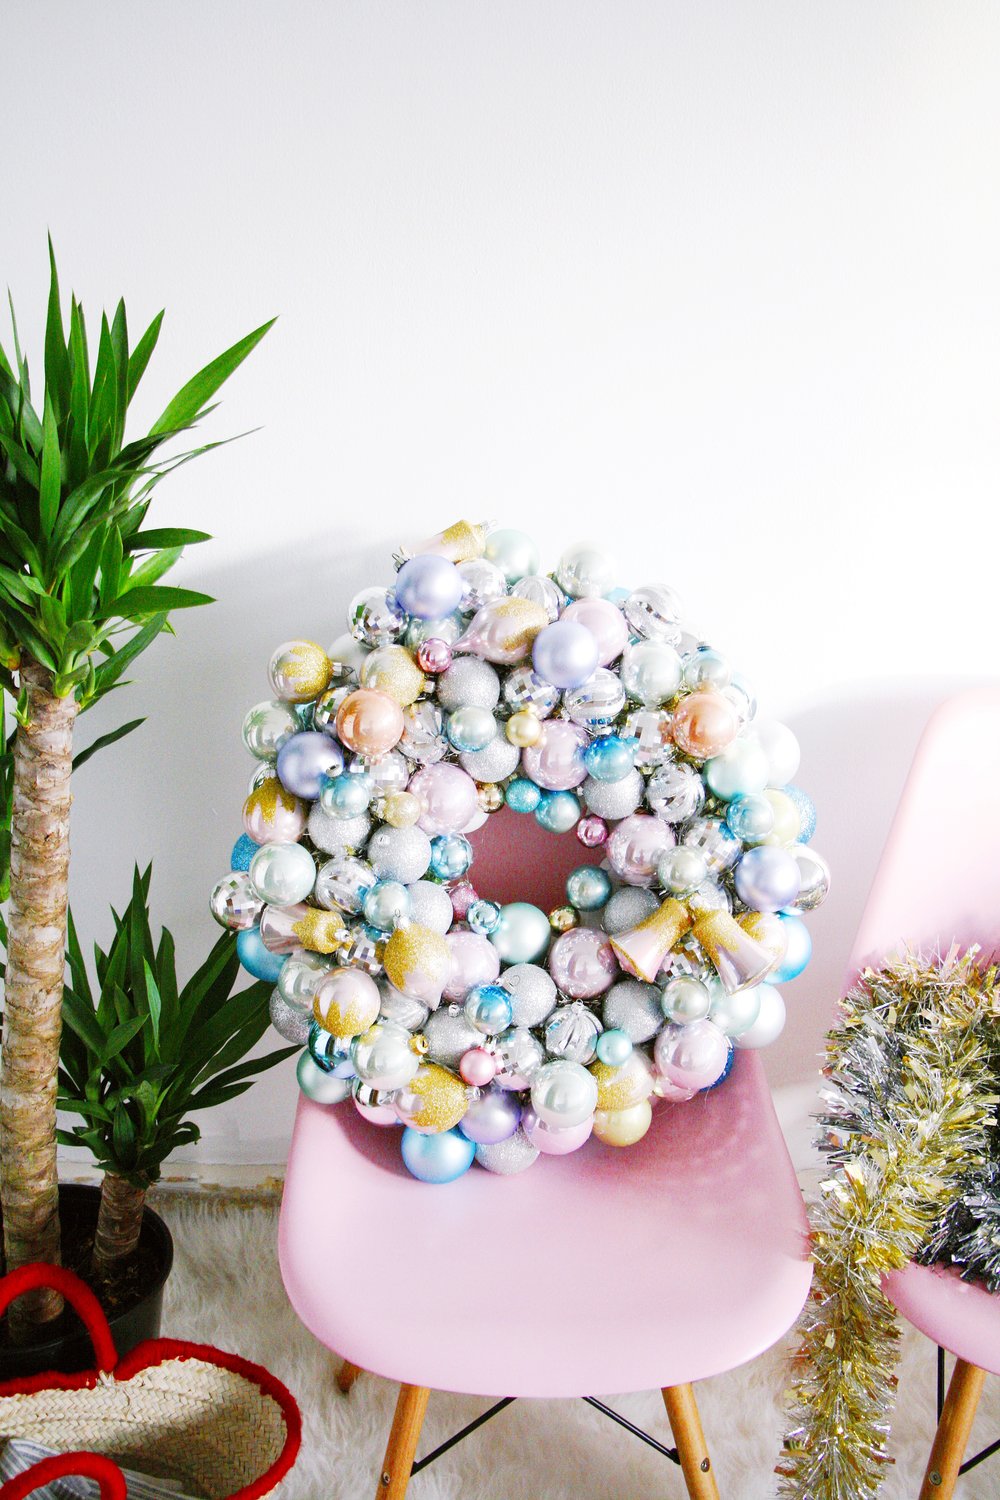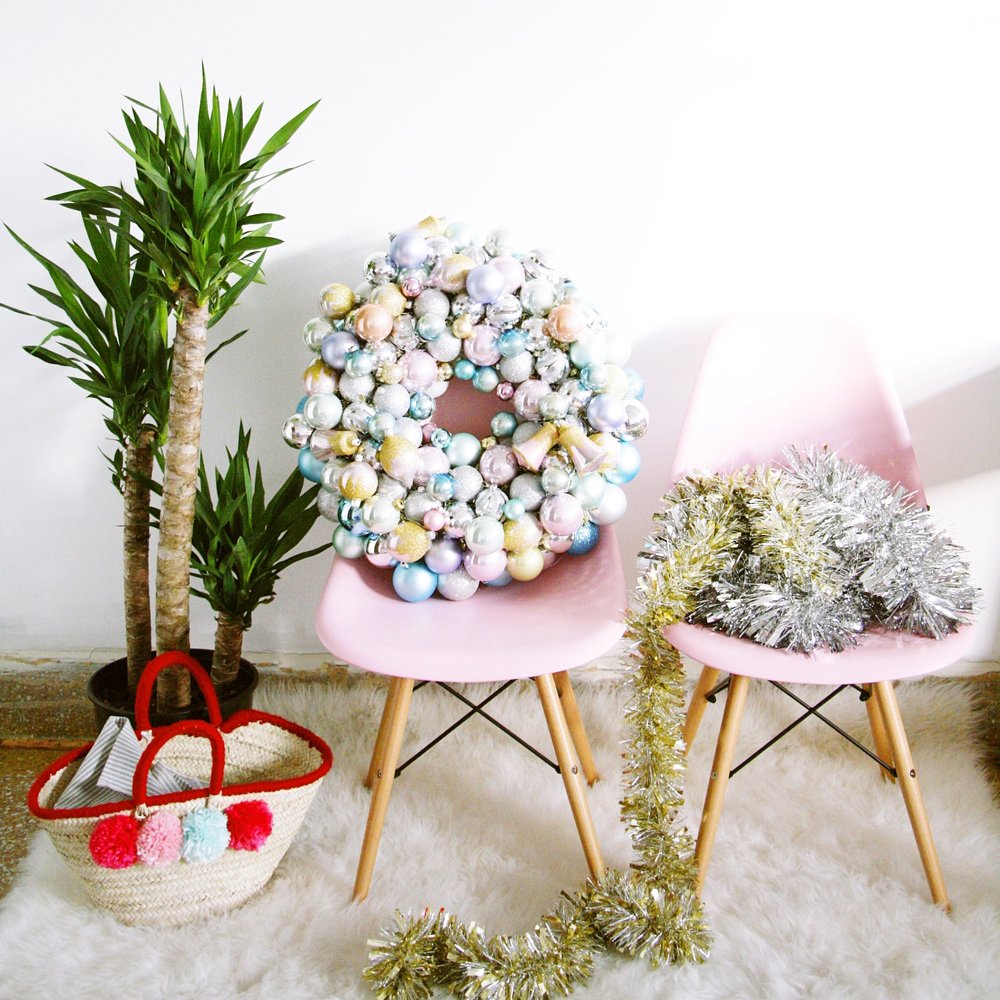
I love fun decorations for the holidays and this wreath is super easy to make with some time and a lot of hot glue! I wanted my wreath to be colorful, happy, and festive, so I decided to go with a palette that went with my taste and decor which is mainly pastels. I got my ornaments a few ways, some were bought new in larger sets and others were vintage purchased from thrift stores. Finding vintage ornaments is great because most of the time they are really inexpensive. I found quite a few sets at Goodwill for $2 each. I did need to make a run to Target half way through when I realized I was going to need more ornaments. So to be on the safe side try to have more ornaments than you think you will use.
What you will need:
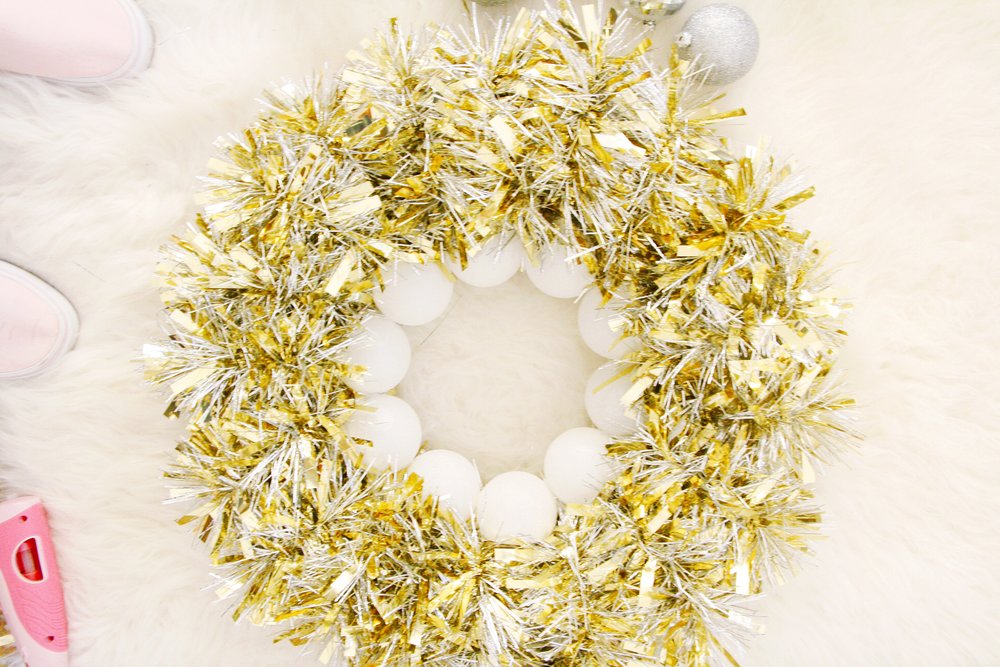
- A styrofoam or straw wreath form
- Tinsel Garland
- Hot glue gun and extra glue sticks
- About 120 ornaments in your preferred color choices
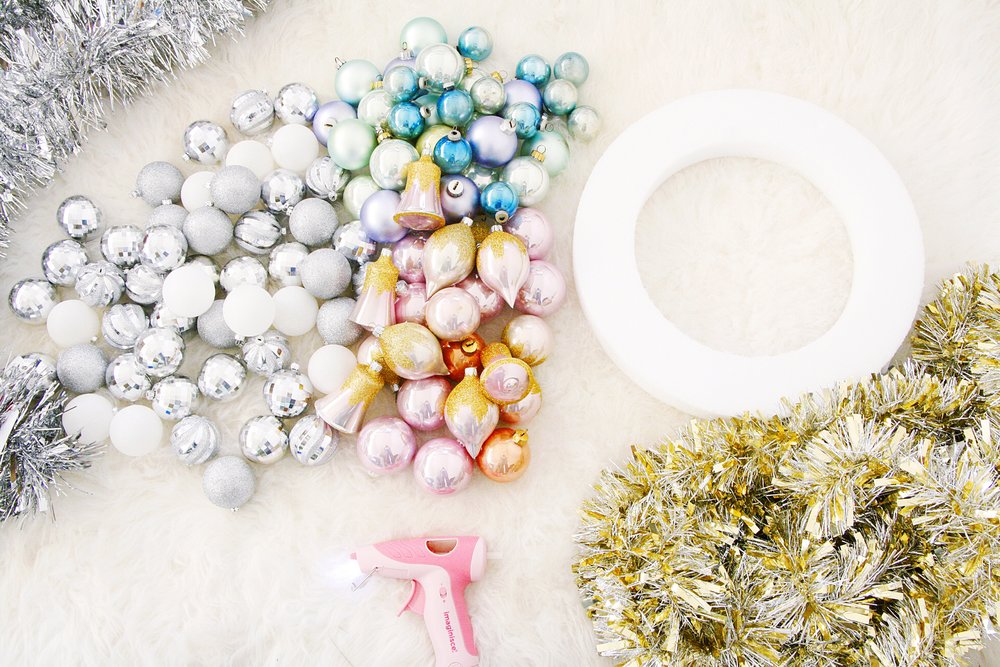
I started by organzing my ornaments and planned on how I would style them by color on the wreath. I decided to go with a neutral silver and fill in with pink, gold, and blue. There’s also some random coral and periwinkle because I found a few vintage ornaments that were too pretty not to buy and incorporate.
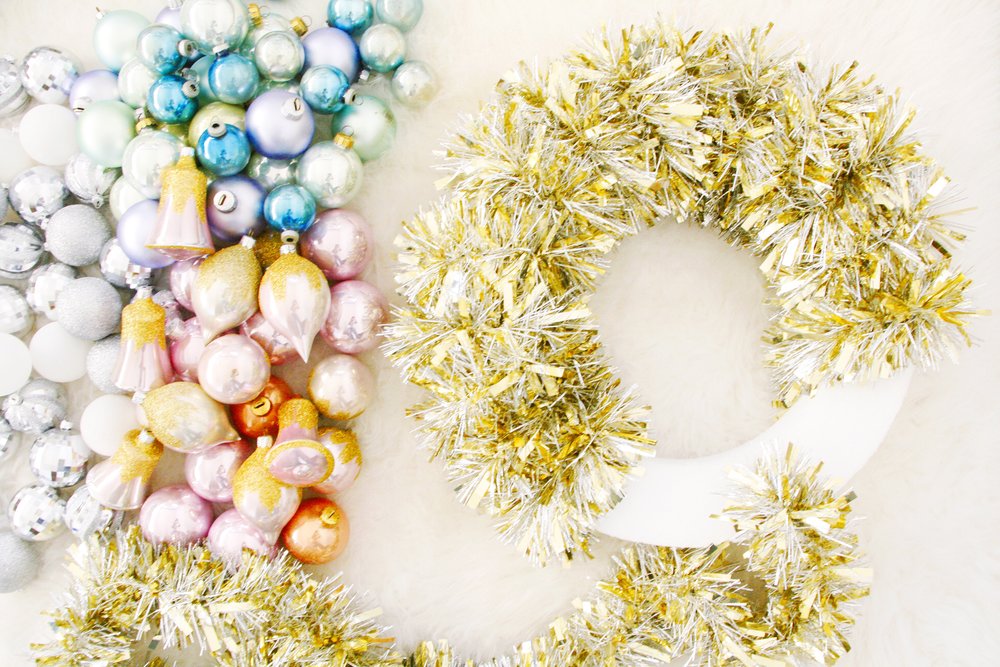
Next step is prepping your wreath. I wrapped my styrofoam wreath form in tinsel garland that way the first layer of ornaments would be easier to glue on and also so that if there were slight holes, tinsel would be showing instead of styrofoam. Plus it adds a little sparkle!
I worked my way from the inside out, first glueing onto the form but then also glueing the ornaments to eachother.
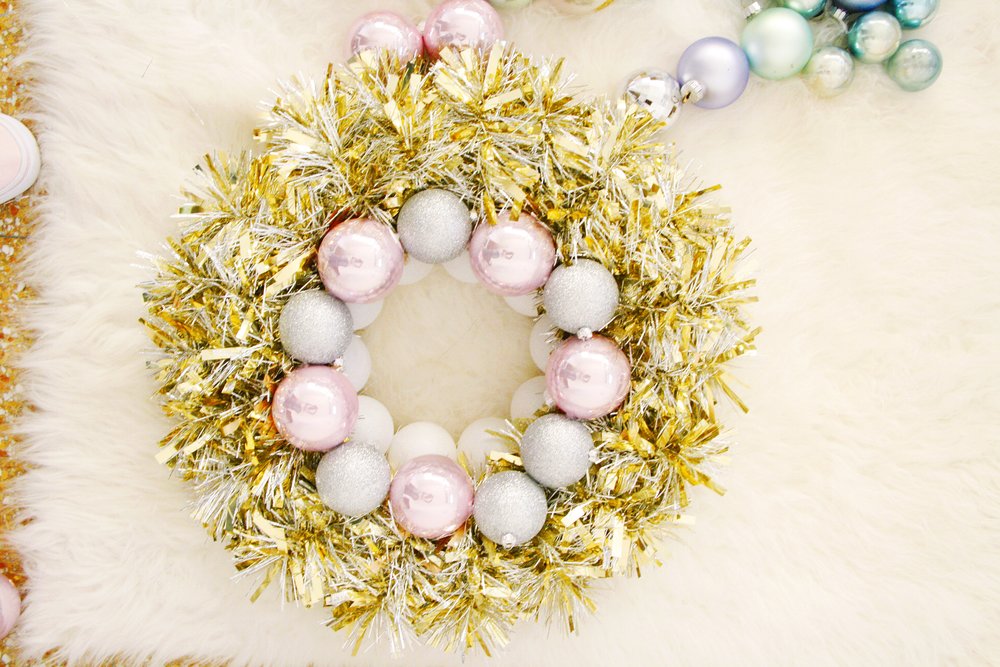
Continue building and glueing onto one another. Ideally you want to work from the flat surface on the inside of the wreath to the flat surface on the outside of the wreath so that there are no holes from any angle.
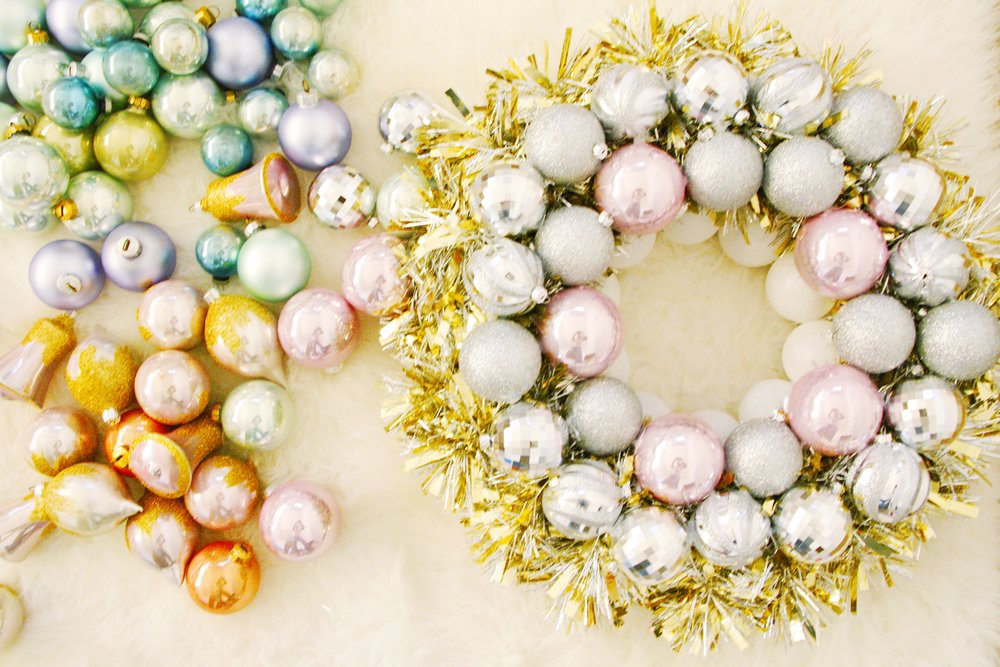
After you cover the whole wreath with the first layer, go back and start filling holes, this is when I started to add more color. This is also when I got crazy with it and ended up with a very large wreath. I am super happy with how it turned out and now it’s a decoration I can continue to use year after year. It is a little more special because I made it myself with colors and ornaments that fit my personal aesthetic.