• Skip to primary navigation
  • Skip to content
  • Skip to primary sidebar
  • Skip to footer

Arsenic Lace

  • Recipes
    • Boozy Treats
    • Cocktails
  • Lifestyle
    • Decor
    • Home Entertaining
    • Travel
  • About
  • Press
  • Book
  • Events
  • Contact
  • Nav Social Menu

    • Email
    • Facebook
    • Instagram
    • Pinterest
    • Twitter

DIY

Creating My Outdoor Living Space

April 28, 2020 by Natalie

Okay. I’m going to start by saying that I’ve never had an outdoor living space in my adult life. So I’m really really excited to be sharing inspiration for creating my outdoor living space. My deck! I haven’t come up with a clever name yet as I have in the past for the Hallway Refresh or Office Overhaul. If you want to help me brainstorm a cute name feel free to leave a comment below. Deck Dreams? lol, I don’t know.

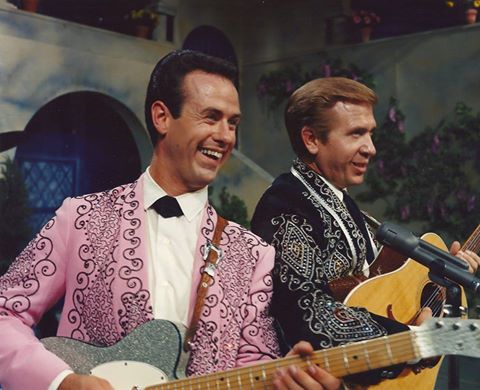
Like everyone else during the lockdown, I’ve been binge-watching a lot of things. Alias Grace, Outlander, The Dublin Murders, Little Fires Everywhere, Handmaid’s Tale to name a few. I’ve also been watching a lot of music videos too. I’ve watched Dwight Yoakam’s entire catalog of music videos. I have also watched a lot of episodes of The Buck Owens Show. So don’t be surprised when I tell you the color palette inspiration came from Buck Owens and The Buckaroos western suits in a 1966 episode. It’s true. I have problems. Pink, white and black everyone.

I made two design boards for what will be the living room area and what will be the dining area. This is the first time ever that I have been into the idea of black being an accent color but I really loved the way it looked. Thanks Buck!

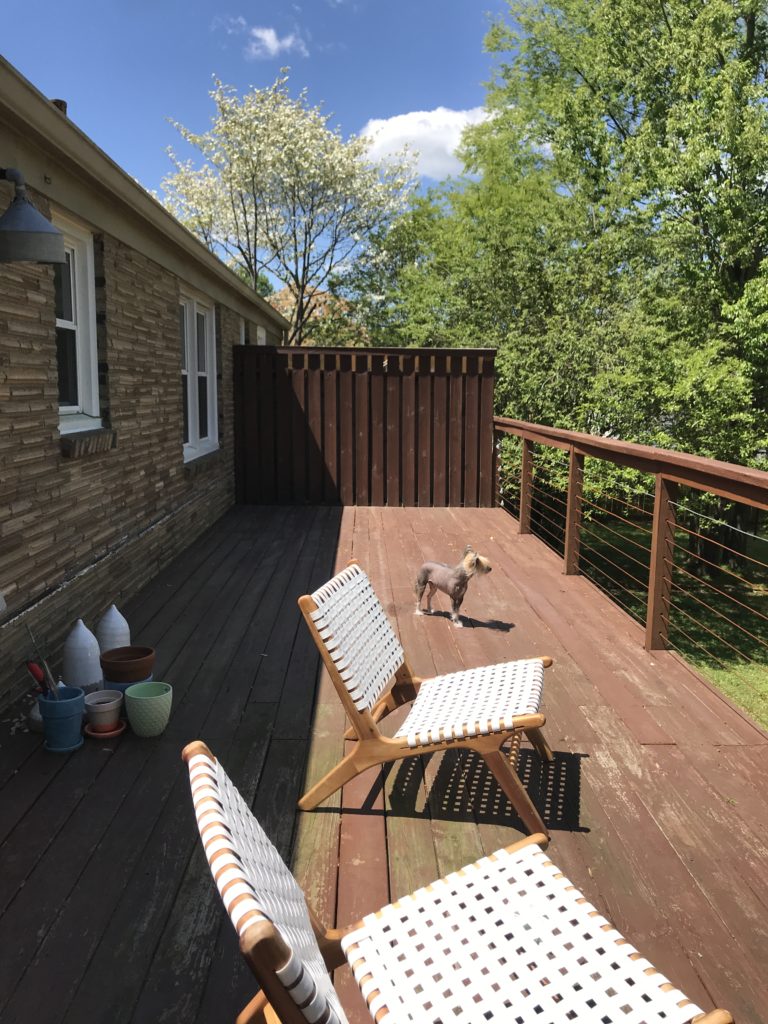
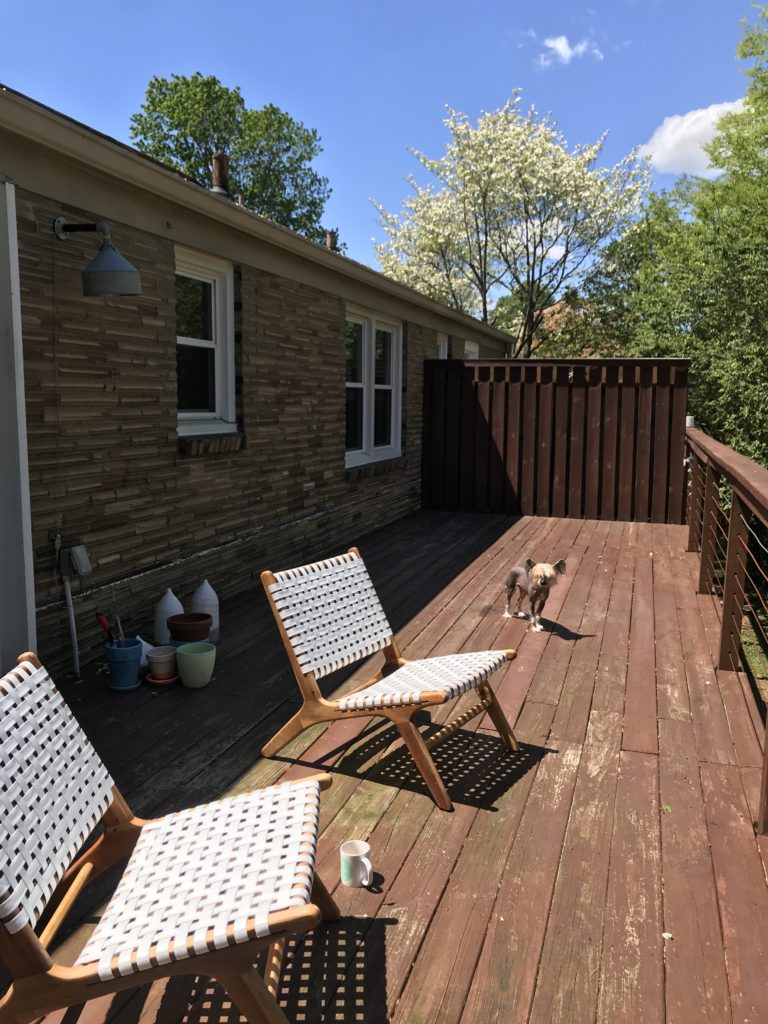
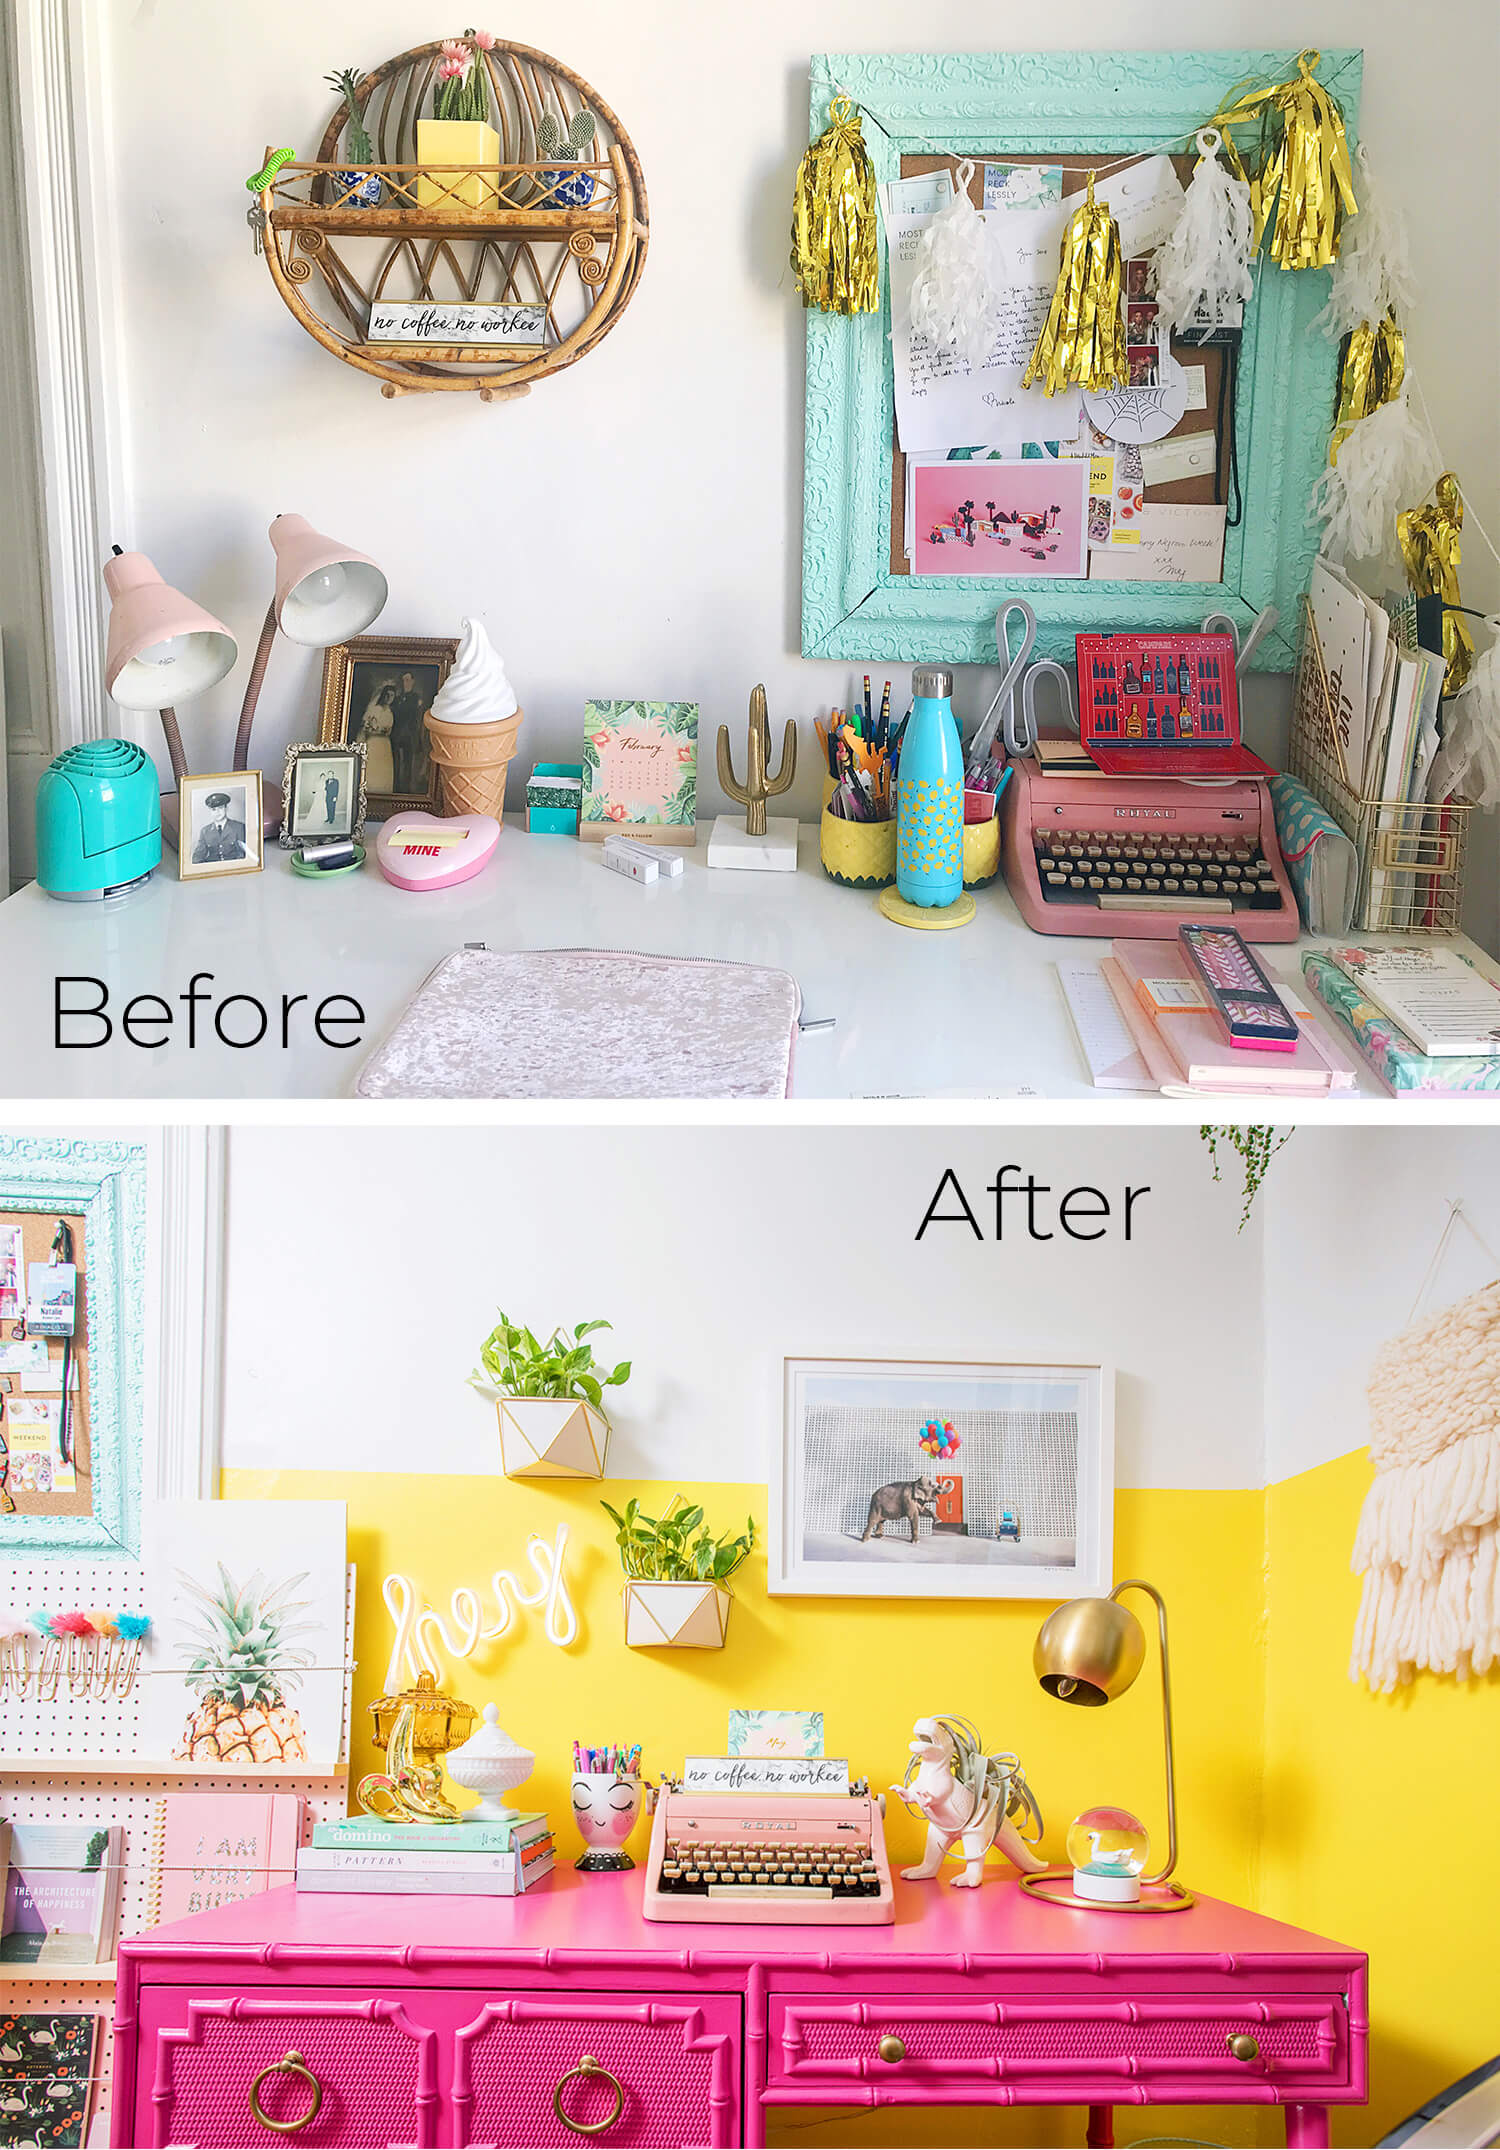
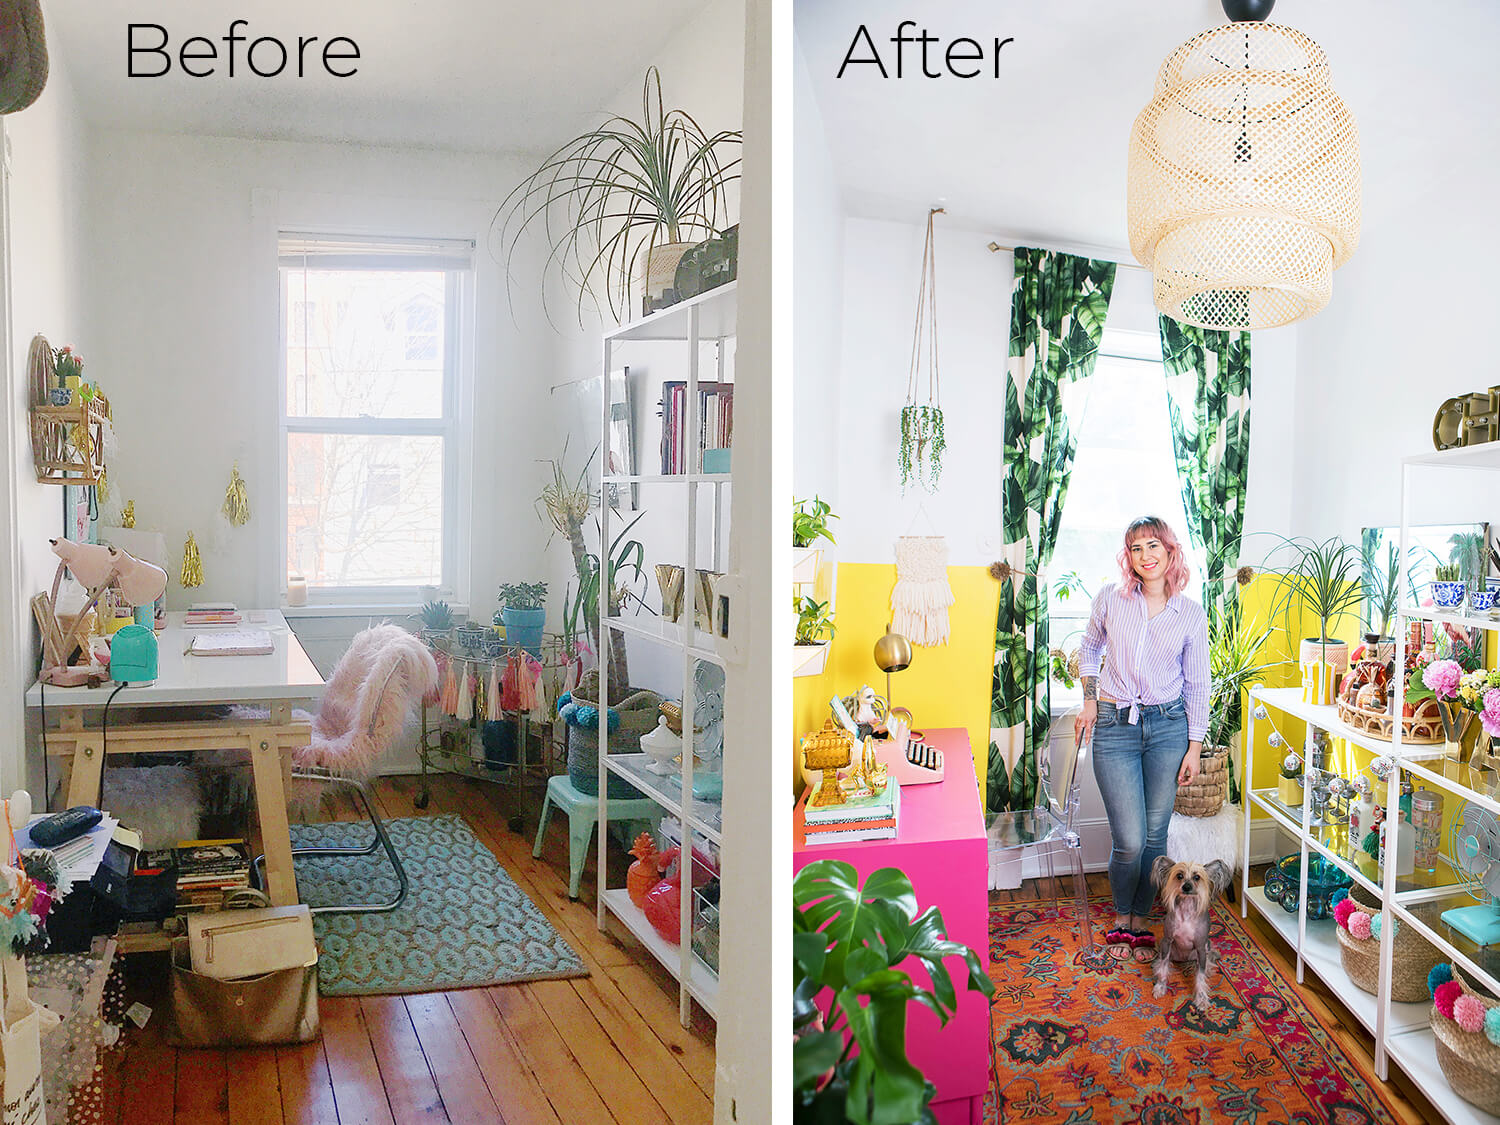
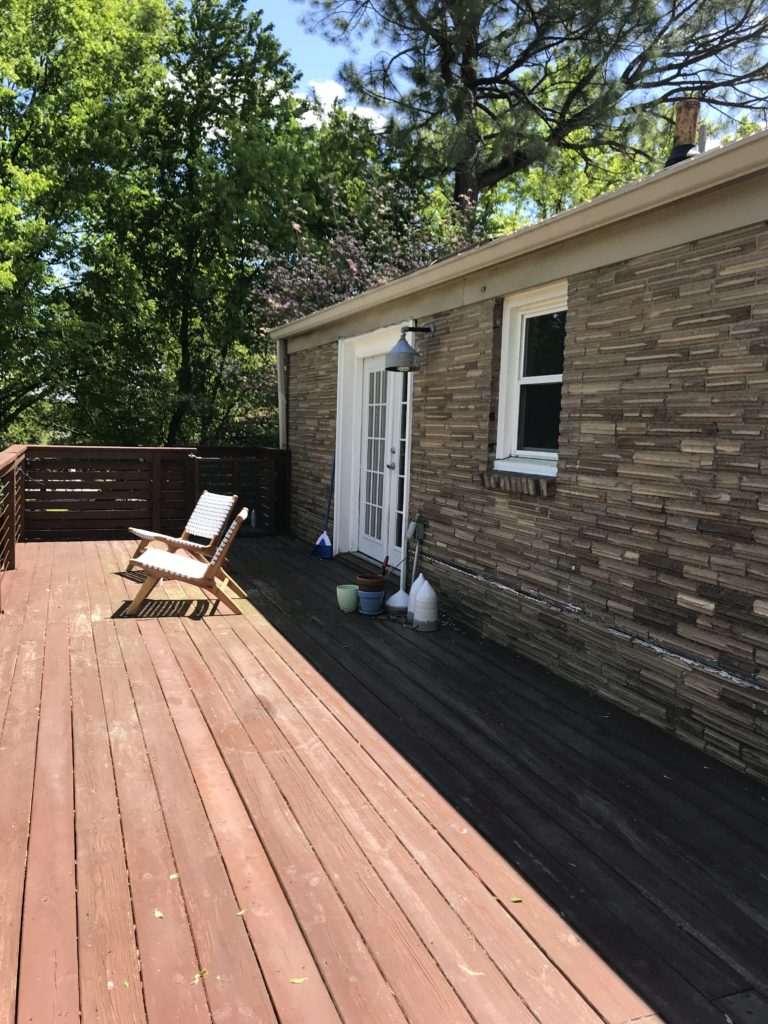
Here are some before photos.

I’d really love to put up some outdoor curtains to cover the back wall that divides the deck from my neighbors. That would also allow me to hang some plants from the curtain rod. I’ve looked up some options and it seems doable. Covering the brown wall with white curtains will make everything look a little more cohesive and bright since I can’t repaint the deck.

The Living Space

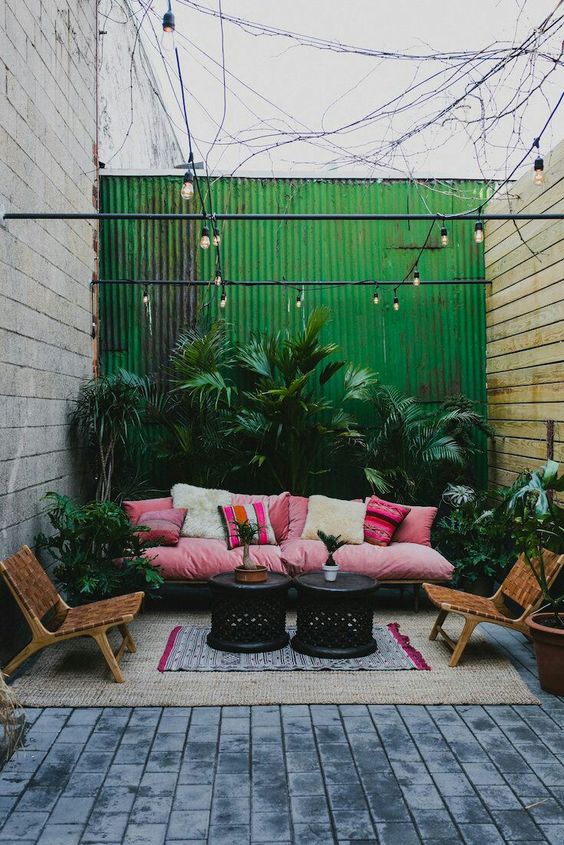
Here is my main inspiration image for the back of the deck which will be the living area. Obviously a different color palette but pretty much how I imagine the setup being. Also, LOTS OF PLANTS. YES! Big couch and two deck chairs that actually came from my old living room design. I loved the style so I bought them and used them inside but now they save me a little money since I no longer have to buy chairs.

I went back and forth about whether I was going to get a large coffee table or two smaller ones. But I went with two metal stools because I liked the option of moving them around as needed. The perfect pop of black to tie in the end chairs in the dining area. That pink/terracotta rug is everything. Jute poof to add texture and to pull in the jute of the rug from the dining area.

Creating My Outdoor Living Space

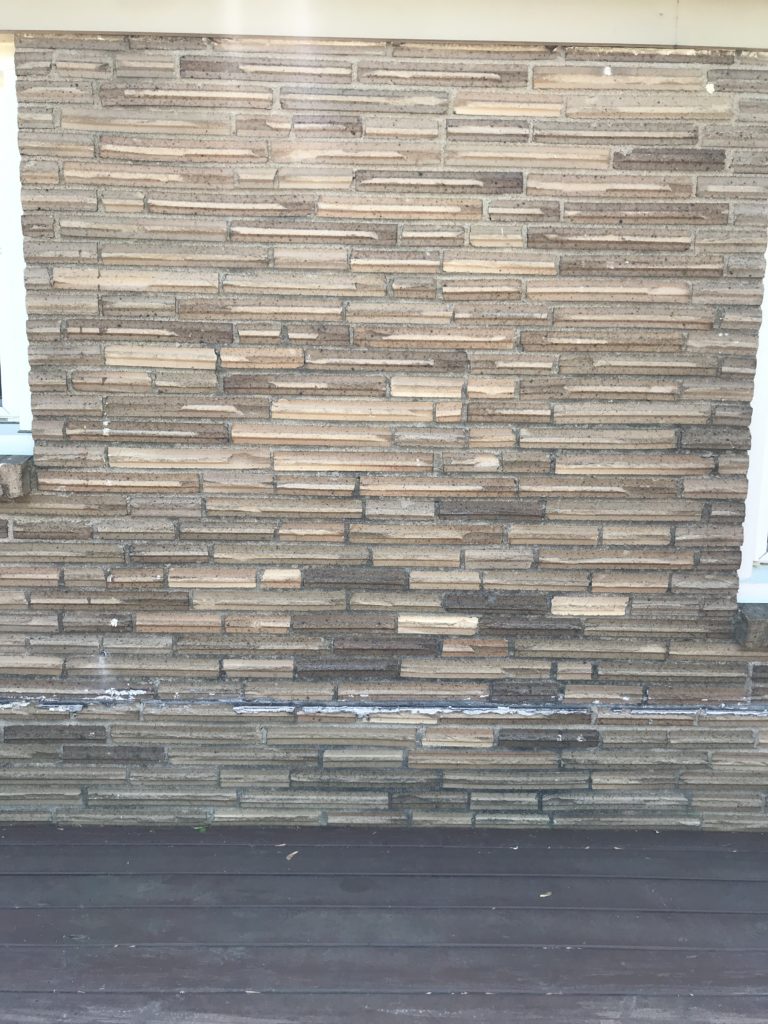
There is a break in the windows which leaves a bit of wall in between the living and dining areas. I imagine that being a bar cart area. WITH MORE PLANTS.
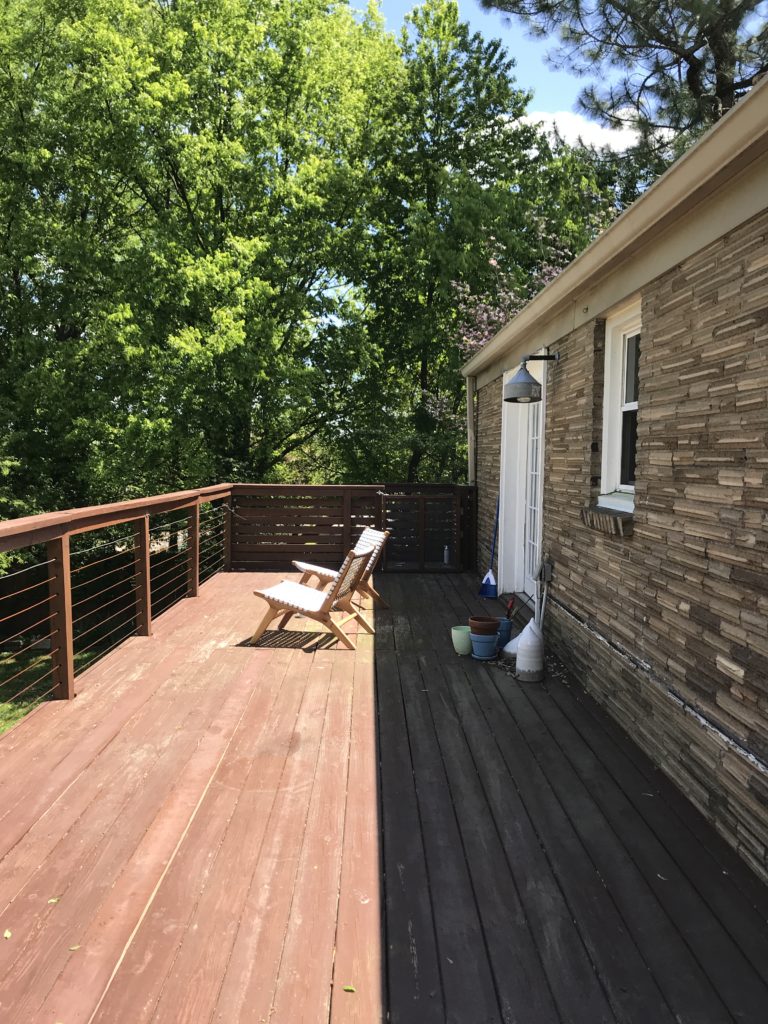
Creating My Outdoor Living Space

More before photos.

The Dining Space

Here is my inspiration image for the dining area. I like the idea of walking out of the house into this space as an extension of the existing dining space in the house. I’m dreaming of having my morning coffee here. I loved the idea of four main chairs that matched and two matching end chairs. So I went with pink metal chairs for the main chairs and black rattan chairs for the ends. A simple light wood table and a jute rug to pull it all together. Also MORE PLANTS.

All items linked below, Pinterest board here and can’t wait to keep updating you on the process of my outdoor living space.

  1. Couch
  2. Rug
  3. Jute Pouf
  4. Deck Chairs
  5. Metal Side Tables
  6. Bar Cart
  7. Planters
  8. Planter
  9. Dining Table
  10. Jute Rug
  11. Pink Metal Chair
  12. Black Rattan Chair

Filed Under: Design, DIY, Home Decor, Room Tour, Window Shopping Tagged With: deck, design, DIY, home, Home Decor, interior design, outdoor space, patio

DIY Summer Sangria Bar with World Market

July 24, 2018 by Natalie 1 Comment

DIY Summer Sangria Bar

This post is sponsored by Cost Plus World Market. All opinions expressed in the post are my own and not those of World Market. Thank you for reading the sponsored content that makes Arsenic-Lace possible!

Recently I was super excited to team up with Cost Plus World Market to create a DIY Summer Sangria Bar. I shopped at my local Woodland Park, NJ store where all the store associates were friendly and accommodating. They eagerly helped me find the products I needed for my Sangria Bar. When setting up a Sangria Bar it is so important to have all the appropriate bar tools and accessories. I found so many affordable, not mention, stylish options in store. Cost Plus World Market is definitely my one stop shop for entertaining essentials!

DIY Summer Sangria Bar

DIY Summer Sangria Bar

I developed 3 easy, delicious, and unique sangria recipes using wine from World Market as well. It took me by surprise the wide variety of wine they carried in the store. I picked Radio Boca Tempranillo for the red which is a dry and fruity Spanish wine perfect for a traditional sangria. The Oyster Bay Sauvignon Blanc for the white which is grassy, herbaceous, and has notes of tropical fruit. This crisp, lush, and floral Rosè from Louis Jadot tastes like Summer and is a great pink sangria option.

DIY Summer Sangria Bar

DIY Summer Sangria Bar

I picked items with tropical details for my Sangria Bar set up to get everyone in the Summer spirit! A woven fiber table runner together with palm leaf placemats add texture and style when decorating your table. I also used added gold accents along with a gold pineapple ice bucket, gold and marble tray, gold stemless wine glasses, and gold spoons. These inexpensive glass carafes were the perfect option for having multiple vessels to serve the sangria in. Having extra fruit out for guests to customize their sangria is key and these cute blush bowls completed the look while also adding a pop of color.

DIY Summer Sangria Bar

Head over to the World Market Blog to see the full recipes and how I put together this DIY Summer Sangria Bar. Overall I’m so happy with how it turned out! I’ve added all my picks that I used from World Market below just in case you want to shop them. If you’d rather shop in person at a Cost Plus World Market near you, you can use their convenient store locator on their website. Happy shopping and drinking! 😉

DIY Summer Sangria Bar

Filed Under: Cocktails, DIY, Entertaining, Home Entertaining, Party Ideas, Sangria, Sponsored, Summer Cocktails, Sweet, Wine Tagged With: ad, classic cocktails, DIY, easy entertaining, home entertaining, recipes, sangria, sponsored, summer cocktails, wine, world market

One Room Challenge | Reveal of the Office Overhaul

May 10, 2018 by Natalie 12 Comments

Reveal of the Office Overhaul

The reveal of the Office Overhaul is finally here. This is my third time being at week six of the One Room Challenge and let me tell you it’s not easy. Even when you say you’re not going to get stressed, even when you plan ahead, something inevitably goes terribly wrong. Yet somehow I always get to the finish line even if it’s amidst a nervous breakdown and completely exhausted.

As I write to you from my newly finished office, I am so happy to show you the reveal of the Office Overhaul! I couldn’t have done it without Greg Pallante who came to the rescue and photographed the room on Monday. He did such a great job and is a photographer I’ve been wanting to work with for awhile and finally, the stars aligned. Maybe everything does happen for a reason.

Now for some Before + Afters. Drum roll, please!

Reveal of the Office Overhaul

Reveal of the Office Overhaul

Reveal of the Office Overhaul

Although this room wasn’t giant and just needed some small updates I think the end result has a huge impact. It just goes to show you that using paint and updating decor goes A LONG WAY. My design plan and inspiration from week 2 goes over everything but I was heavily inspired by The Parker Hotel in Palm Springs for my color and pattern choices. I decided to give the room a fresh coat of white paint and then color block the walls almost half way up with the color Bold Yellow by Benjamin Moore. Swapping out my giant desk for a smaller vintage one that I also painted was important. I actually found it on the Facebook marketplace in pretty rough shape for $75, sanded it down, and then repainted it with Razzle Dazzle by Benjamin Moore in a semigloss.

Having a smaller desk opened up the room a lot and allowed me to extend the shelving for storage. In the end, I decided not to make a seat cover for the acrylic chair because I love how it disappears into the room. It takes up no visual real estate, which also makes the room look more spacious. Another thing I added was the banana leaf curtains which are old H&M that I found on eBay. They draw your eye upwards, also giving the appearance of a larger room. I swapped out the outdated light fixture for this inexpensive rattan pendant light from IKEA that I’ve had my eye on forever.

Reveal of the Office Overhaul

Reveal of the Office Overhaul

Here are the full shots of the room so you can get a good idea of what I accomplished with my design plan. This room is narrow and therefore a challenge to shoot but I think Greg nailed it. I love how all the colors play off each other and the rug from RugsUSA ties it all together. As far as I’m concerned there can never be enough plants. I love brining the outdoors in and decorating with greenery. I think my office is now officially “The Jungle Room”.

Reveal of the Office Overhaul

I love that my new desk has drawers so that I have a place to store all my paperwork and files. This DIY ombré bookshelf that I made comes in handy to store and display cute notepads, my planner, and whatever books and magazines I’m currently reading. It is right next to the desk so I can grab something when I need it without having it clutter on top of the desk. I had the pegboard already and used paint leftover from the stairs to do the ombré. Then I purchased elastic cord and got the wood cut at Home Depot. Easiest DIY ever!

Reveal of the Office Overhaul

Reveal of the Office Overhaul

Reveal of the Office Overhaul

Reveal of the Office Overhaul

Reveal of the Office Overhaul

Reveal of the Office Overhaul

Reveal of the Office Overhaul

Here are some close-up shots of the shelves. I’m using the bottom shelves to store office related things in the baskets. On the higher shelves, I’m displaying a lot of plants (duh) and barware that I have collected over the years. I’m so happy to have my tiki mug collection out of storage finally. I have some super rare ones and I love that I can look at them now instead of them being in a box in the closet. The rattan tray from the Opalhouse Collection for Target houses all my special booze. Bottles that were gifted to me, limited runs of things, or brands that I’m currently working with. There is booze all over the house but I wanted to display the important stuff here. I may need to periodically taste some when I’m having a hard day. 😉

Reveal of the Office OverhaulReveal of the Office OverhaulReveal of the Office Overhaul

The desk will be more functional for everyday use but I really wanted to make my pink Royal typewriter the showpiece. I always wanted one and would search Etsy and flea markets nonstop but they were always super expensive. Then one day as I was strolling down the sidewalk on my way to work and she was sitting in the window of my local pawn shop at an amazing price. I even haggled the price down a little and then I walked out the door with her.

Reveal of the Office Overhaul

Reveal of the Office Overhaul

My Gray Malin print looks perfect above the desk and I offset it with planters from Project 62 and the hey neon sign from Oh Joy both from Target. I actually had the planters and the hey neon sign so this didn’t add to my budget. The dinosaur planter is from Homegoods and was in the living room so I moved it to the office where I think it will stay. The task lamp and swan pool float snow globe are from West Elm. Catchalls on top of the books are vintage and the gold banana vase is Jonathan Adler.

Reveal of the Office Overhaul

Reveal of the Office Overhaul

The string of pearls plant and wall hanging were last-minute additions. If I shot the reveal of the Office Overhaul last Wednesday they wouldn’t be in the reveal photos. So the plus side to not shooting last week was that I had a few days to put some finishing touches on the room. The wall hanging is by a friend who is local Margaret Margaret Gabriella that I purchased at Kanibal Home.

I’ve been searching for a string of pearls plant for years and my local garden center never gets them in. I went there over the weekend and boom! There it was in all its glory! I DIYed the same twine plant hanger that I did for the Hallway Refresh and also made that curtain tie back out of twine too using a pom pom maker. I love the texture that the wall hanging and twine adds to the room.

Reveal of the Office Overhaul

Reveal of the Office Overhaul

Reveal of the Office Overhaul

Participating in the One Room Challenge is fun but it’s never easy. I love that this challenge motivates you to finish a room in only six weeks. Which means you get to enjoy your room and your design sooner but it’s hard work! Not sure how many of you are slow decorators but I am guilty of taking my sweet, sweet time. That’s why I’ve been a guest participant for the last three One Room Challenges. Not only does it motivate you to finish a room but it also encourages you to connect and support other designers and bloggers which I think is the most important part. We’re all in this together and we’re all just trying to get to the same place.

I’m so happy with the reveal of the Office Overhaul. I can’t wait to spend many days and nights in here growing my business and staying inspired. Thank you for following along and make sure you check out all the other featured designers and guest participants rooms on the One Room Challenge site. I’ll be updating my Office Overhaul board on Pinterest with the additional product that I added to the room. I’ve also linked to past weeks below in case you missed any of my progress over the last six weeks. Cheers to another successful One Room Challenge everyone! Let me know what you think of the Reveal of the Office Overhaul in the comments below. I always love to hear what you guys think!

Week 1 // Week 2 // Week 3 // Week 4 // Week 5


Design by Natalie Jacob // Photography by Greg Pallante

One Room Challenge

Decor Sources:

Desk- Vintage

Chair- Flash Furniture Ghost Chair – Hayneedle

Shelving- VITTSJÖ, VITTSJÖ – IKEA

Rug- Adileh rug in orange – RugsUSA

Elephant Photography Print- Gray Malin Always Welcome at the Parker

Wall Planters- Succulent Wall Geometric Hanging White/Gold – Project 62 Target

Hey sign- HEY LED sign lamp– Oh Joy – Target – Sold Out

Banana Vase- Jonathan Adler Banana Bud Vase

Dinosaur Planter- HomeGoods (similar)

Table Lamp- Scoop Table Lamp – West Elm

Snow Globe- Swan Pool Float Snow Globe – West Elm

Wall hanging- Margaret Margaret Gabriella – Kanibal Home

Curtains – Banana Leaf Curtains – H&M – Sold Out

Catchalls- Vintage

Ombre Bookshelf- DIY

Rattan Pendant Lamp- SINNERLIG – IKEA

Uppers Canister- Jonathan Adler

Rattan Tray- Opalhouse – Target

Flamingo Canister- Flamingo Cookie Jar – World Market

Flamingo Mirror- Vintage

Yay Vase- YAY 3 letter vase – Oh Joy – Target

House Plants Print- Home is Where my Plants are – WildHartPaper

Elephant Basket – Opalhouse – Target

Filed Under: Design, DIY, Home Decor, Room Tour Tagged With: at home, design, DIY, Home Decor, interior design, office overhaul, one room challenge

The Office Overhaul | Week 5 Disaster

May 3, 2018 by Natalie 4 Comments

The Office Overhaul | One Room Challenge Week 5 Disaster

It wouldn’t be the One Room Challenge unless something went terribly wrong, right? The Office Overhaul Week 5 has been quite the disaster.

While doing the Spring 2017 ORC the day I was having the wallpaper installed we realized we didn’t have enough wallpaper. Last minute we had to switch walls, which actually turned out for the better. THANK GOD! For the Fall 2017 ORC I had a lighting nightmare that almost made me not finish on time but then we were luckily granted a week extension. Phew! This time around I knew exactly what to do ahead of time to ensure that this project was smooth sailing. Sometimes things are completely out of your hands though.

I had The Office Overhaul finished ahead of time.

I need to stop for a second and pat myself on the back before I tell you that I drowned myself in many Aperol Spritzes last night. This room was completed ahead of schedule and is so glorious I exceeded all of my own expectations for it. I was suppose to shoot yesterday, Wednesday May 2, but the photographer flaked last minute leaving me in a lurch. Everyone is saying I should just shoot it myself but I dont have the correct lens and I wanted these photos to be 100%.

This is a huge setback as I need photos for the reveal next Wednesday. It’s already such a tight timeline to have photos taken and get edited product back in 7 days but in a few days depending on when I get them taken? I could be cutting this REAL close. There was a breakdown, then there were some tears, then there was a cheese danish (if you watched my IG stories), and then there were drinks. Can you blame me? Also the drinks are defintely to fault for me getting this post up late.

I took some quick pics yesterday just to show you what I got done last week. It’s a small room so I don’t want to show you the desk or shelves styled. I need to leave something if the final reveal ever happens.

The Office Overhaul | One Room Challenge Week 5 Disaster

Last minute I decided not to make a seat cover. I love the way the chair disappears into the room and because it’s a small room I like how it takes up now visual real estate making the room appear larger in a way. If I decided I want something removable I can always make it at a later time.

The Office Overhaul | One Room Challenge Week 5 Disaster

I DIYed this pegboard book shelf. It was SO easy. I used leftover paint from my hallway stairs to create the ombre effect, got wood cut at home depot, and used elastic cord to hold the books up. Pretty neat, huh? I already had the pegboard from my studio so I just repurposed it. So much of that stuff would be sitting all over the desk and now I have somewhere pretty to stash books and notepads that are easily grabable when I need them.

The Office Overhaul | One Room Challenge Week 5 Disaster

I’m sure you’ve seen these baskets everywhere, and for sale online for a lot of money. I snagged the baskets at IKEA for $12.99 and made my own pom poms using supplies I already had (pom pom maker and yarn).

The Office Overhaul | One Room Challenge Week 5 Disaster

There are lots of plants. Ethan has been calling it “the jungle room”. I’m not mad about it. I bought that plastic flamingo at Target for $1!!!

The Office Overhaul | One Room Challenge Week 5 Disaster

Erik approves of the room transformation. It also wouldnt be The One Room Challenge without one of my pets photobombing my images. How is he even comfortable lying there like that? lol. Wish me luck in my hopes to track down another photographer and get this room shot on time. Stay tuned for the reveal (hopefully) next week!

One Room Challenge

Images edited with Amethyst from Glow using the A Color Story app on Iphone

Filed Under: Uncategorized Tagged With: at home, design, DIY, Home Decor, interior design, office overhaul, one room challenge

3 Ways to Celebrate Memorial Day Weekend

May 1, 2018 by Natalie

3 Ways to Celebrate Memorial Day Weekend

I’m so excited to be teaming up with Bai for this next post! Memorial Day Weekend is just over a month away and is the official kick-off to Summer. I’ve put together 3 fun ways for you to celebrate Memorial Day Weekend this year. Whether you’re staying home, entertaining, or going to a friends party, it’s always a good idea to have a few tricks up your sleeves.

3 Ways to Celebrate Memorial Day Weekend

DIY Balloon Arch

Supplies:

helium tank

balloon decorating strip

various balloons in different colors and sizes

glue dots

balloon string

3 Ways to Celebrate Memorial Day Weekend

I’ve never blown up balloons with helium before this project. Honestly, it was so easy and I got this Balloon Time tank that is available at Party City. They’re so easy to use and can easily be recycled when empty. To use all you have to do is twist the nozzle, press down to fill the balloons, and then tie the ends up. You can blow up all your balloons and then attach them or attach them as you go which is what I ended up doing. If you blow them all up at once, make sure you can reach them, or put them in garbage bags so they don’t float up.

3 Ways to Celebrate Memorial Day Weekend

Next, you can attach them to the balloon decorating strip. Slip the knot of a balloon through the hole of the decorating strip. Skip a few holes and place another balloon facing the opposite direction. Keep alternating balloon colors and sides until you have a balloon strip as long as you need your arch to be. If your balloon arch is looking scarce you can add a few more balloons where needed, but don’t go too crazy. We’re going to add little balloons to fill in the holes too.

3 Ways to Celebrate Memorial Day Weekend

Once all your main balloons are on the strip as long as you need it to be, you can cut the strip on either side where the balloons end. You can use balloon string to tie your arch to the table or piece of furniture your using. I tied mine to strings that went to the floor and then used balloon weights to hold it down. Use glue dots to stick mini balloons into the holes and crevices until you have an arch that’s completely full.

3 Ways to Celebrate Memorial Day Weekend

Jalapeño Watermelon Paloma

Ingredients:

2 oz Jalapeño infused Tequila

2 oz. Bai Kula Watermelon

1/2 oz. fresh lime juice

4 chunks watermelon

salt, for rimming

top with Bai Bubbles Gimbi Pink Grapefruit

3 Ways to Celebrate Memorial Day Weekend

First, infuse your tequila. Slice jalapeño and add it to a jar with the tequila. Depending on the intensity of your pepper this may infuse fairly quickly. With this in mind, I’d say infuse it for 10 minutes or 20 minutes MAX. I have a very high tolerance for spice, however, if you don’t straw test it every few minutes until it’s at your desired spiciness. Once your tequila has infused you can build your drink.

3 Ways to Celebrate Memorial Day Weekend

3 Ways to Celebrate Memorial Day Weekend

Now, rim your glass with salt. Add watermelon together with lime and Bai Kula Watermelon to a shaker and muddle. Next, add the jalapeño tequila and shake with ice. Strain into your desired serving vessel that’s been rimmed with salt and top with Bai Gimbi Pink Grapefruit. Finally, garnish with a lime wheel. This Jalapeno Watermelon Paloma is spicy, fruity, refreshing, and not to mention delightfully fizzy, which makes it perfect for a hot day. I found that using just the Bai Kula Watermelon made this drink sweet enough so no added sugar or syrups necessary.

3 Ways to Celebrate Memorial Day Weekend

Additionally, you can also make this Jalapeño Watermelon Paloma a large format style drink too. To serve 10 people add 20 oz. jalapeño infused tequila, 2 bottles Bai Kula Watermelon, 8 oz. lime juice, 2 cups watermelon, 2 sliced grapefruits, and 2 cans of Bai Bubbles Gimbi Pink Grapefruit to a punch bowl or drink dispenser with ice. It’s such a perfect beverage for your Memorial Day Weekend festivities!

3 Ways to Celebrate Memorial Day Weekend

Hot Dogs 4 Ways

It wouldn’t be Memorial Day Weekend without some hot dogs! Pick out your favorite type of dog and cook it your favorite way. These are my 4 suggested ways to dress up your dog this holiday weekend.

3 Ways to Celebrate Memorial Day Weekend

Mexican Dog

Ingredients:

avocado, sliced

jalapeño, sliced

1/4 cup white onion, diced

1 tomato, diced

kiwi, diced

1 cup pineapple, diced

pinch of salt

pinch of pepper

4-6 dashes hot sauce of your choice

juice of 1 lime

To make the pineapple kiwi salsa simply toss onion, tomato, kiwi, pineapple, salt, pepper, hot sauce, and lime juice in a bowl. To assemble your Mexican Dog top with the salsa, freshly sliced avocado, and freshly sliced jalapeño.

3 Ways to Celebrate Memorial Day Weekend

Chicago Dog

Ingredients:

white onion, diced

tomato, sliced

pickle spears

yellow mustard

sweet relish

pickled sport peppers (we used serranos)*

celery salt

Cut the tomato into half-moon slices and line your hot dog bun with the tomato slices. Add your dog and then top with a pickle spear, sweet relish, sport peppers, mustard, a sprinkle of onion and celery salt. *sport peppers are regional and if you can’t find them where you live use serrano peppers

3 Ways to Celebrate Memorial Day Weekend

Caprese Dog

Ingredients:

tomato, sliced

whole basil leaves

fresh mozzarella

balsamic vinegar

Cut tomatoes into half-moon slices. In your hot dog bun line one side with tomatoes and one side with fresh basil leaves. Top with fresh mozzarella, I used mozzarella pearls, and then drizzle with balsamic vinegar.

3 Ways to Celebrate Memorial Day Weekend

Greek Dog

Ingredients:

cucumber, sliced

tomato, sliced

greek yogurt

cheese, crumbled

Cut cucumber as well as the tomatoes into slices and line your hot dog bun with them. Add your hot dog to the bun and then top with greek yogurt and a sprinkle of feta cheese.

3 Ways to Celebrate Memorial Day Weekend

3 Ways to Celebrate Memorial Day Weekend

3 Ways to Celebrate Memorial Day Weekend

3 Ways to Celebrate Memorial Day Weekend

I had so much fun putting this all together with Bai for Memorial Day Weekend. You can use one of these ideas or all of them, it’s totally up to you! I love the idea of doing a hot dog bar with the DIY balloon arch, and serving your favorite kind of dog coupled with a large format drink, like the jalapeno watermelon Paloma, to go along with it. I’d love to hear what your planning for your Memorial Day Weekend especially if you decide to try any of these ideas. Make sure you chime in on the comments below and let me know what you think!

Thank you for reading this sponsored post that makes Arsenic Lace possible.

Filed Under: DIY, Entertaining, Fizzy, Food, Healthy Cocktails, Home Entertaining, Party Ideas, Recipes, Spicy, Sponsored, Summer Cocktails, Tequila Tagged With: bai, balloon arch, celebrate, DIY, easy entertaining, entertaining, food, grapefruit, home entertaining, hot dogs, jalapeno, memorial day weekend, paloma, recipes, summer, summer cocktails, watermelon

Super Bowl Party Ideas

January 24, 2018 by Natalie 3 Comments

Super Bowl Party Ideas

I’m so excited to be teaming up with Bai for this post to bring you some fun Super Bowl Party Ideas. If you’re hosting a Super Bowl gathering or heading to a friends house, these DIYs and recipes should be a part of your goodie bag of tricks. I’m breaking down some fun, totally easy ways to gussy up that Sunday football fest in style!

Bourbon Salted Caramel Popcorn

Bourbon Caramel Popcorn

6 cups popped popcorn

cooking spray or parchment paper

6 tbsp. butter

1/3 cup dark brown sugar

3 tbsp. corn syrup

1/4 tsp. salt

1 tsp. vanilla extract

4 tbsp. bourbon

Bourbon Salted Caramel Popcorn - Super Bowl Party Ideas

Preheat the oven to 300°. Spray a large baking sheet with cooking spray or line it with parchment paper. Pop the popcorn and transfer it to a large bowl. Heat the butter, sugar, corn syrup, and salt in a medium saucepan over medium-high heat, stirring frequently. Once the mixture starts bubbling, cook for one minute more. Remove from heat and add the bourbon and vanilla. Stir and pour over the popcorn. Stir until popcorn is nicely coated and then transfer to the baking sheet, spreading out to an even layer. Bake for 35 minutes, stirring halfway through. Let cool and serve in a bowl or cute football snack bags. Store leftovers in a sealable container — if you have any leftovers.

Super Bowl Party Ideas

Football Snack Bags

brown paper bags

white paint

paint brush

Bourbon Salted Caramel Popcorn - Super Bowl Party Ideas

Simply paint line on a brown paper bag to resemble a football. Let dry and use to serve your Bourbon Caramel Popcorn or to send guests home with a Super Bowl goodie bag.

DIY Football Field Tray - Super Bowl Party Ideas

DIY Football Field Tray

clear lucite tray

astroturf

white duct tape

white number stickers

scissors

hot glue gun and glue sticks

DIY Football Field Tray - Super Bowl Party Ideas

Cut the astroturf to the size of the inside of your lucite tray. I found my lucite tray onsale at HomeGoods for $12.99! Cut a strip of duct tape to the width of your tray and fold it lengthwise so it is smooth on both sides. Repeat until you have enough strips to fit your tray. My tray was small so I only did four. If you have a larger tray you can do five or six strips. Lay out each of the strips on the astroturf until they are evenly spaced to form the yard lines. Hot glue in place. Lay out the yard line number stickers. My stickers weren’t very sticky so I secured them with hot glue too. Place on either side of the yard line on both sides of the tray.

DIY Football Field Tray - Super Bowl Party Ideas

Your tray is Super Bowl ready!!

Chocolate Covered Strawberry Footballs - Super Bowl Party Ideas

Fizzy Bourbon Strawberry Lemonade

2 oz. Bourbon

3 oz. Bai São Paulo Strawberry Lemonade

top with club soda or champagne

chocolate covered strawberry football for garnish

Fizzy Bourbon Strawberry Lemonade - Super Bowl Party ideas

I kept the cocktail easy peasy because I know hosting for game day can be tough. These can be made easily to order, built right in the glass or you can toss all the ingredients in a punch bowl for easy self-service.

Fizzy Bourbon Strawberry Lemonade - Super Bowl Party ideas

If you want to take this cocktail a step further you can add the bourbon, Bai Sao Paulo Strawberry Lemonade, fresh strawberries and mint to a cocktail shaker then muddle and shake with ice. Strain into a highball glass over ice and top with club soda. If you’re feeling lucky you can swap out the club soda for champagne and kick the ABV up a notch.

Chocolate Covered Strawberry Footballs - Super Bowl Party Ideas

Chocolate Covered Strawberry Footballs

strawberries

dark chocolate melting wafers

white cookie icing

Chocolate Covered Strawberry Footballs - Super Bowl Party Ideas

Fill a coffee mug with the dark chocolate melting wafers and put in the microwave for 10 seconds. Take out, stir the chocolate, and return to the microwave for another 10 seconds. Repeat this until all chocolate has melted but be careful not to burn the chocolate. Take your strawberries by the stems and dip into the mug of chocolate. Place on a piece of parchment paper and let the strawberries set in the refrigerator for 10 minutes. Remove from the refrigerator and pipe the white cookie icing on to resemble footballs. Now you have the cutest and most delicious garnish for game day!

Fizzy Bourbon Strawberry Lemonade - Super Bowl Party ideas

Super Bowl Party Ideas

Super Bowl Party Ideas

I’m so happy with how my Super Bowl Party Ideas turned out. Super bowl and super cute tend to not go hand in hand usually, but I feel like I totally scored with these! There is no better day to nosh on popcorn than on Super Bowl Sunday and the fact that it’s boozy popcorn makes it all the better. The fizzy bourbon strawberry lemonade is easy, delicious, and that chocolate covered strawberry football garnish is a win in my book! Serving in style is key and the DIY football field tray is a cute detail that pulls everything together. I hope this inspires you to make your game day festivities a little more fun. Ethan’s team (The Eagles) are going to the Super Bowl so I can’t wait to recreate these ideas for Super Bowl Sunday. xo

Filed Under: Boozy Treats, Bourbon, DIY, Entertaining, Home Entertaining, Party Ideas, Sponsored Tagged With: bourbon, Chocolate, DIY, easy entertaining, home entertaining, party ideas, popcorn, sponsored, strawberry, super bowl, super bowl sunday

DIY Disco Ball Drink Stirrers

December 31, 2017 by Natalie Leave a Comment

DIY Disco Ball Drink StirrersIf you’re anything like me you might have some little disco ball ornaments lying around from Christmas. If you do, you’re in luck because I made these easy DIY Disco Ball Drink Stirrers that are the perfect accessory for your New Year’s Eve bash. Whether you’re staying at home or going to a friend’s, there’s no better way to say goodbye to 2017 than with a personalized craft to ring in the new year. I saw these first over on The Bay Club Blog and Club Crafted and was so excited to make them too.

DIY Disco Ball Drink StirrersDIY Disco Ball Drink Stirrers

Mini disco ball ornaments

Metallic straws

Super Glue

Icepick (or something with a point)

DIY Disco Ball Drink StirrersRemove all the hanging cords from your disco ball ornaments. Enlarge the hole by pressing an icepick or something with a sharp edge into it.

DIY Disco Ball Drink StirrersDIY Disco Ball Drink StirrersDrop a small amount of super glue into the hole and insert the straw. Allow your DIY Disco Ball Drink Stirrers to dry completely before use.

DIY Disco Ball Drink StirrersDIY Disco Ball Drink StirrersDIY Disco Ball Drink StirrersThese DIY Disco Ball Drink Stirrers were so easy to make and have such a big impact. Serve your Champagne Punch in highball glasses and use them as a fun garnish. I hope you make these last minute DIY Disco Ball Drink Stirrers for New Year’s Eve. If you don’t and you like glitter and sparkles as much as I do, these will pretty much fit into your life any other day of the year as well. I have so much to be thankful for in 2017. It was honestly one of the best years of my life. I’m sad to see 2017 go but am excited about what awaits ahead in 2018. Happy New Year everyone! Thank you so much for all your support over the last year. I look forward to sharing many more years with all of you. So much love and many cheers. xo

Filed Under: DIY Tagged With: Disco ball, DIY, Drink Stirrer, new years, new years eve

DIY Christmas Ornament Wreath

December 7, 2016 by Natalie Leave a Comment

I love fun decorations for the holidays and this wreath is super easy to make with some time and a lot of hot glue! I wanted my wreath to be colorful, happy, and festive, so I decided to go with a palette that went with my taste and decor which is mainly pastels. I got my ornaments a few ways, some were bought new in larger sets and others were vintage purchased from thrift stores. Finding vintage ornaments is great because most of the time they are really inexpensive. I found quite a few sets at Goodwill for $2 each. I did need to make a run to Target half way through when I realized I was going to need more ornaments. So to be on the safe side try to have more ornaments than you think you will use.

What you will need:

  • A styrofoam or straw wreath form
  • Tinsel Garland
  • Hot glue gun and extra glue sticks
  • About 120 ornaments in your preferred color choices

I started by organzing my ornaments and planned on how I would style them by color on the wreath. I decided to go with a neutral silver and fill in with pink, gold, and blue. There’s also some random coral and periwinkle because I found a few vintage ornaments that were too pretty not to buy and incorporate.

Next step is prepping your wreath. I wrapped my styrofoam wreath form in tinsel garland that way the first layer of ornaments would be easier to glue on and also so that if there were slight holes, tinsel would be showing instead of styrofoam. Plus it adds a little sparkle!

I worked my way from the inside out, first glueing onto the form but then also glueing the ornaments to eachother.

Continue building and glueing onto one another. Ideally you want to work from the flat surface on the inside of the wreath to the flat surface on the outside of the wreath so that there are no holes from any angle.

After you cover the whole wreath with the first layer, go back and start filling holes, this is when I started to add more color. This is also when I got crazy with it and ended up with a very large wreath. I am super happy with how it turned out and now it’s a decoration I can continue to use year after year. It is a little more special because I made it myself with colors and ornaments that fit my personal aesthetic.

Filed Under: DIY, Home Decor Tagged With: Christmas Wreath, DIY, Holiday Decor, Home Decor

Primary Sidebar

Hello.

My name is Natalie Jacob and I'm a bartender, author and beverage + creative consultant drinking, honky tonkin and making a home in Nashville, TN. Learn more ->

Subscribe

Featured Posts

Home Tour on Apartment Therapy

Mod Cocktails Now on Pre-Order!

Mod Cocktails Now on Pre-order

Spicy Mexican Hot Chocolate

Spicy Mexican Hot Chocolate

Holiday Gifting and Punch with Chambord

Celebrate the Holidays with Chambord

Recent Posts

  • Celebrate the Holidays with Chambord
  • My Staycation at The Dive Motel
  • Kiwi Watermelon Margarita Popsicles
  • Easy 3 Ingredient Quarantine Cocktails
  • Creating My Outdoor Living Space

Blogroll

  • A Beautiful Mess
  • Apartment Bartender
  • Basil & Bubbly
  • Chat Chow
  • Craft + Cocktails
  • Drinking with Chickens
  • Holly & Flora
  • Palm Springs Style
  • Salt n Pepper Here
  • The Good Drink
  • Thirsty

Footer

Check out what’s happening on Instagram!

…
  • Email
  • Facebook
  • Instagram
  • Pinterest
  • Twitter

Copyright © 2023 · Foodie Pro & The Genesis Framework