• Skip to primary navigation
  • Skip to content
  • Skip to primary sidebar
  • Skip to footer

Arsenic Lace

  • Recipes
    • Boozy Treats
    • Cocktails
  • Lifestyle
    • Decor
    • Home Entertaining
    • Travel
  • About
  • Press
  • Book
  • Events
  • Contact
  • Nav Social Menu

    • Email
    • Facebook
    • Instagram
    • Pinterest
    • Twitter

Natalie

Holiday Hot Cocoa Bar

December 6, 2017 by Natalie 13 Comments

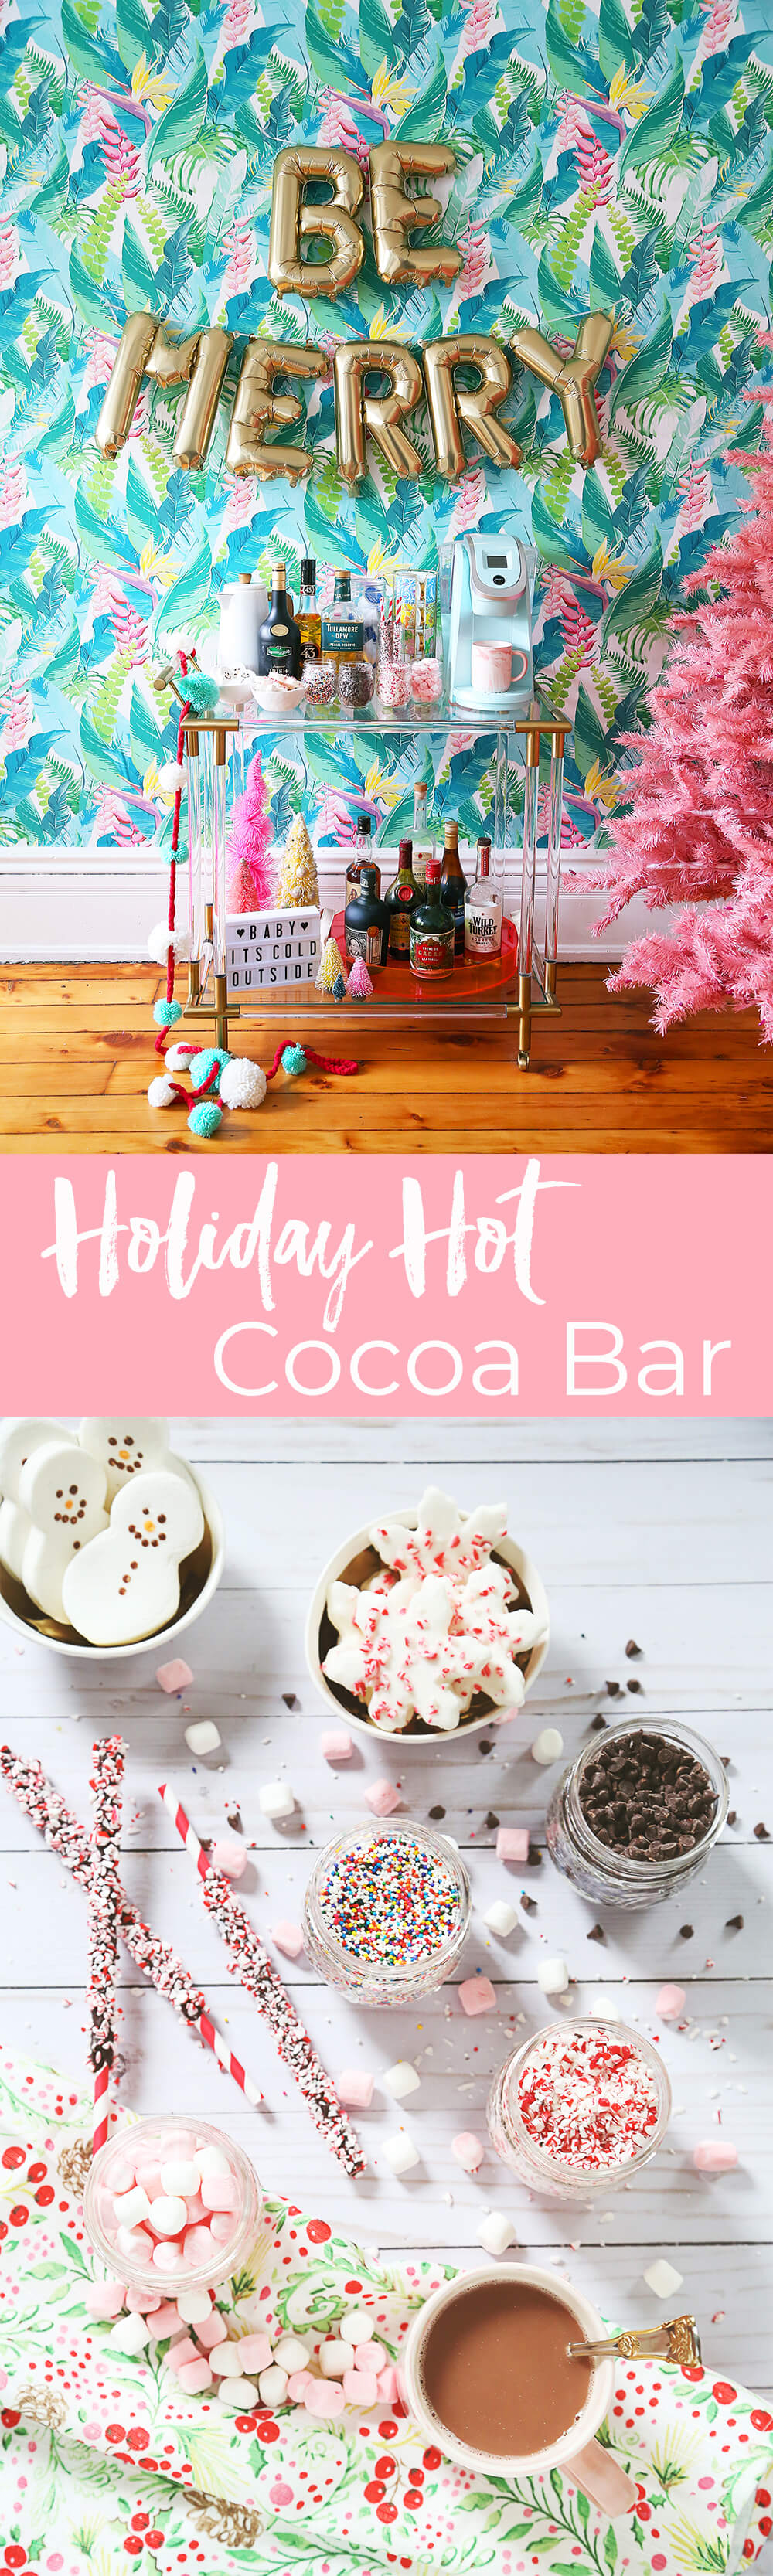
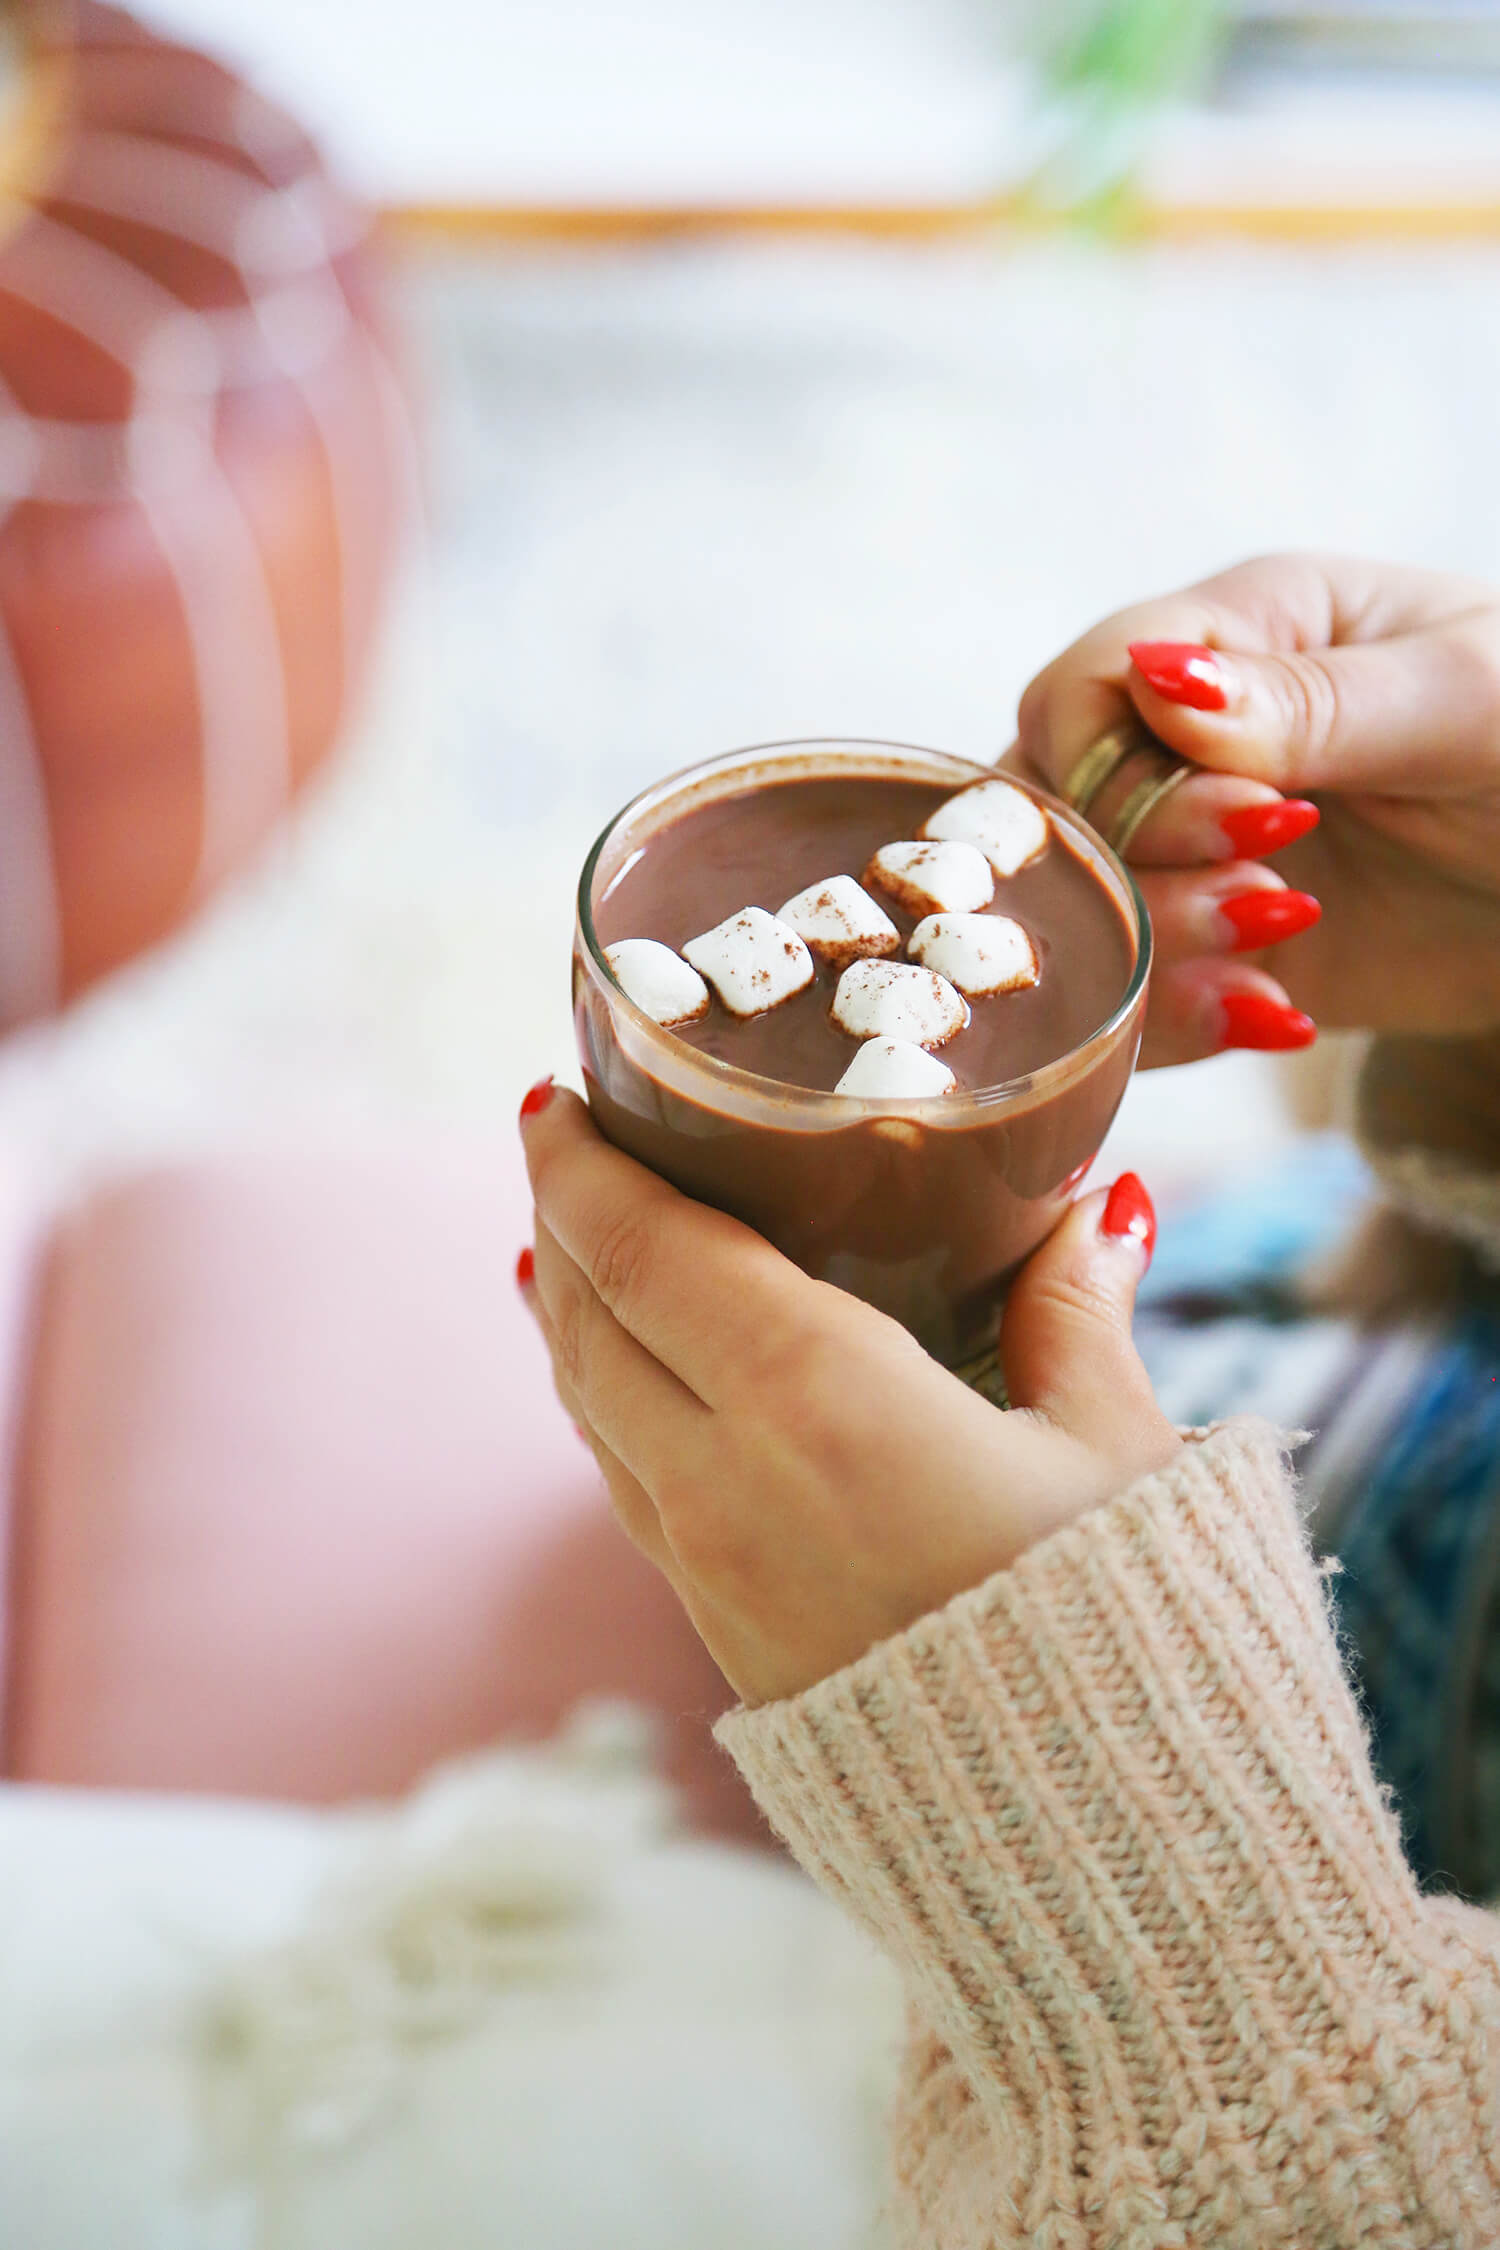
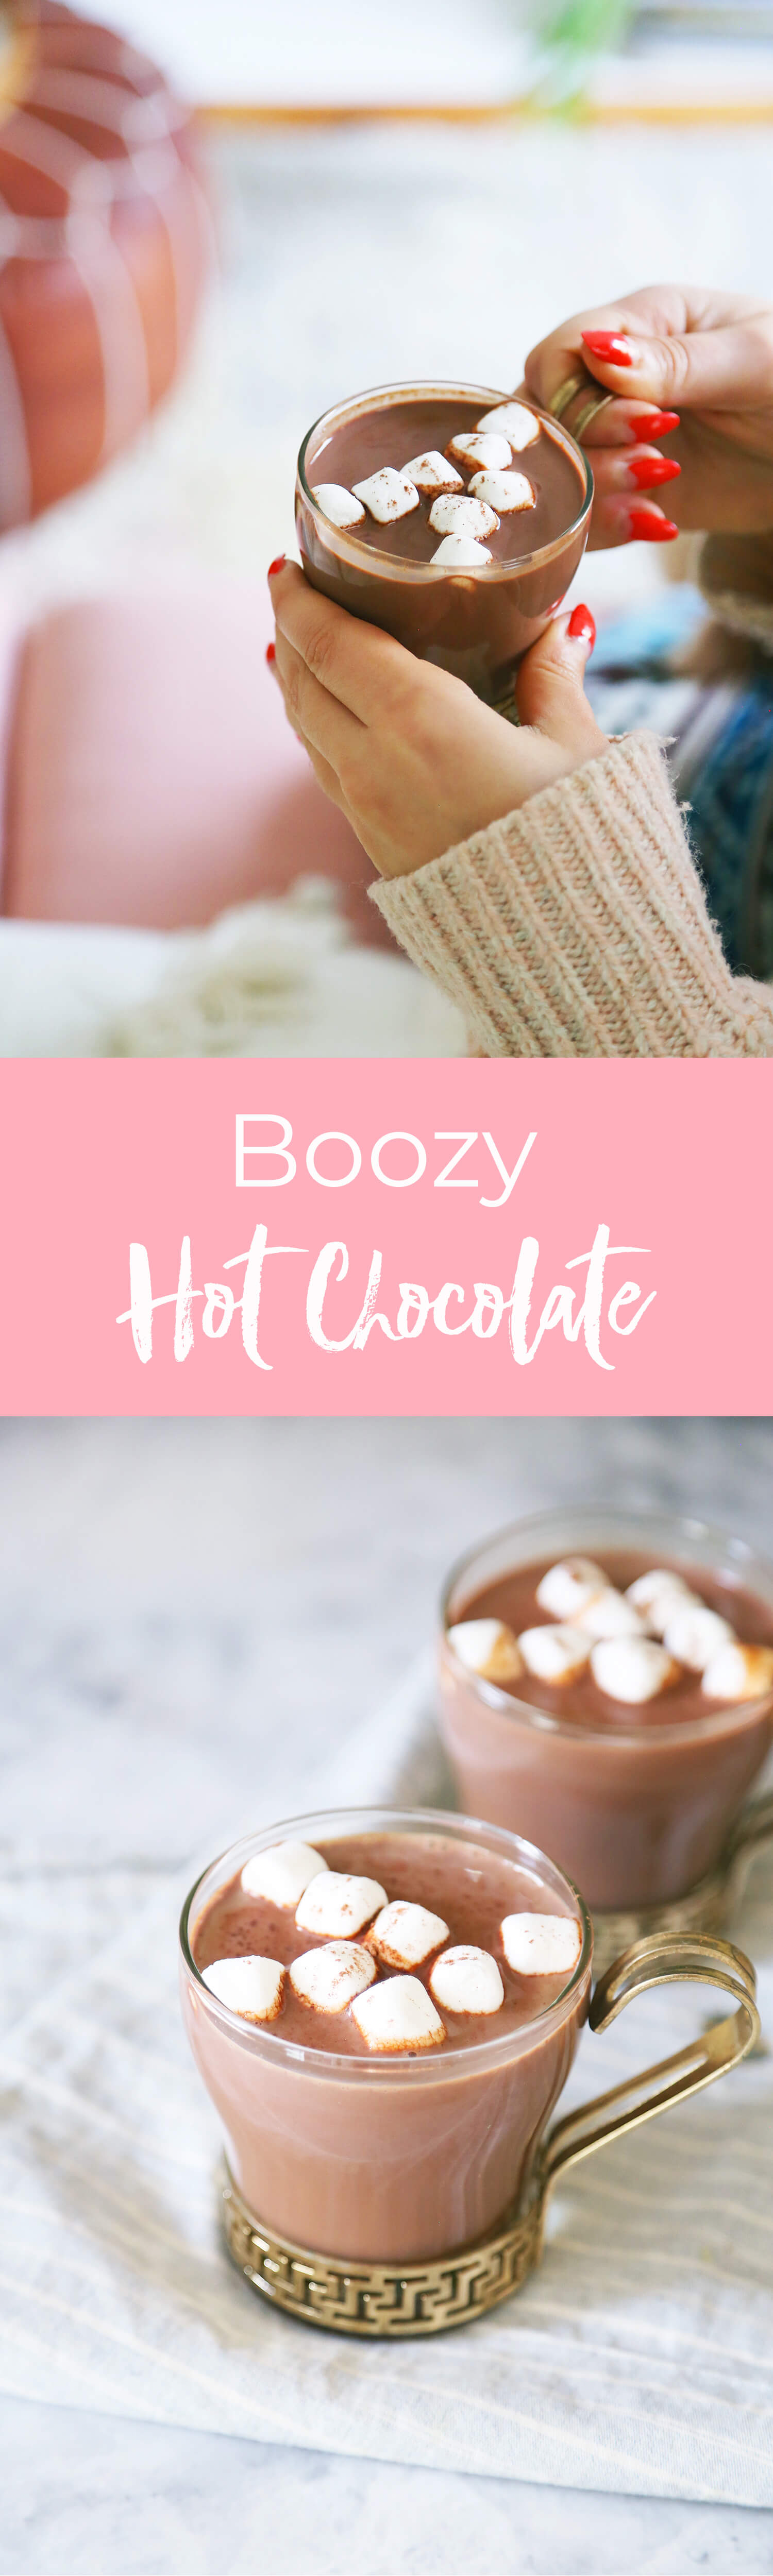
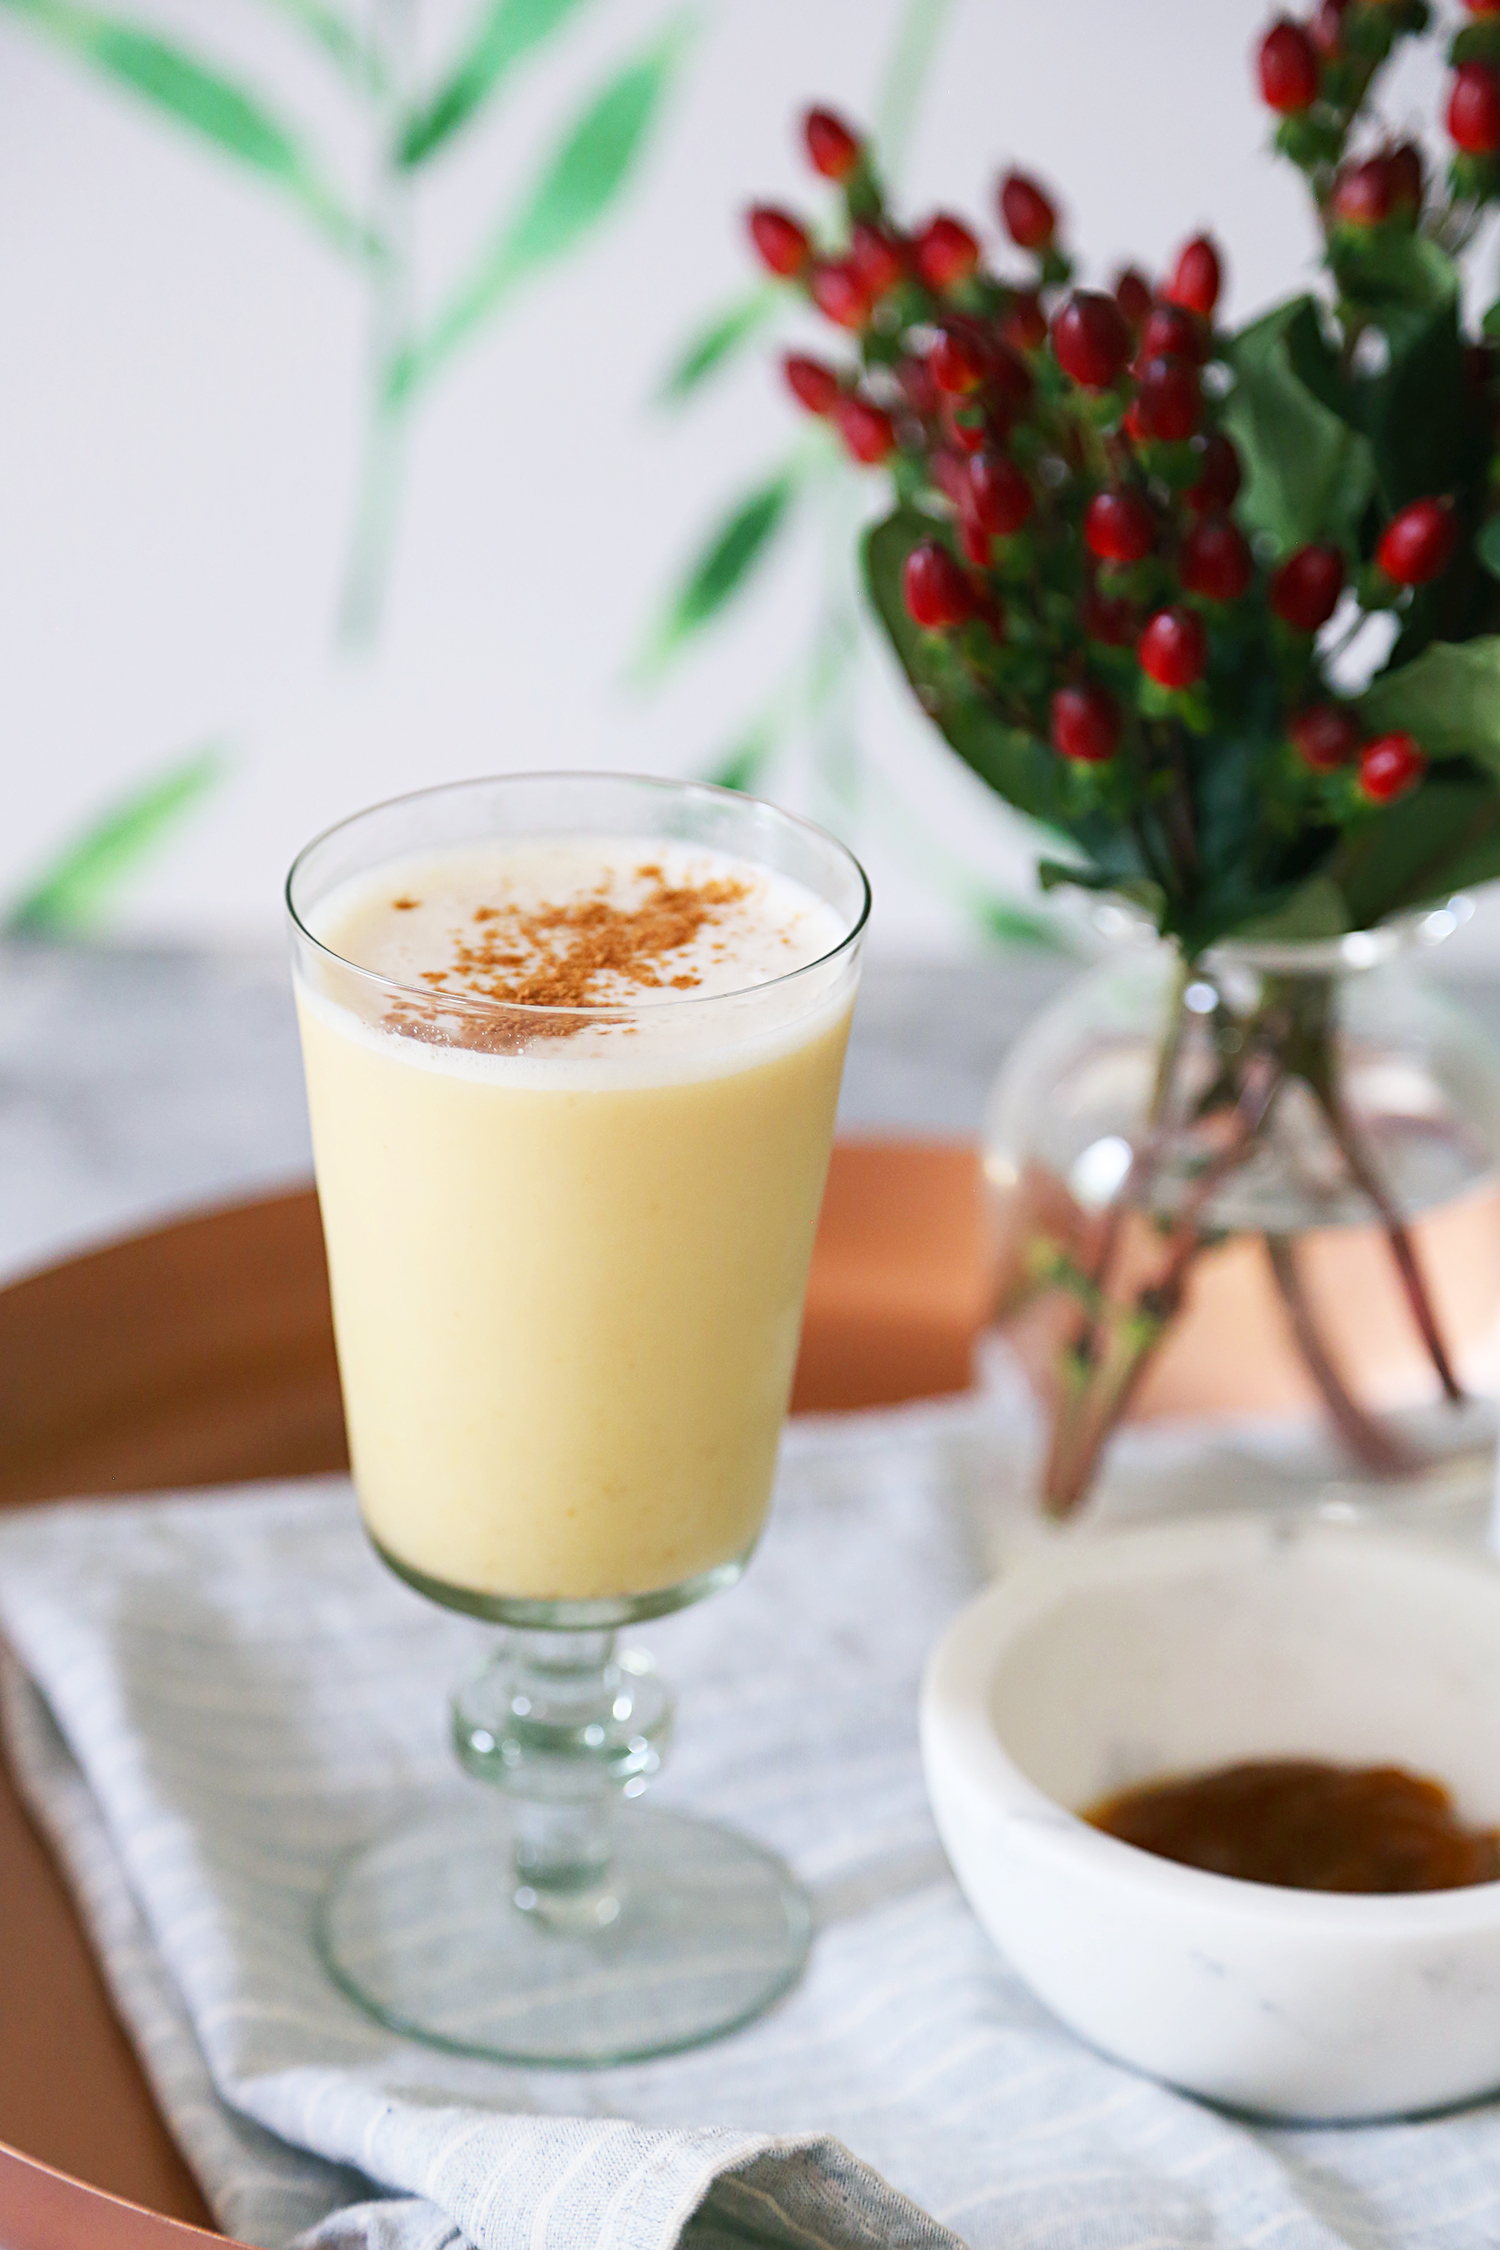
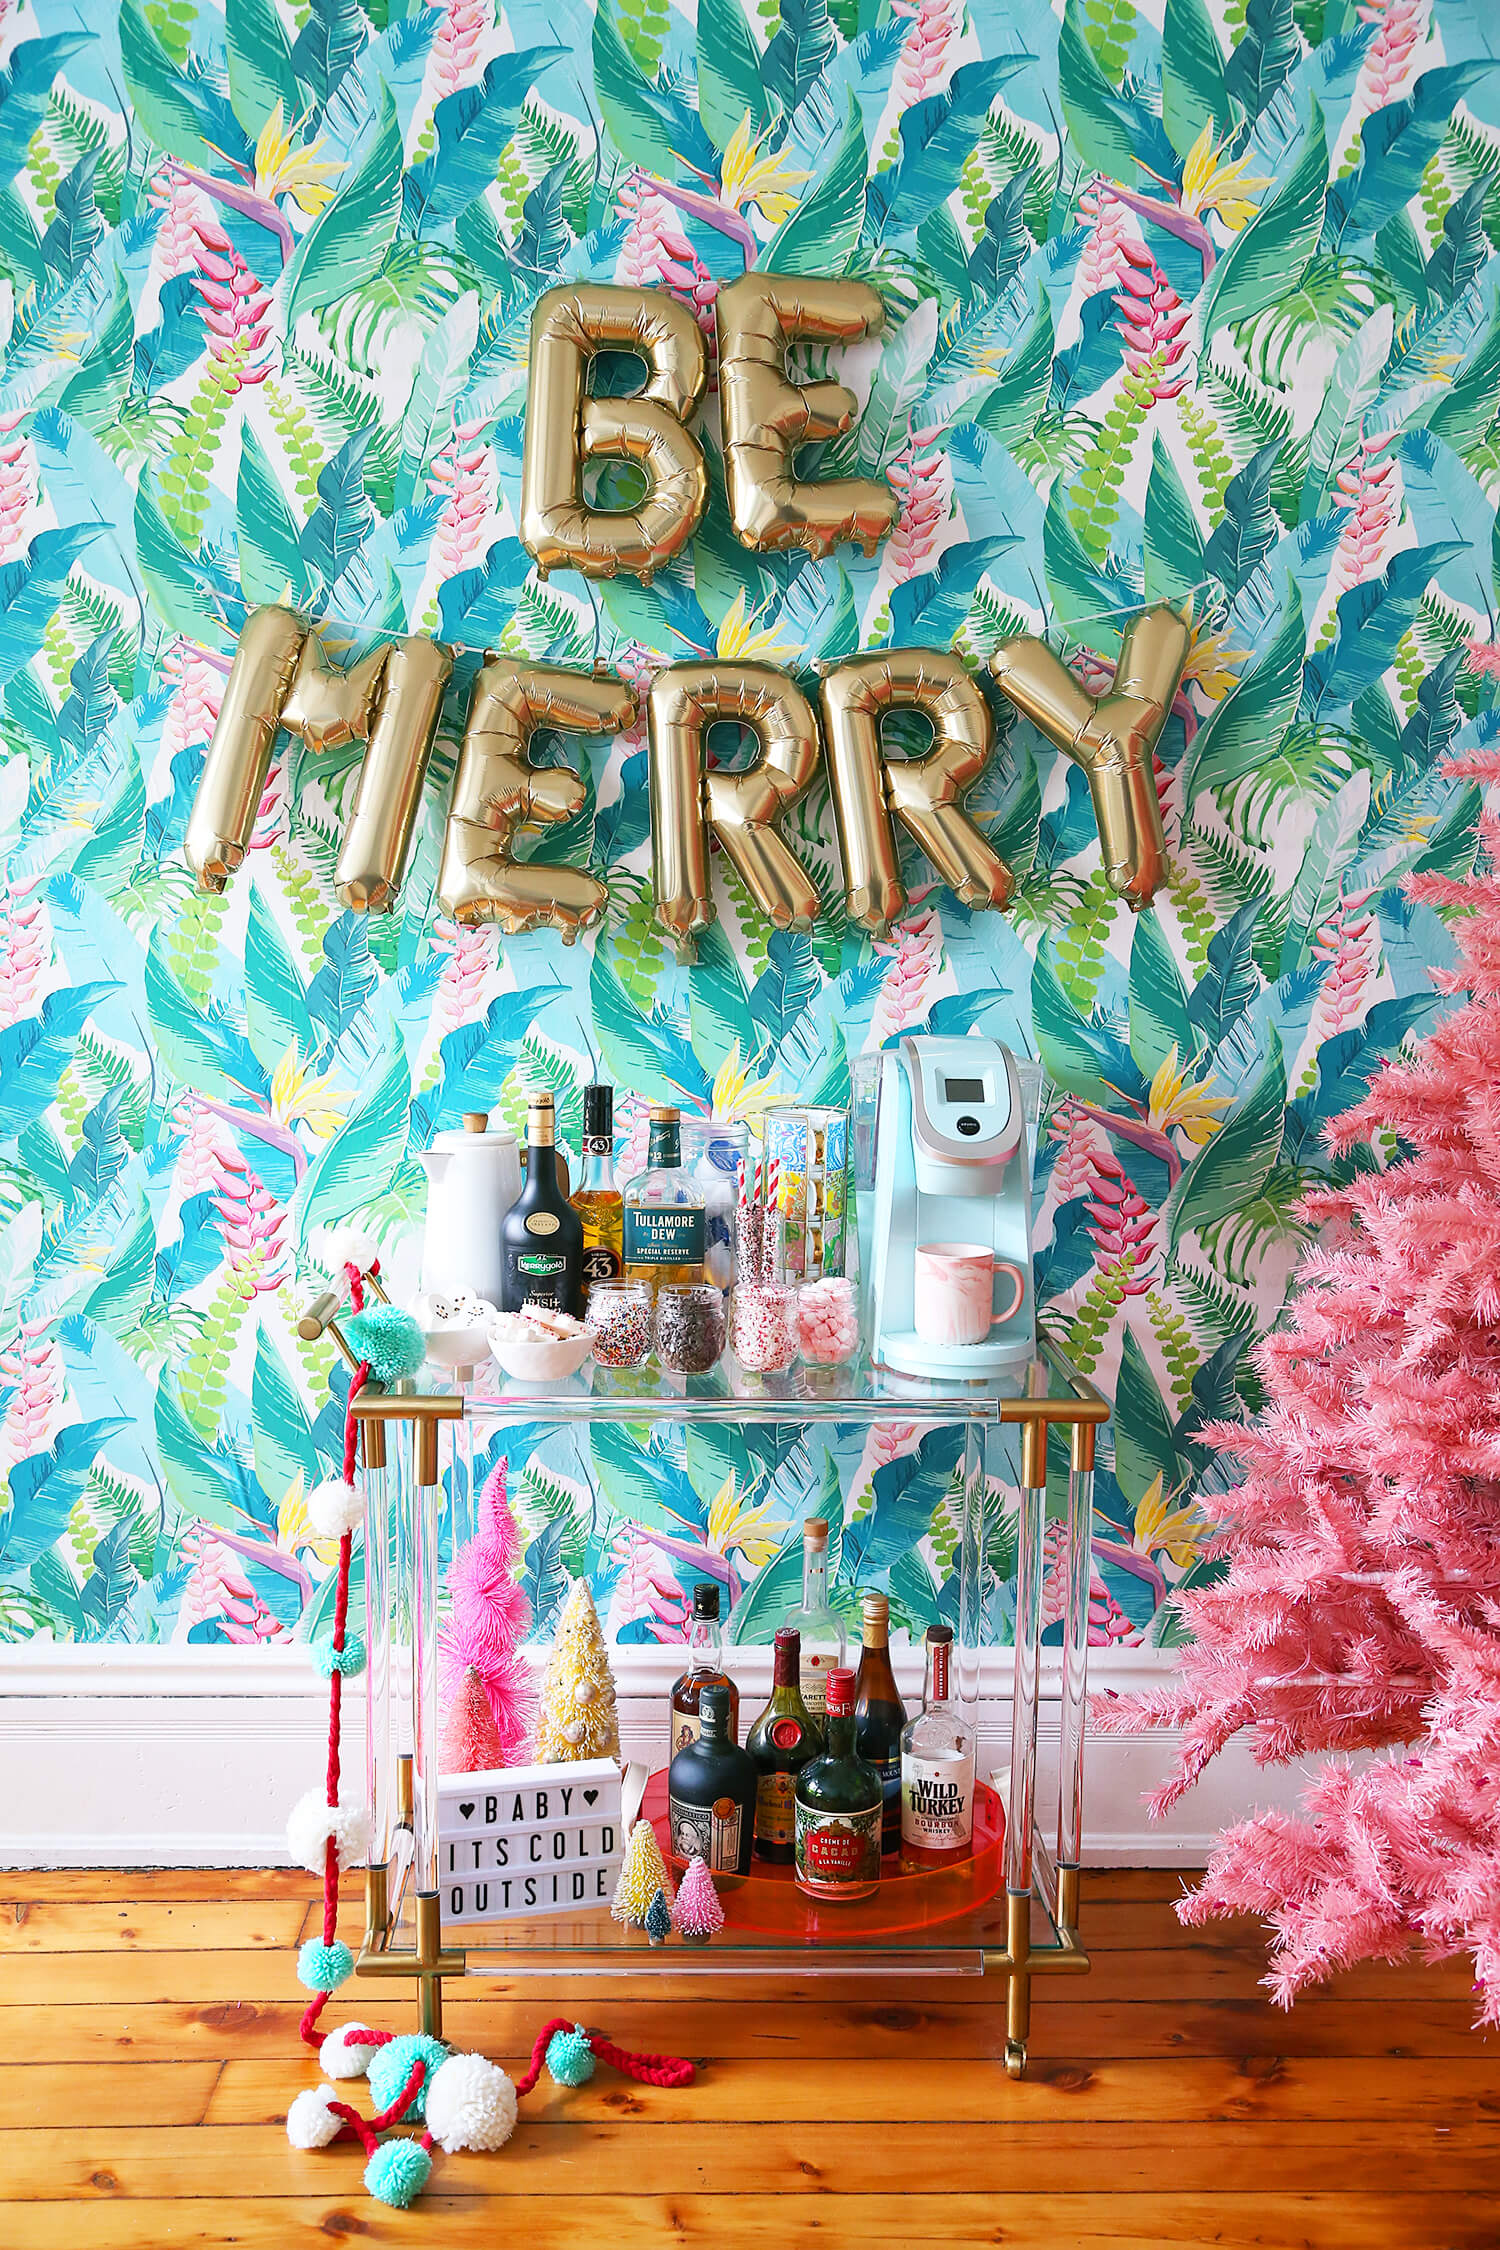
I’m not a huge fan of the weather getting colder but there are a few perks. Enjoying warm drinks at this time of year is definitely one them! I put together this cute, colorful, and festive Holiday Hot Cocoa Bar for us to enjoy while Ethan and I decorated our Christmas tree. It did the trick for putting us in the holiday spirit.

This year I’m more excited than ever for the holidays. It’s the first time in my adult life that I have space for a regular sized Christmas tree and to do holiday decorating at all. I bought the pink Christmas tree of my dreams and I can’t wait to reveal it in all its glory! Perhaps I can even throw a little holiday party since I’m so proud of how everything came out. I don’t know about you but I love a “build your own anything station” at a holiday gathering. Today I’m sharing how to build a simple Holiday Hot Cocoa Bar for your own winter or holiday gathering.

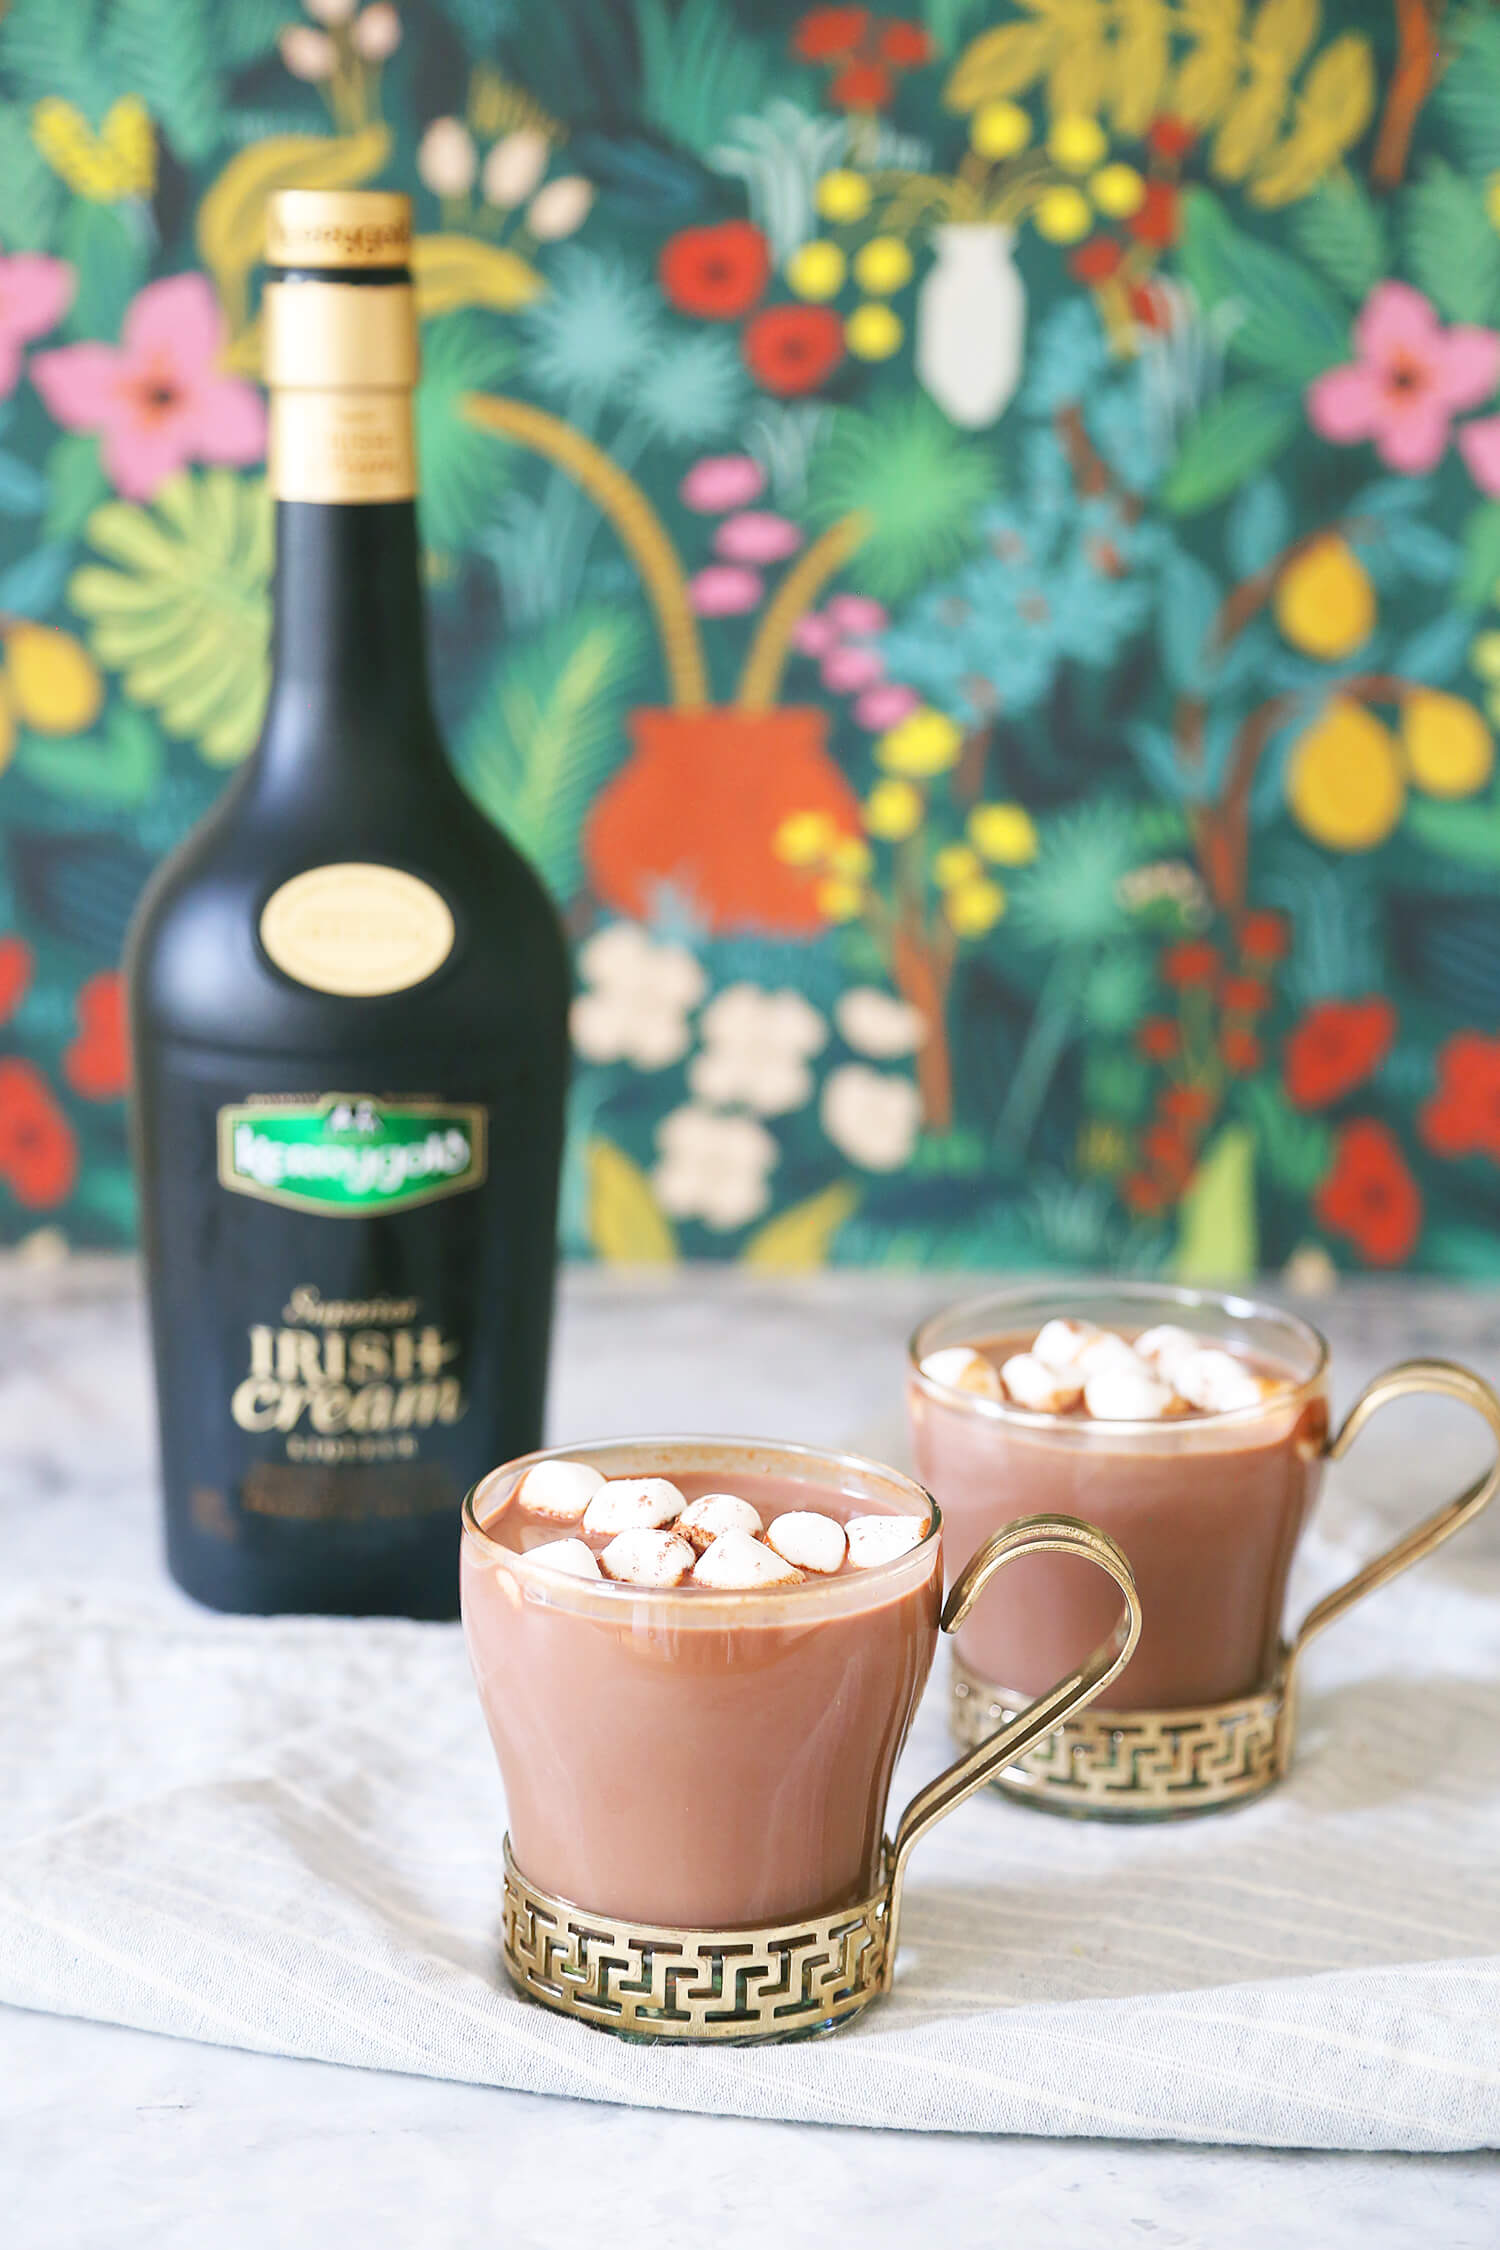
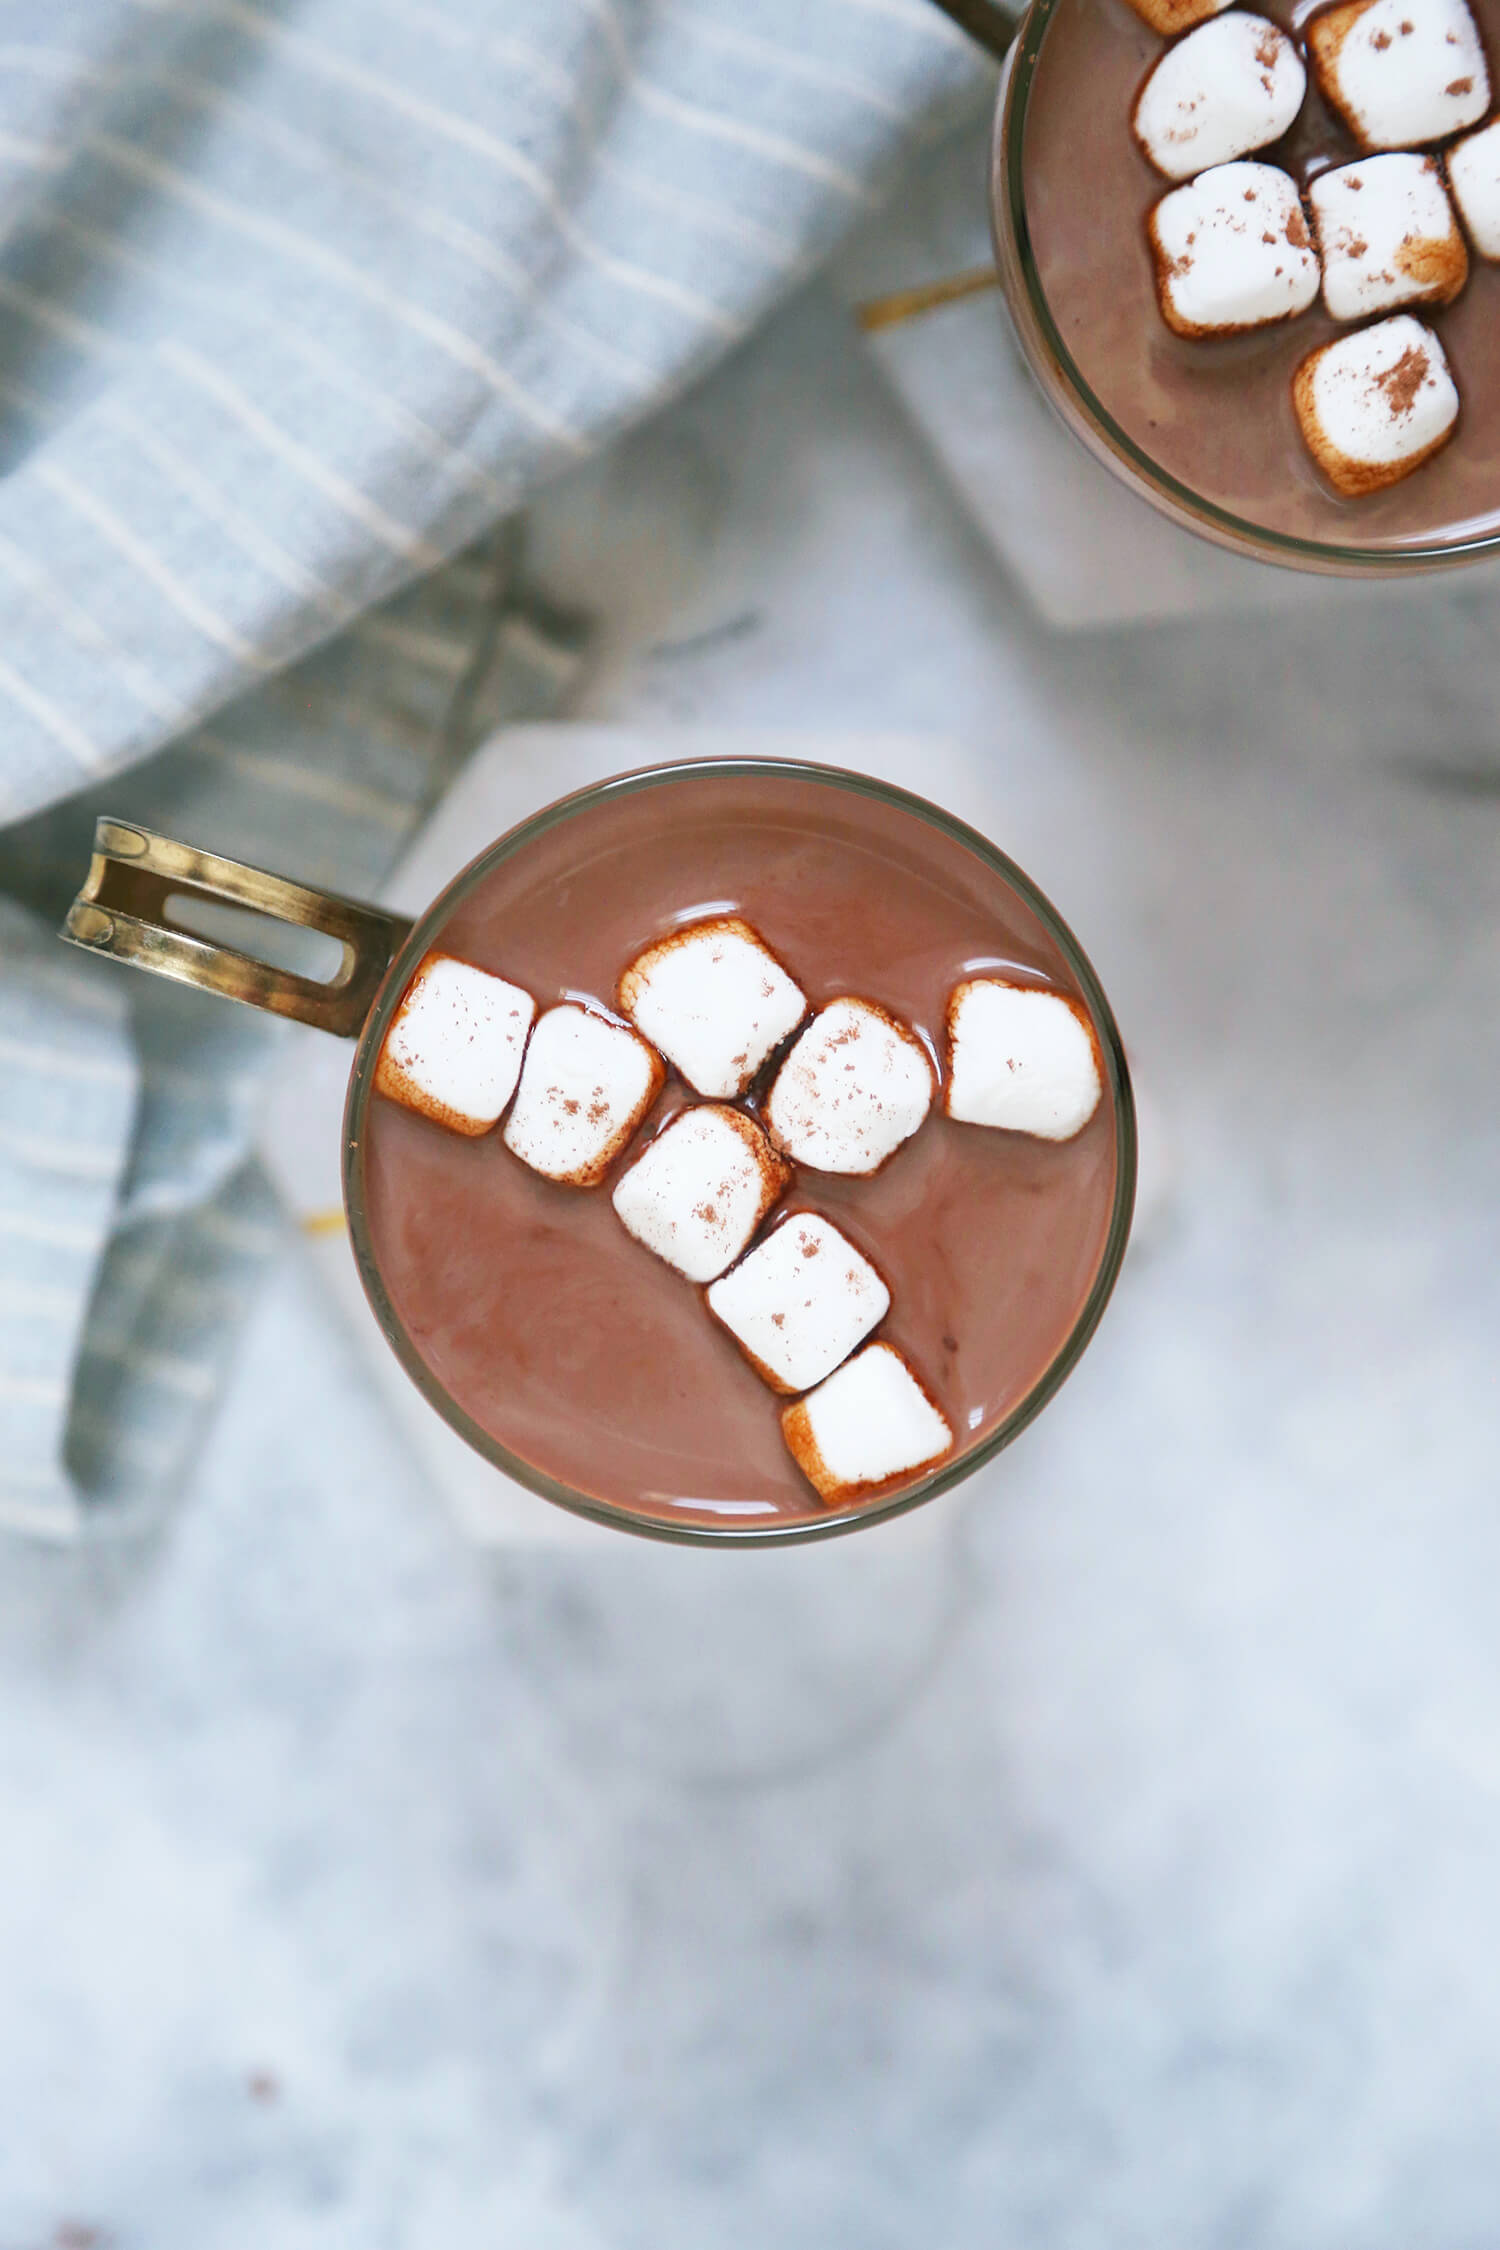
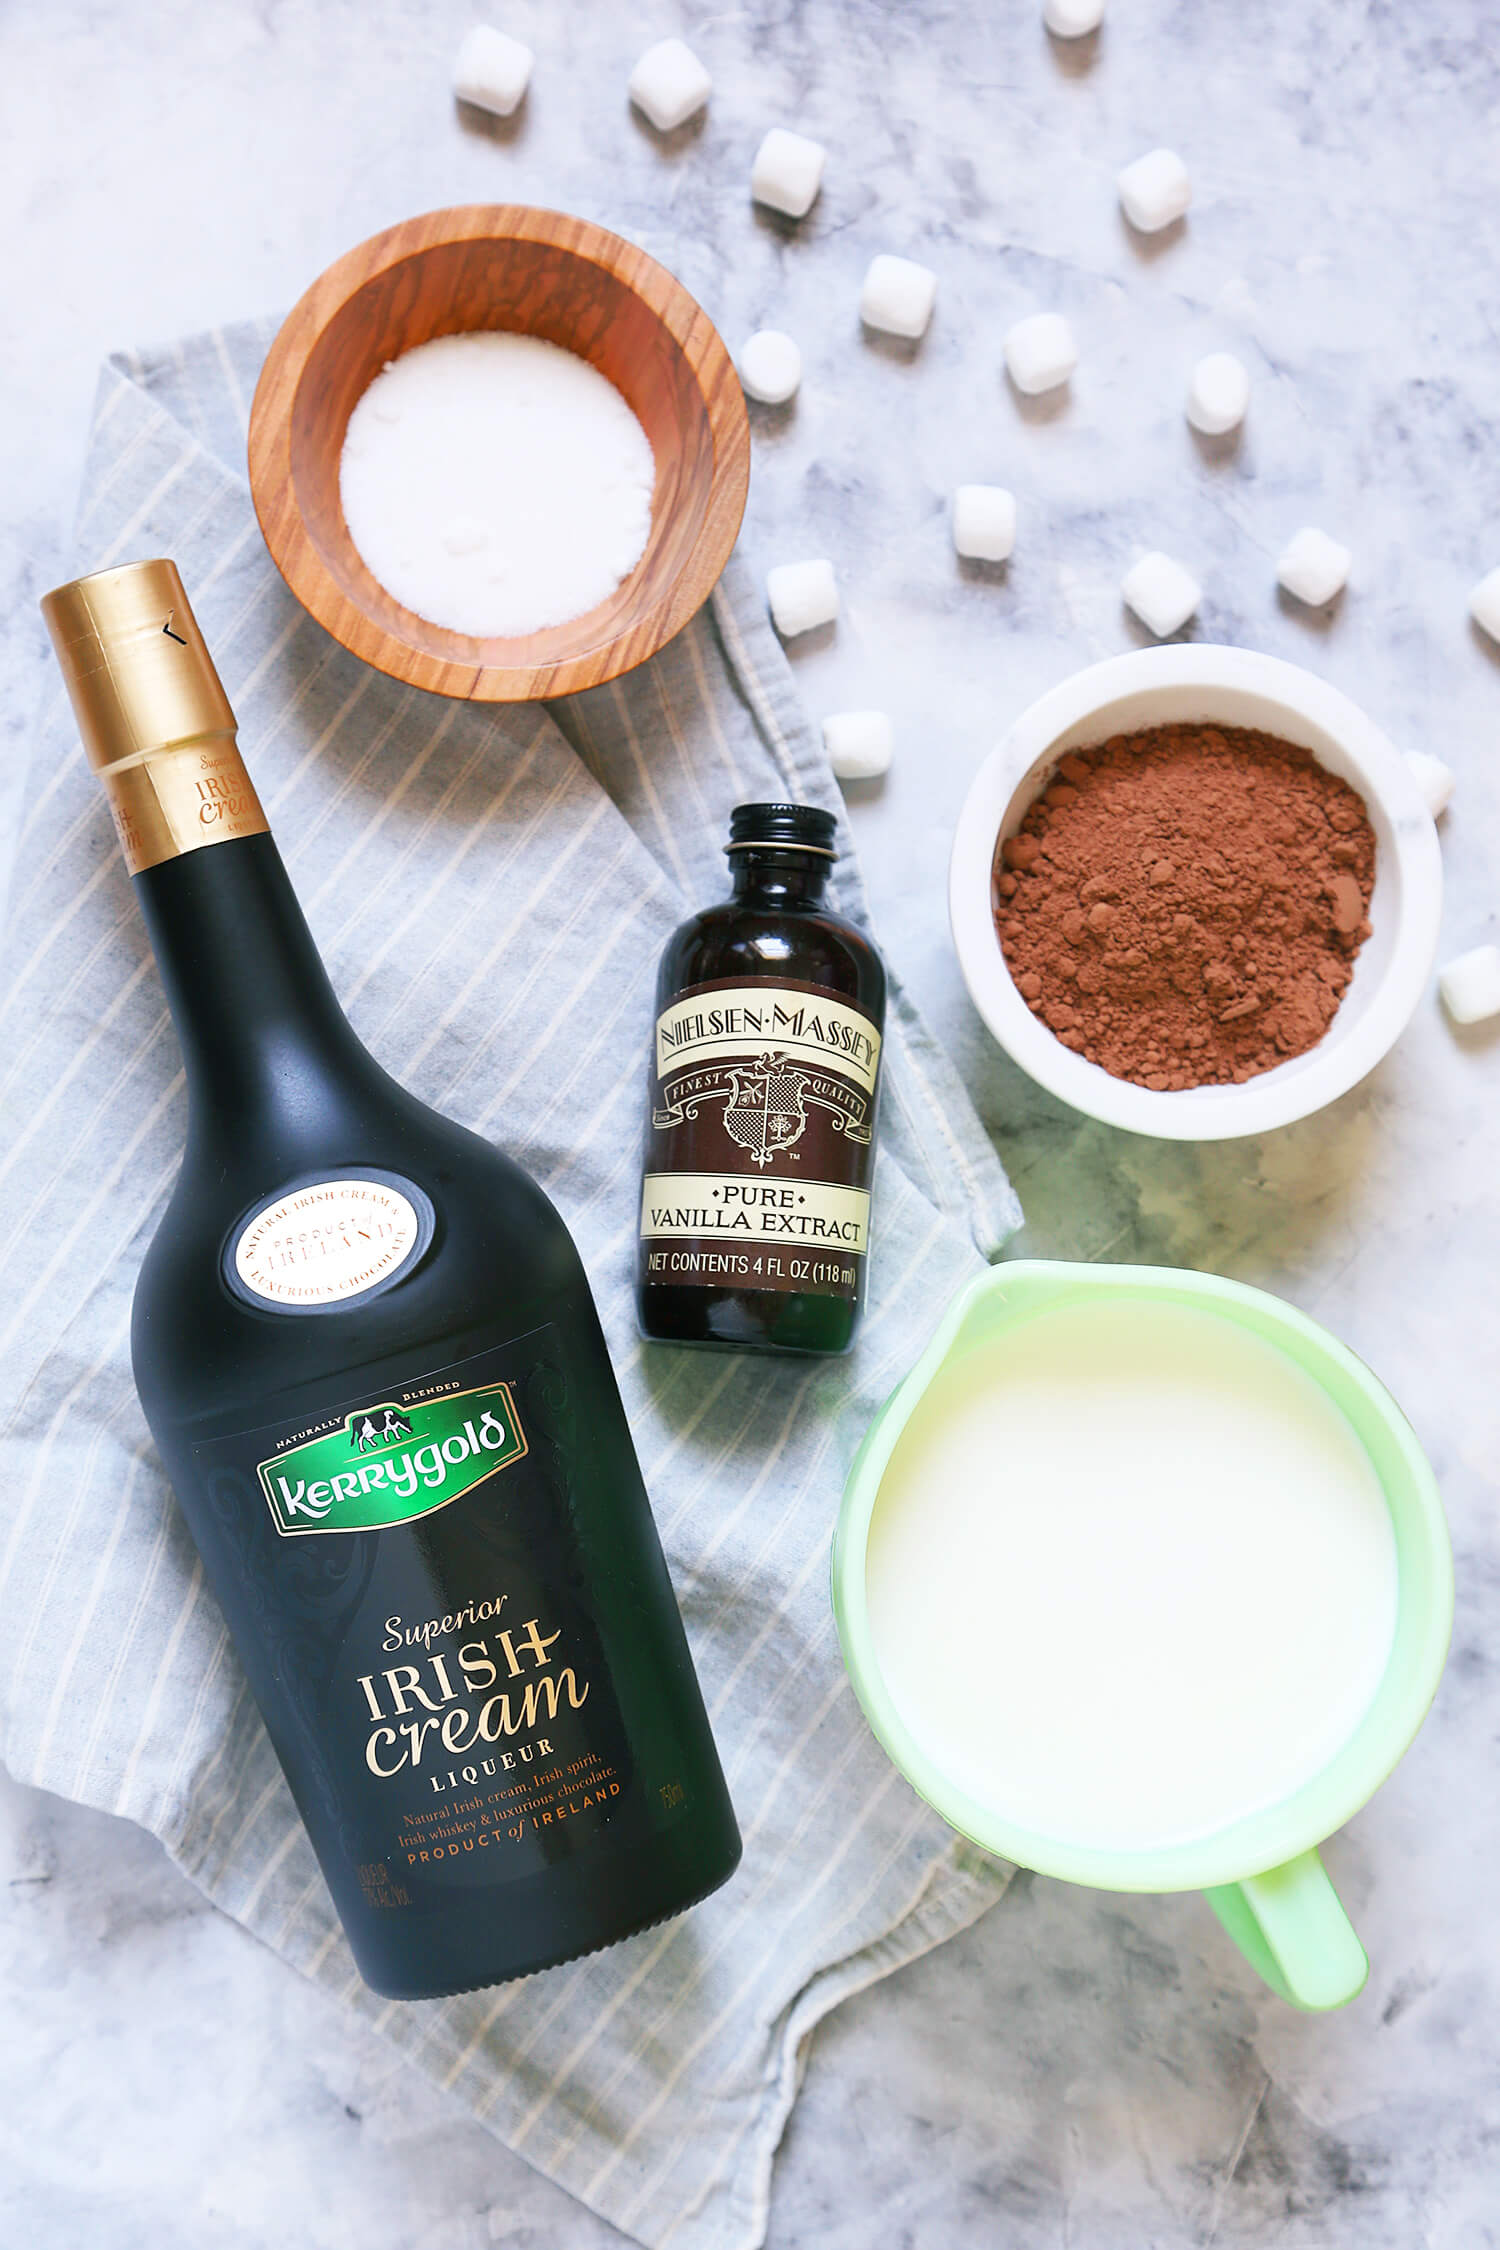
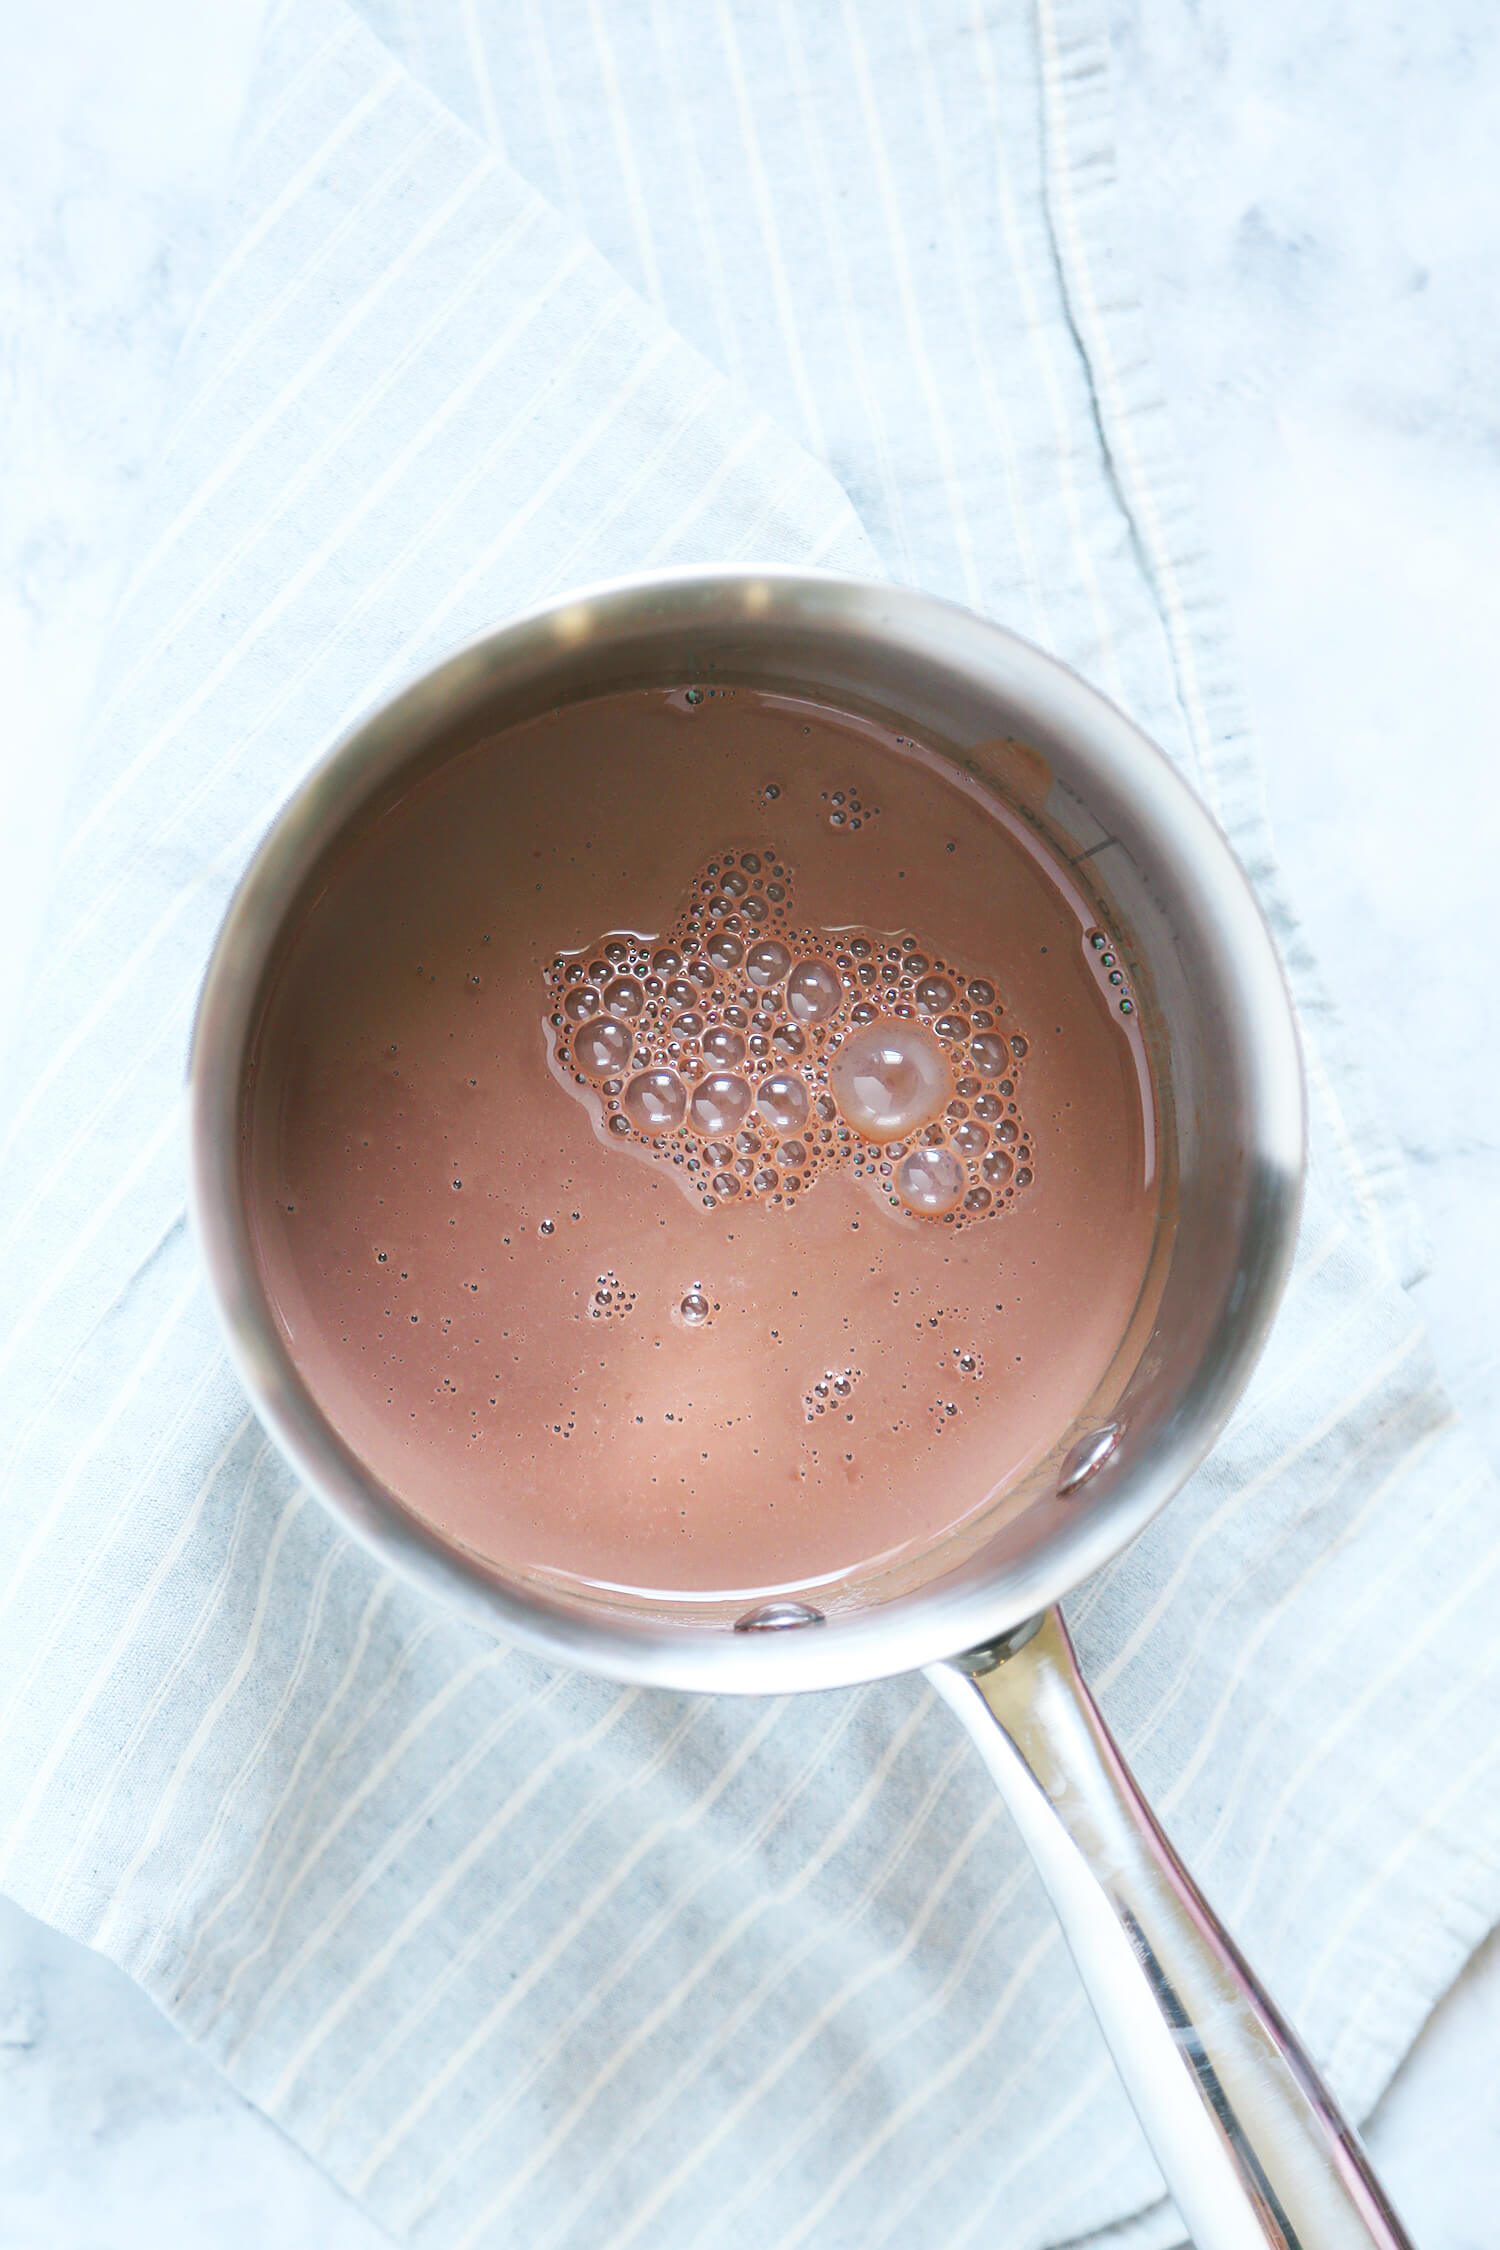
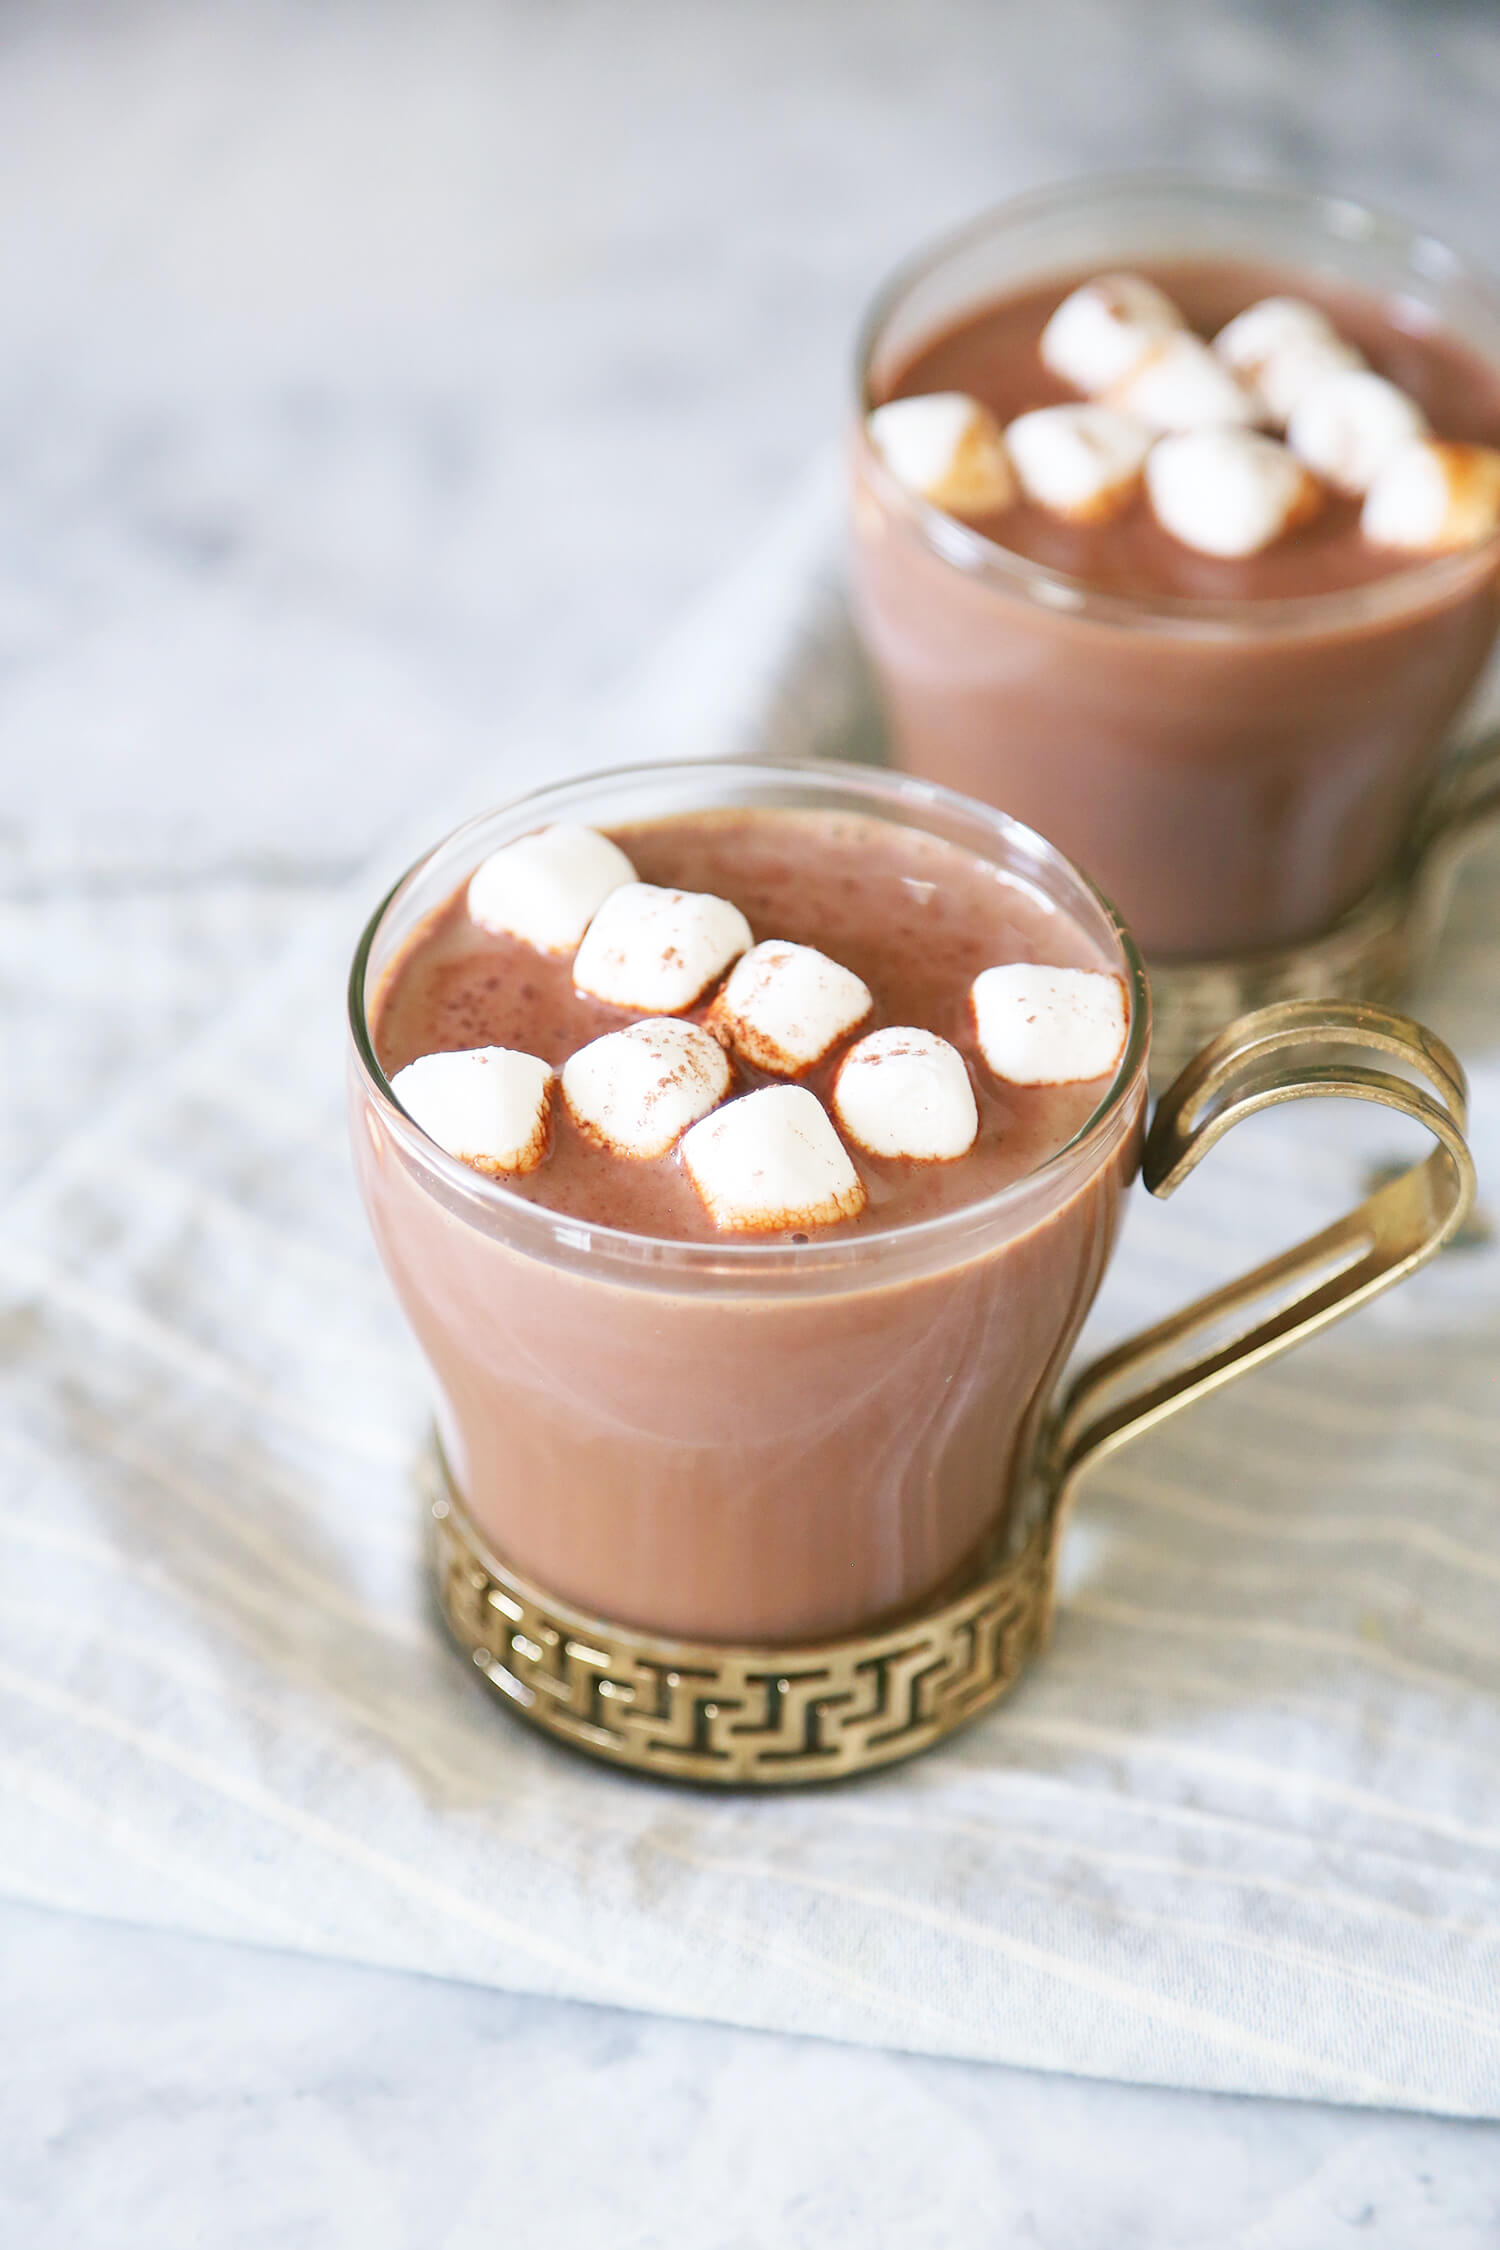
You can make your own hot chocolate like the recipe I made here or put a Keurig out if you own one. I did both that way people could choose what they wanted. The Keurig route is definitely easier but I love making fresh hot chocolate from scratch. I put my fresh hot chocolate in an enamel serving pot and left out a jar of hot chocolate pods for the Keurig.

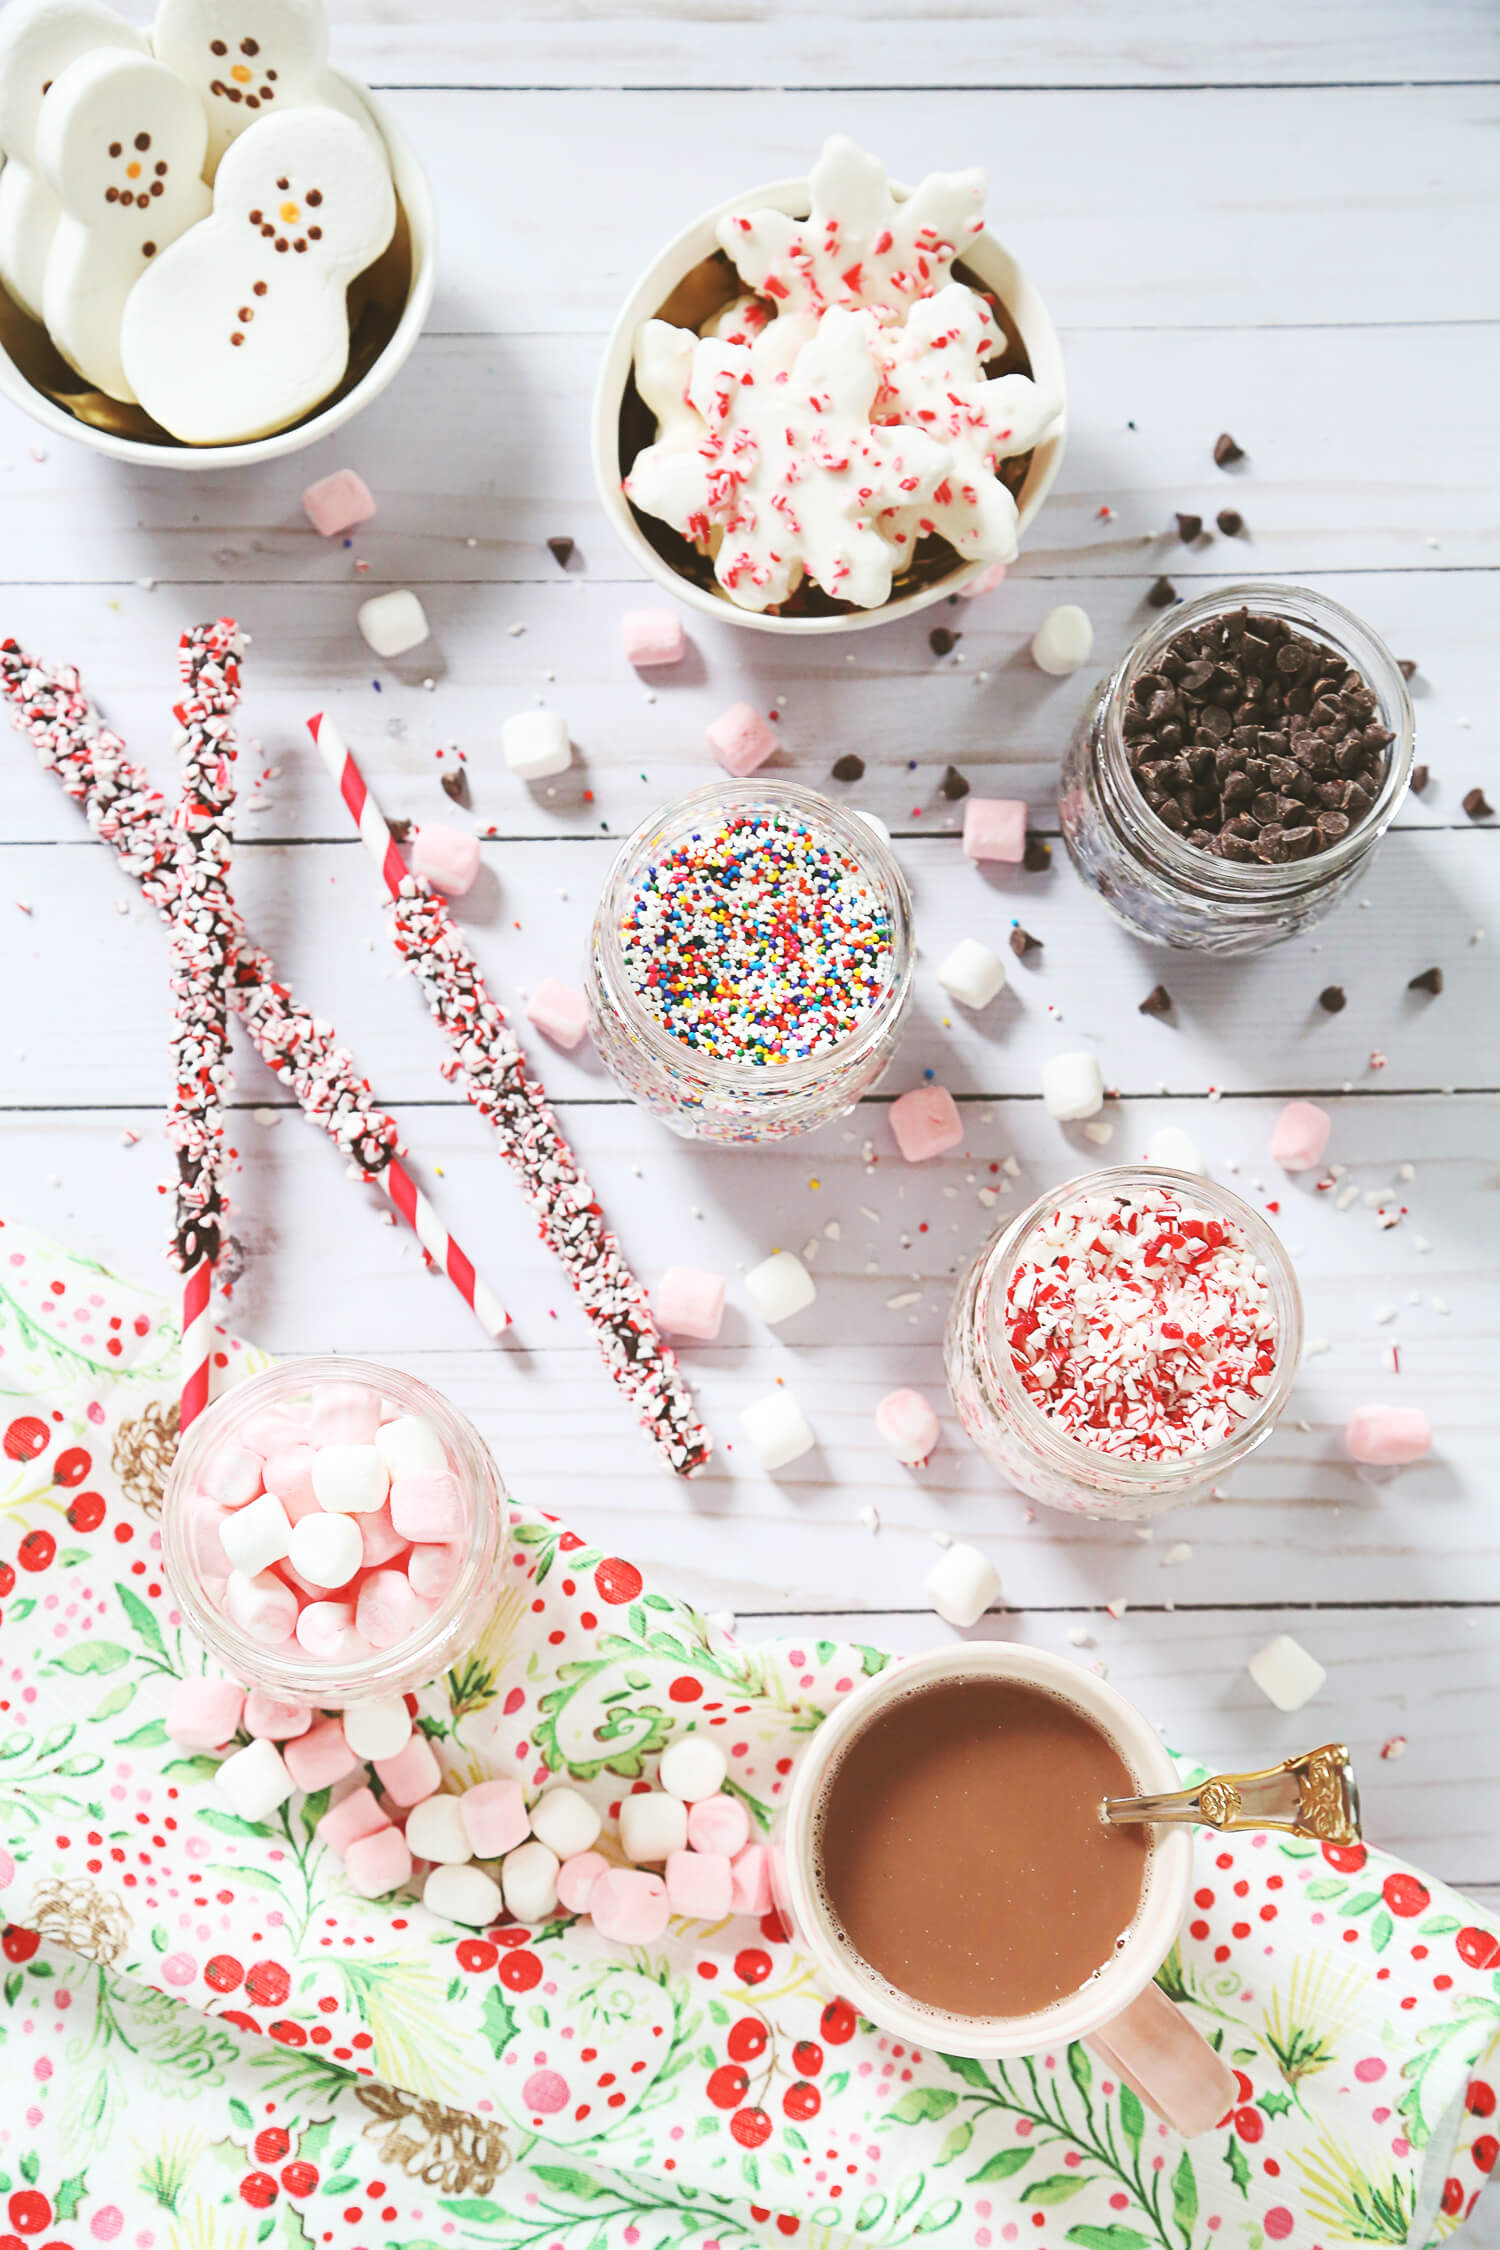
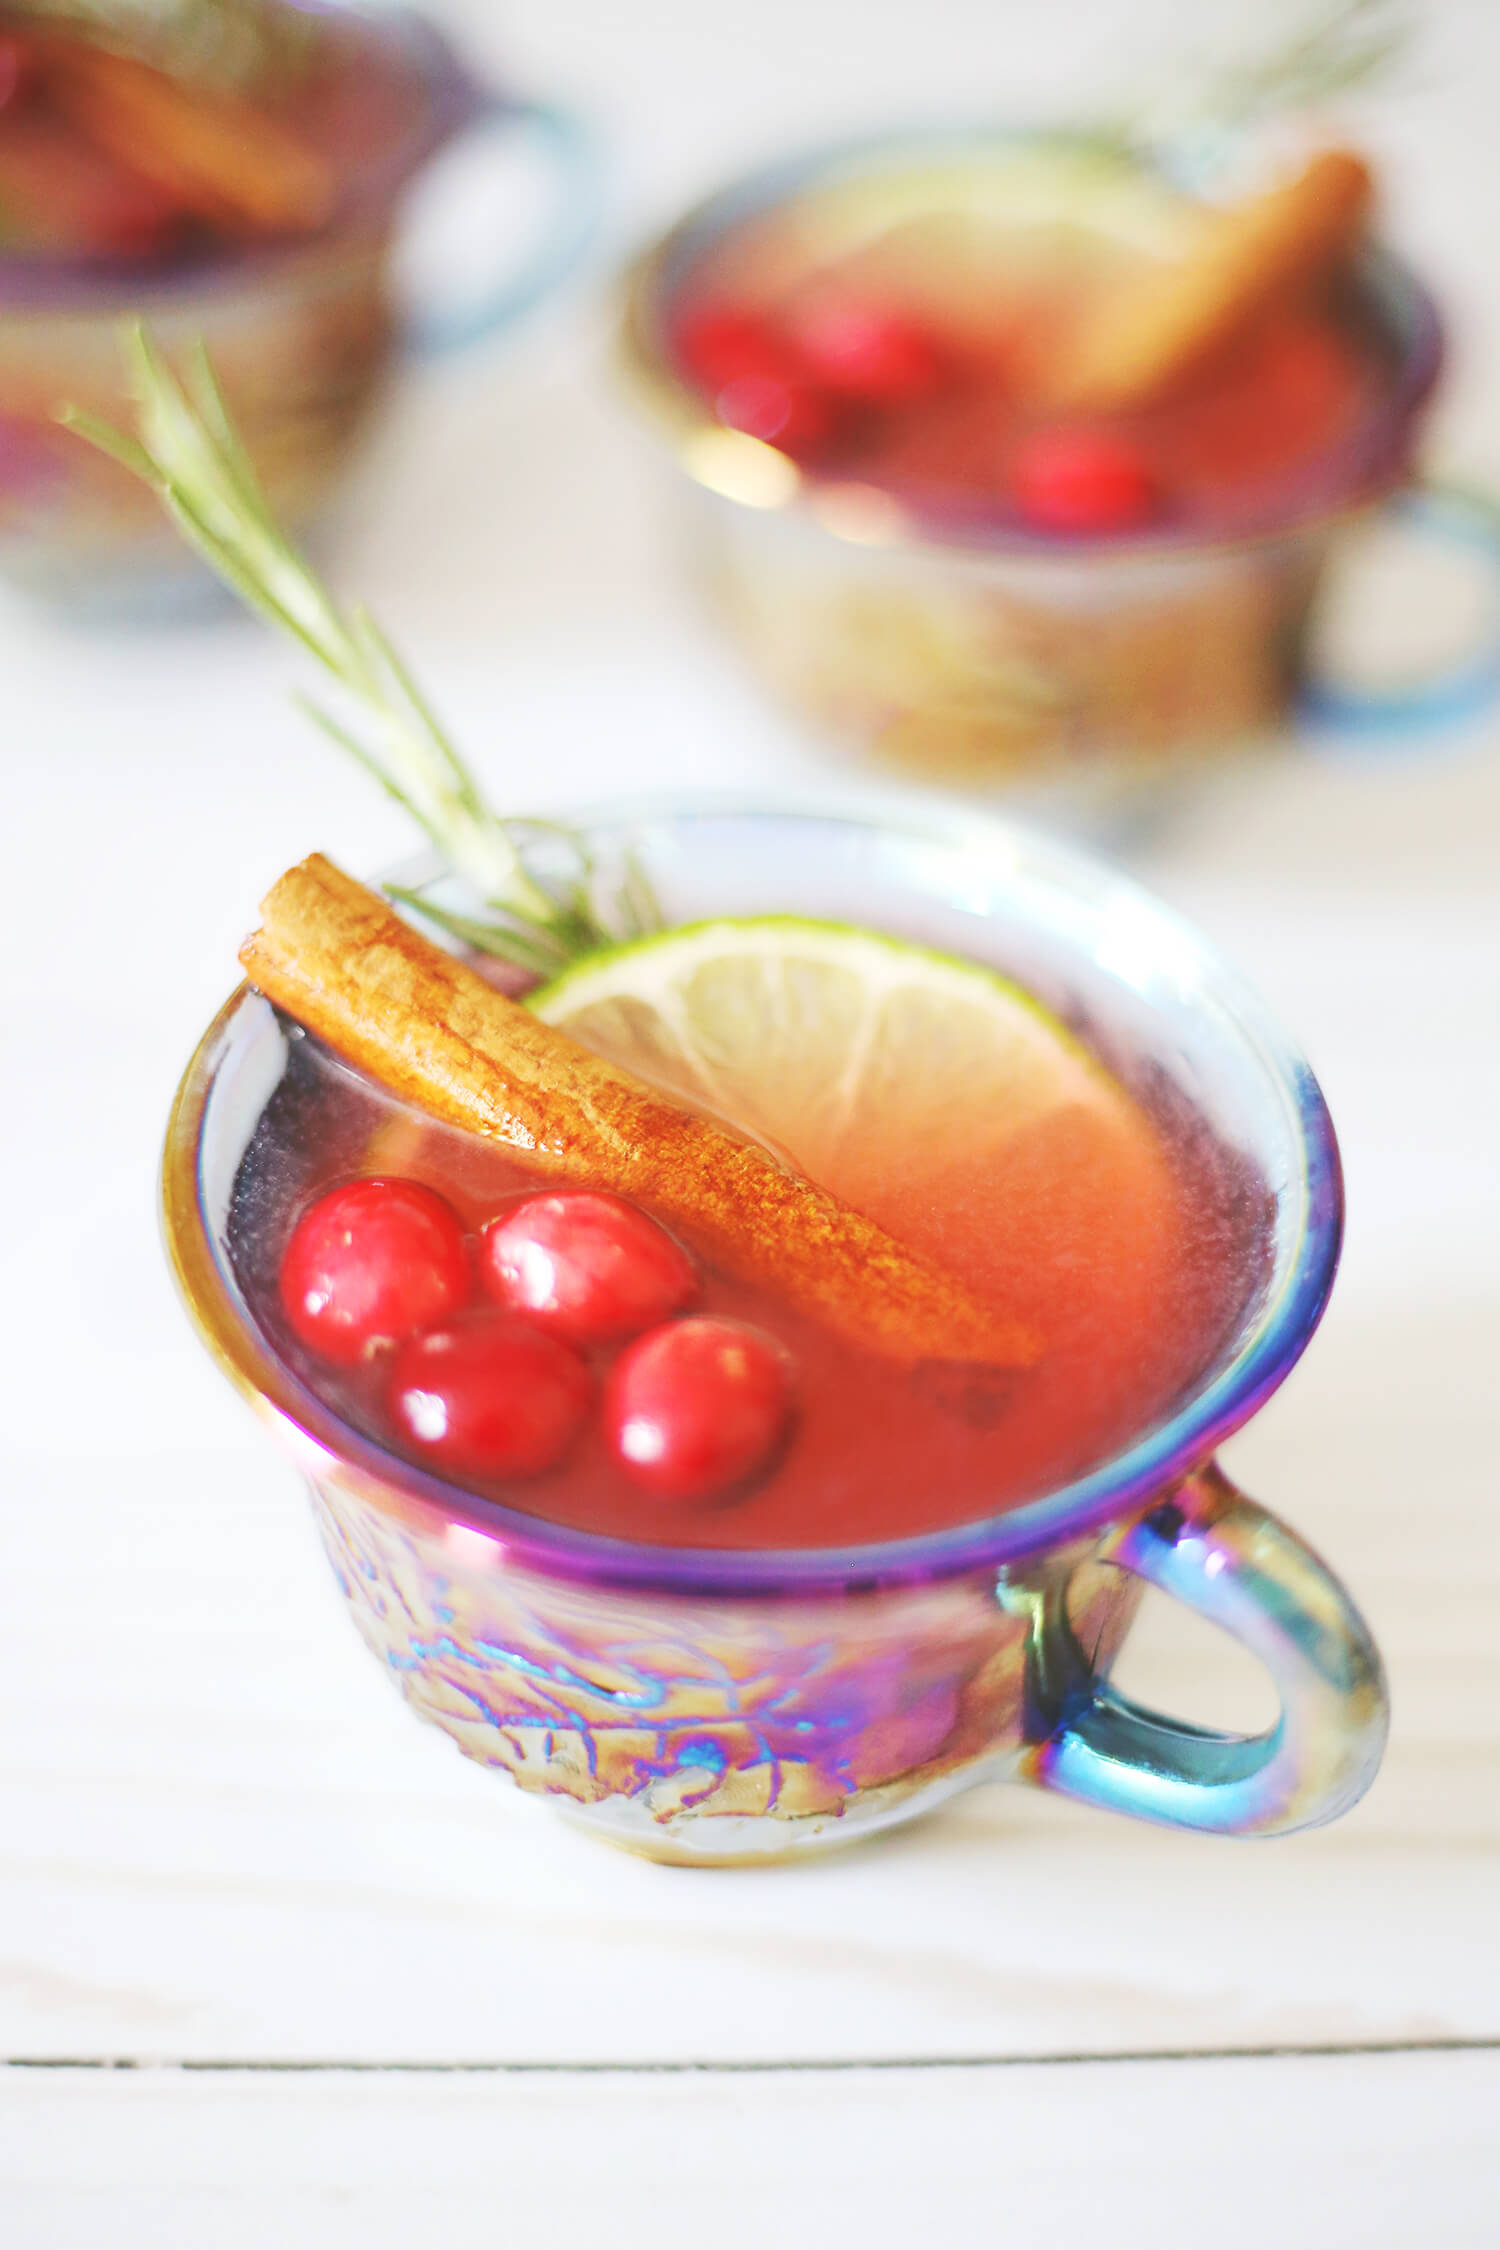
You can use little glass jars to house all your hot chocolate toppings. My favorite hot chocolate toppings include:

  • mini chocolate chips
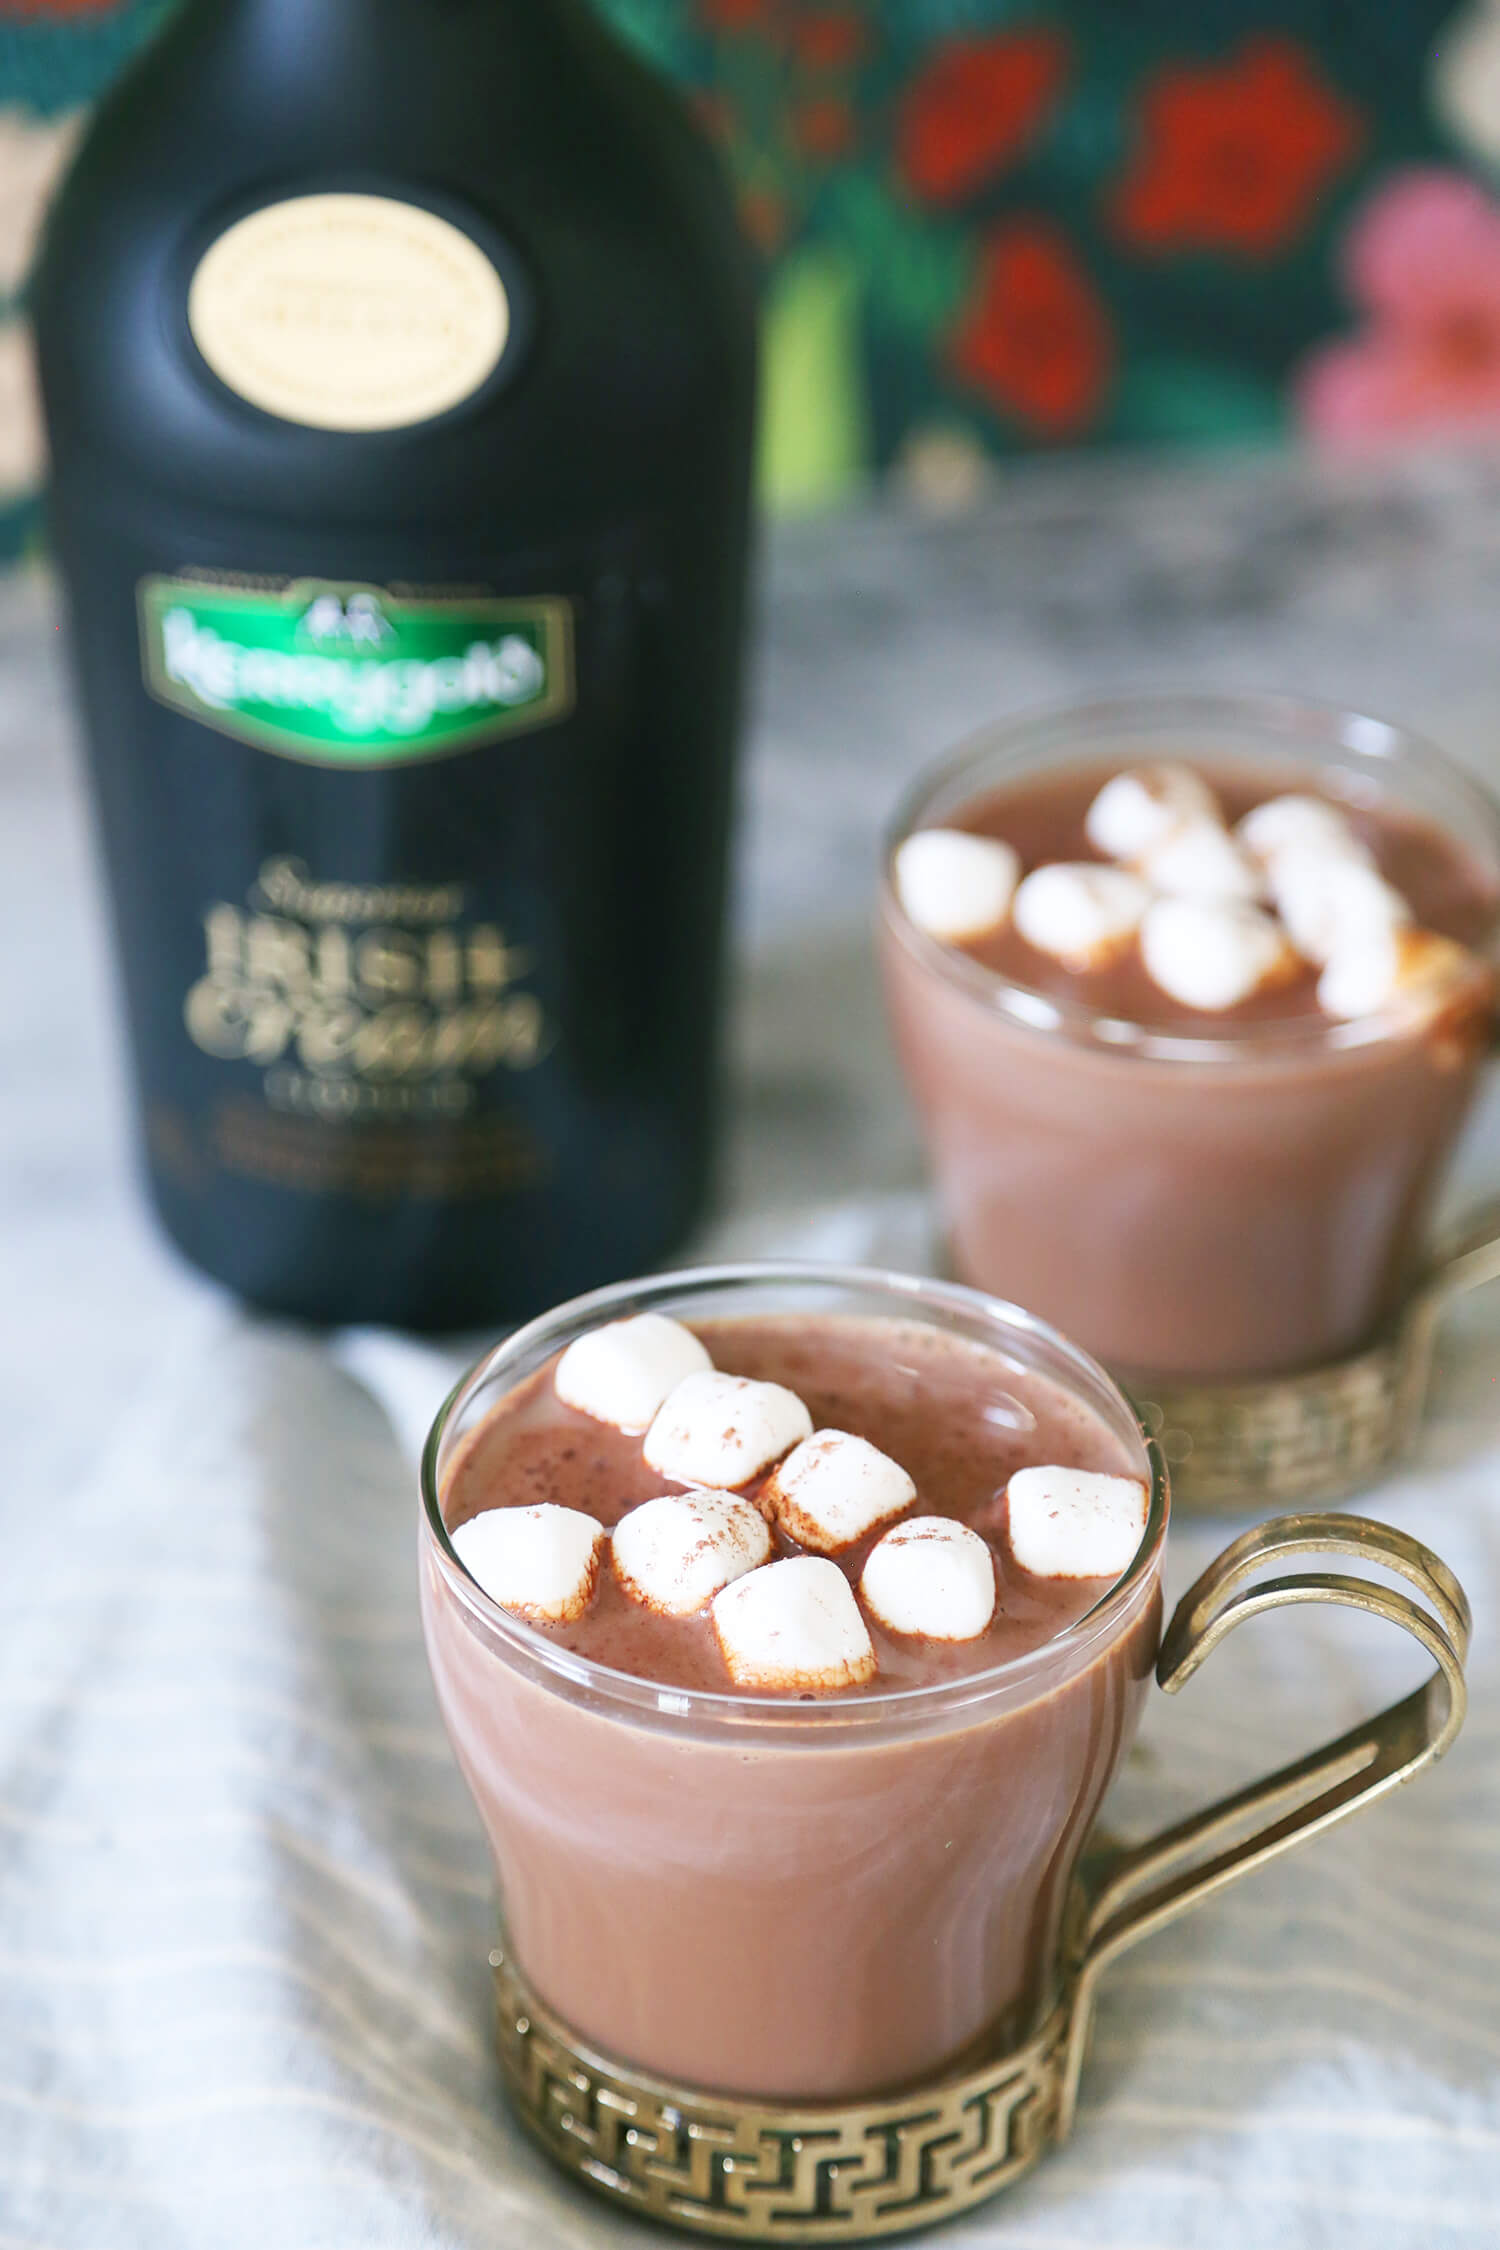
  • mini marshmallows (I bought regular and peppermint)
  • sprinkles
  • crushed peppermint
  • flavored stirring spoons or straws
  • marshmallow snowflakes and snowmen

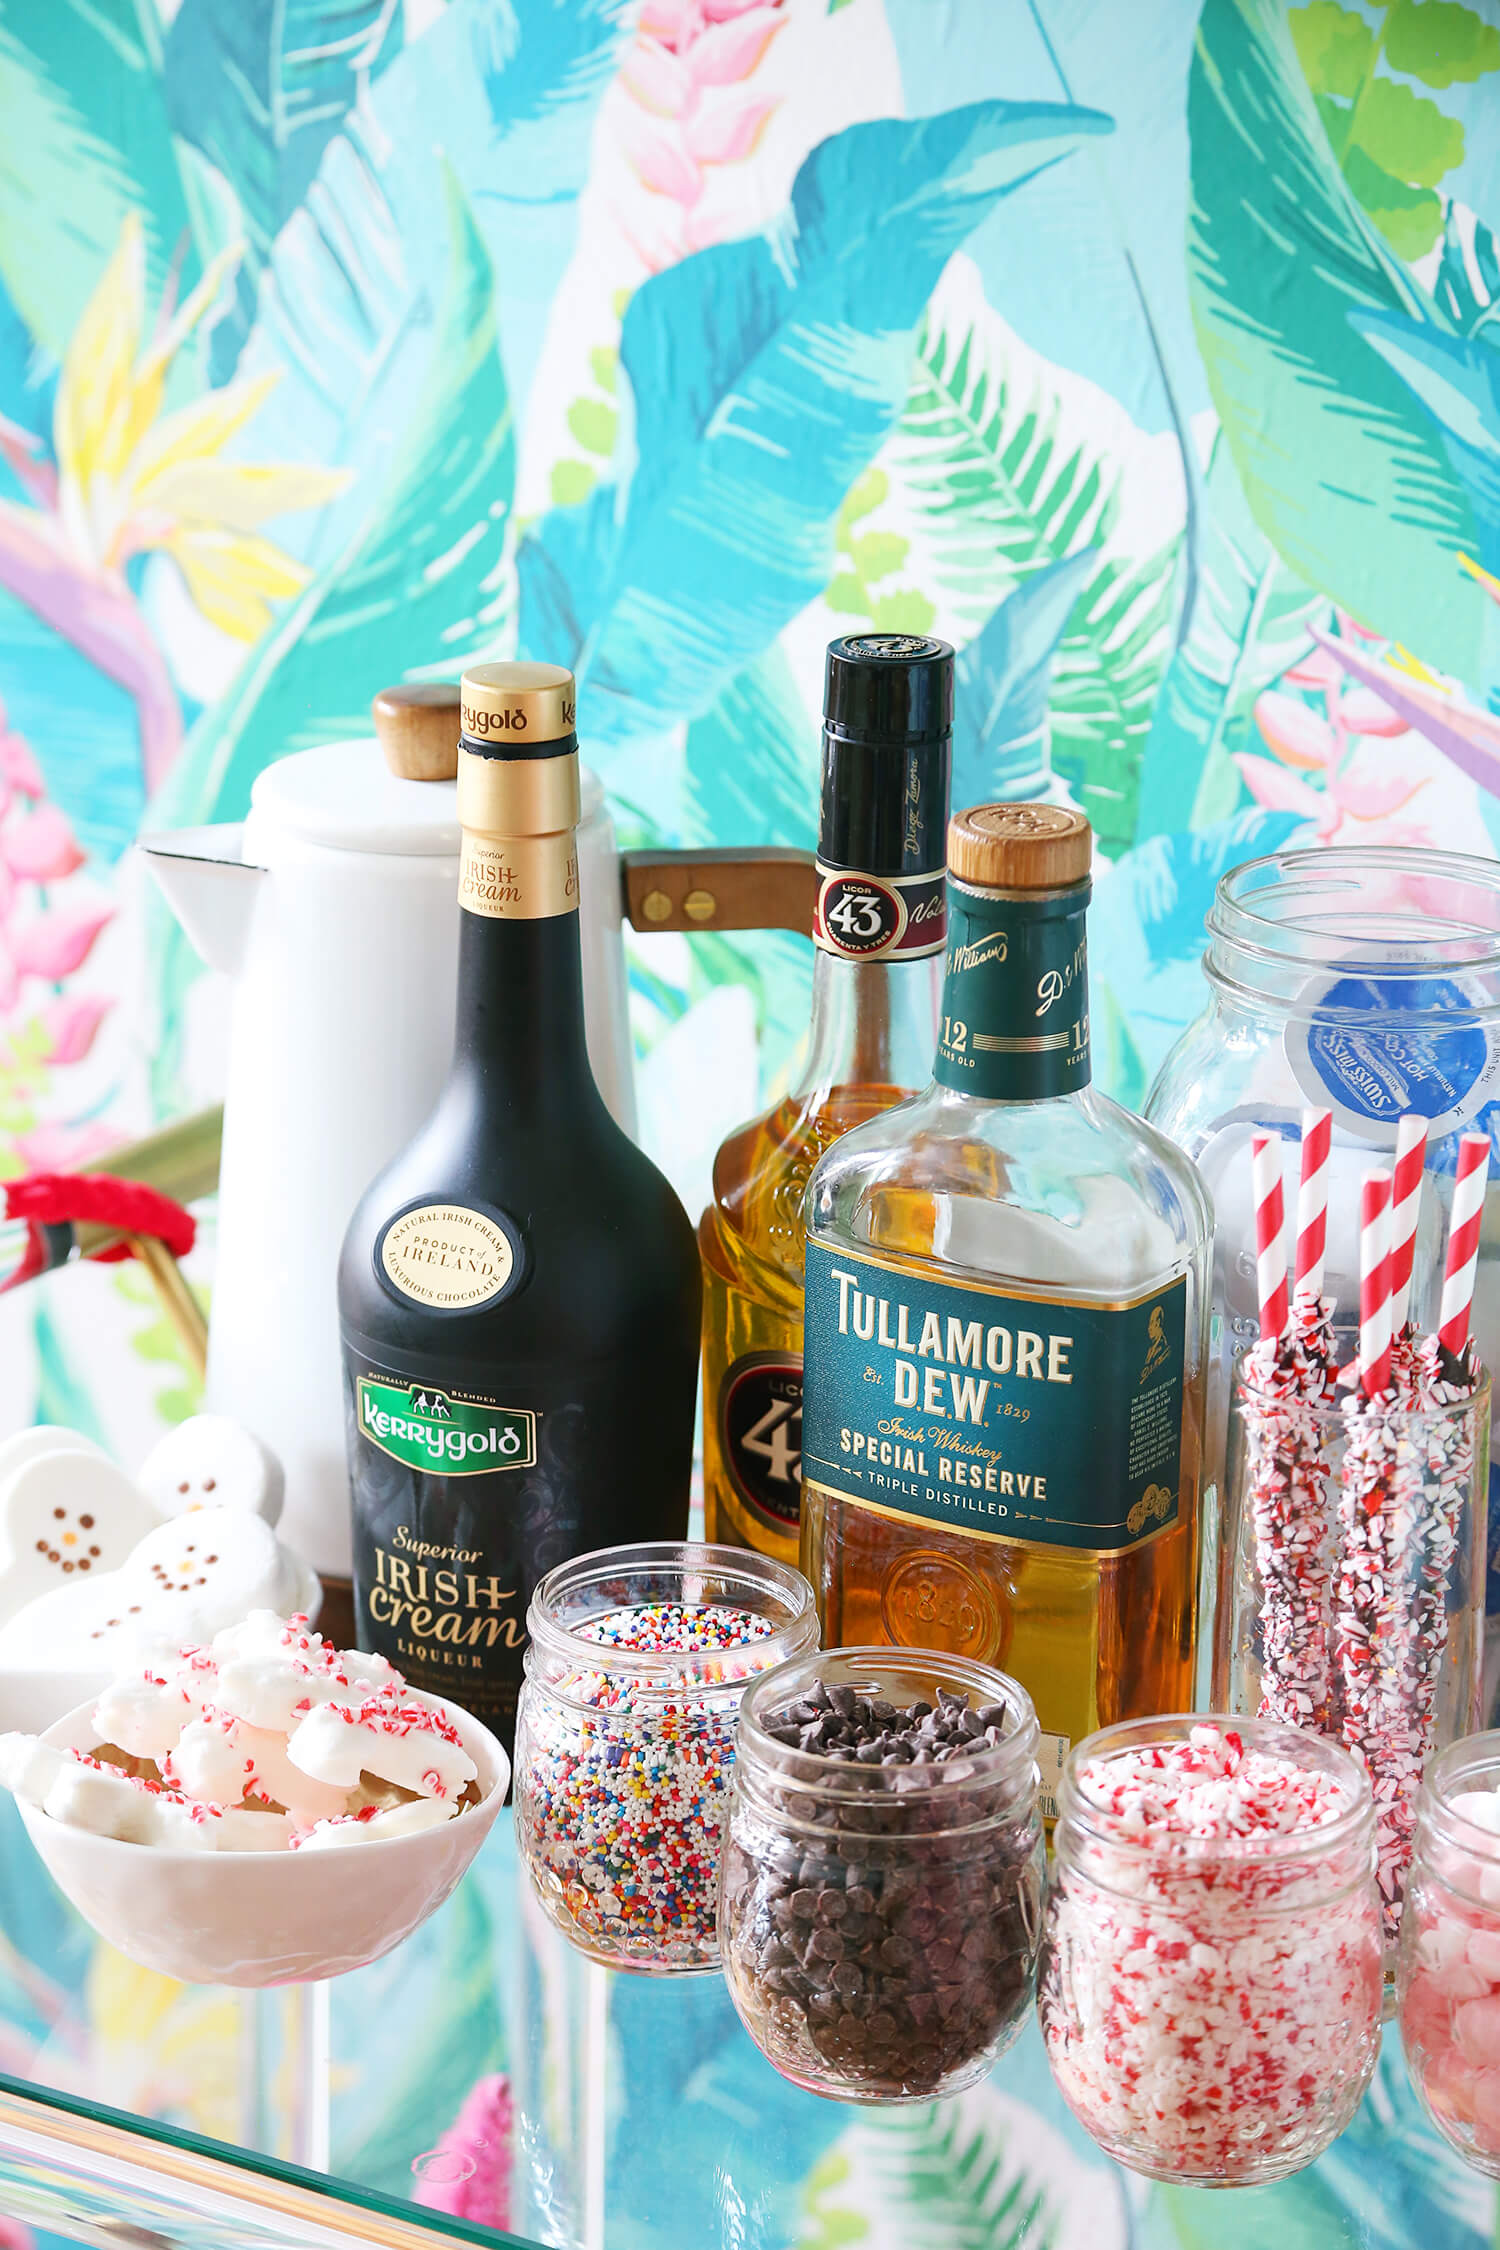
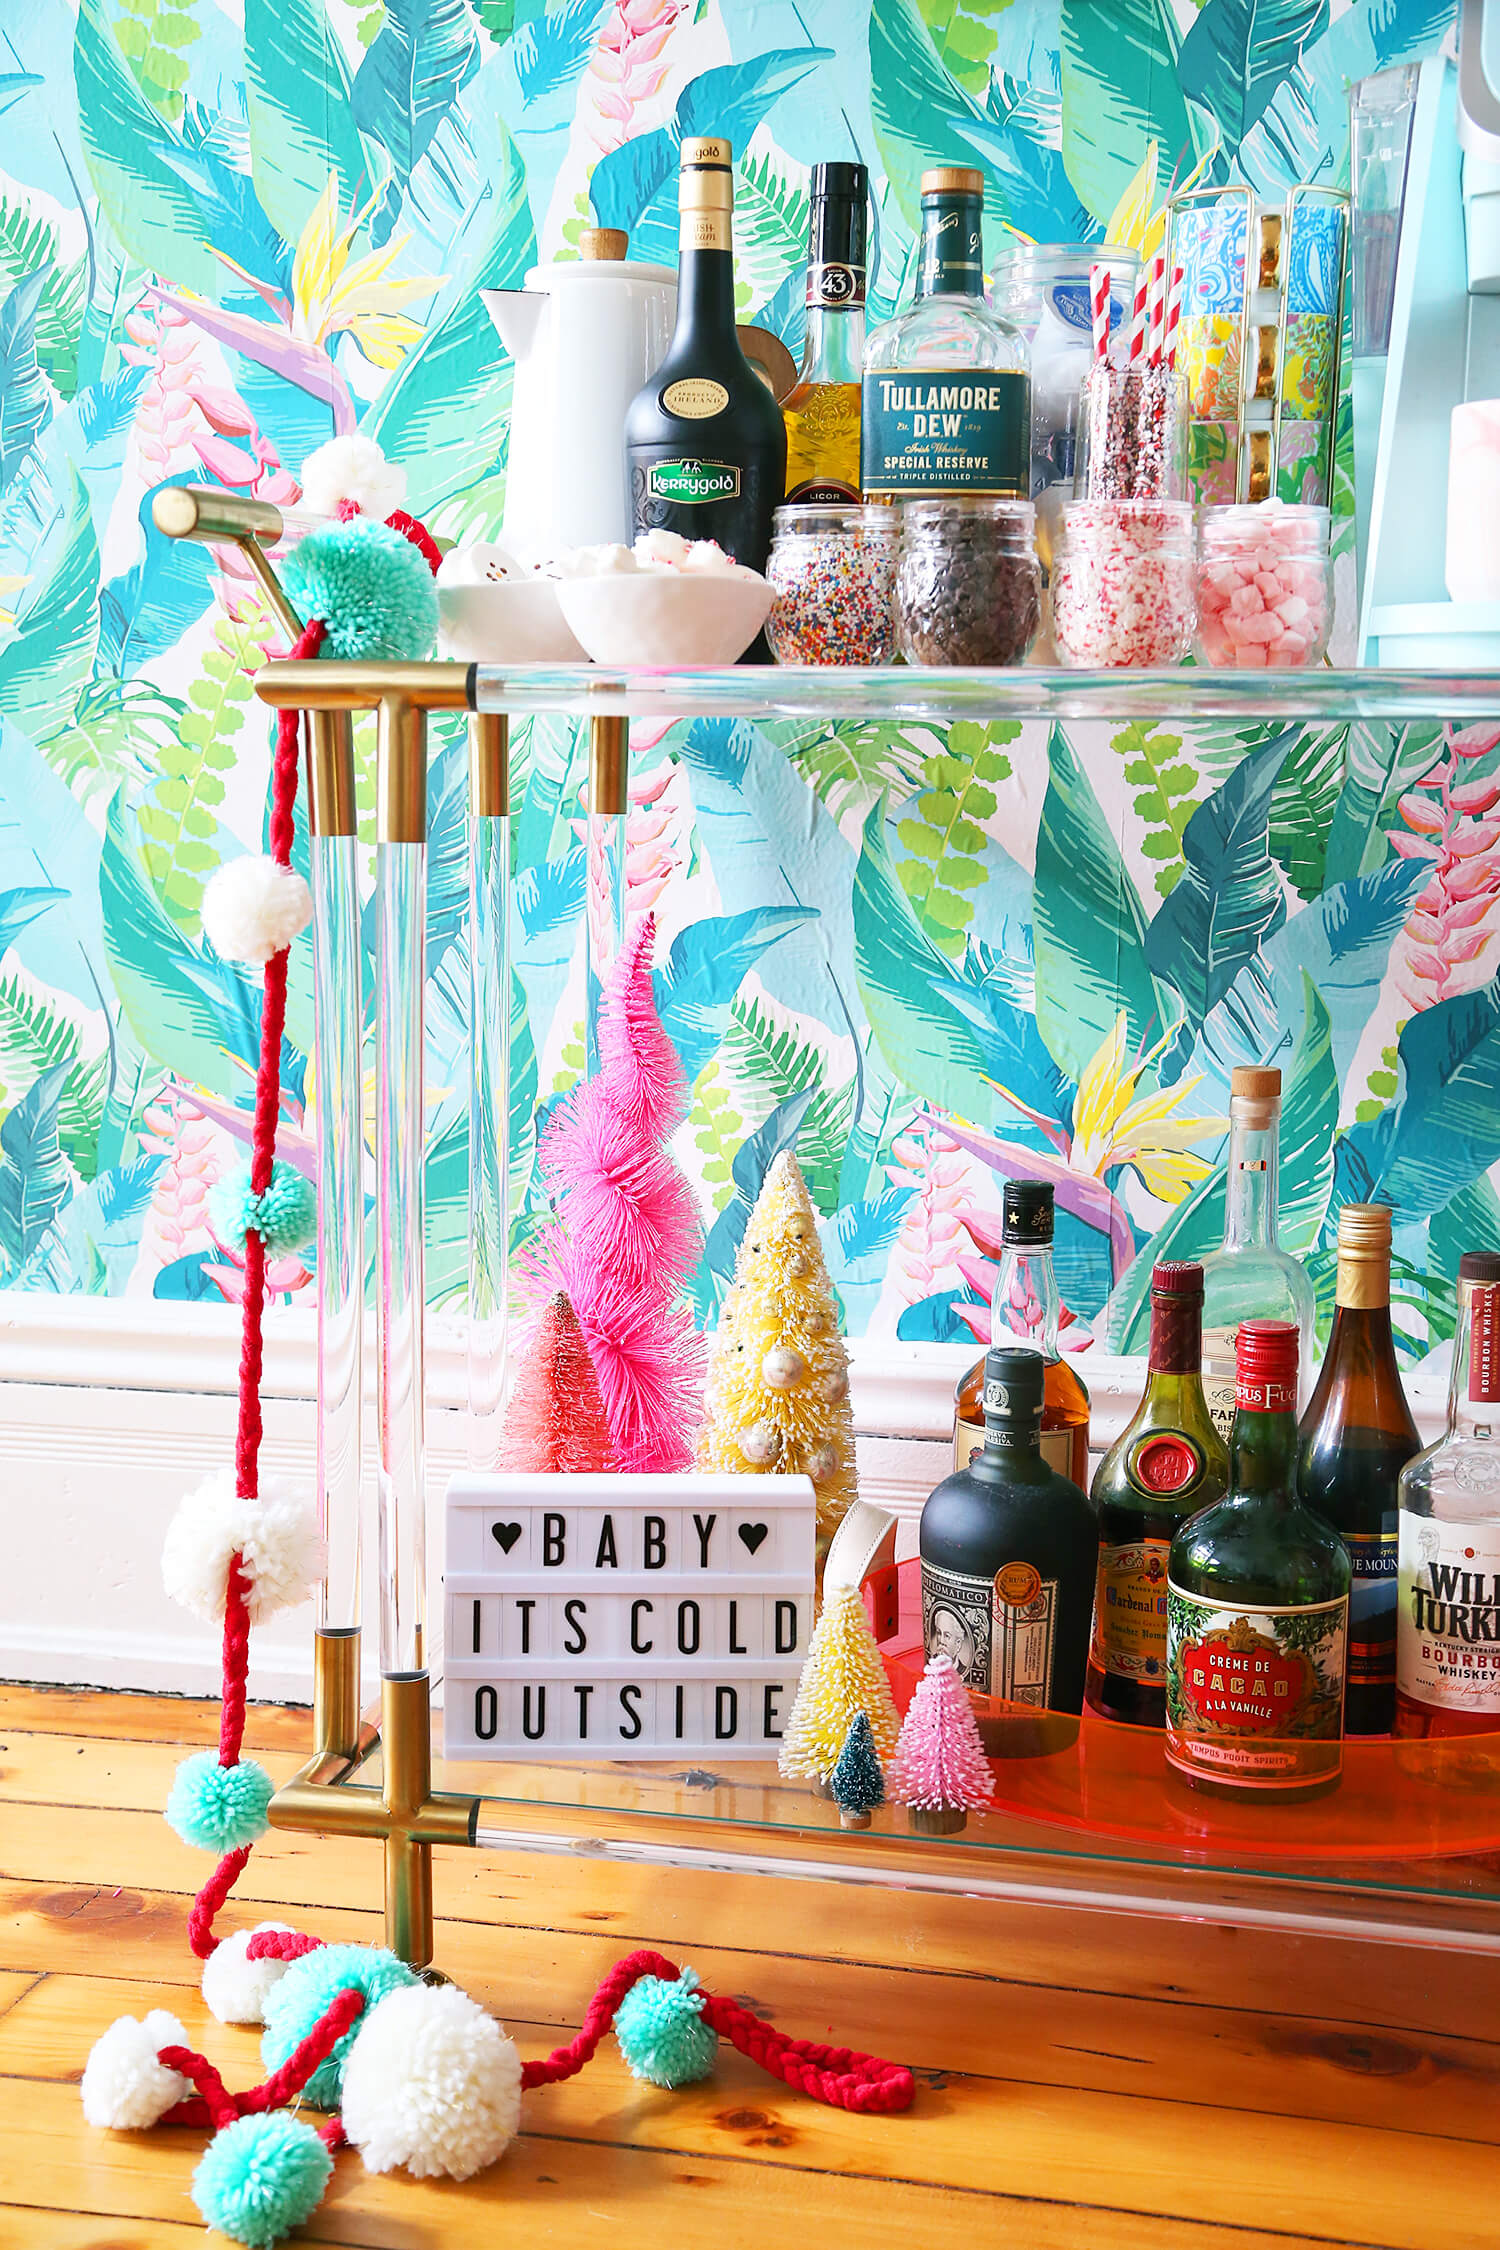
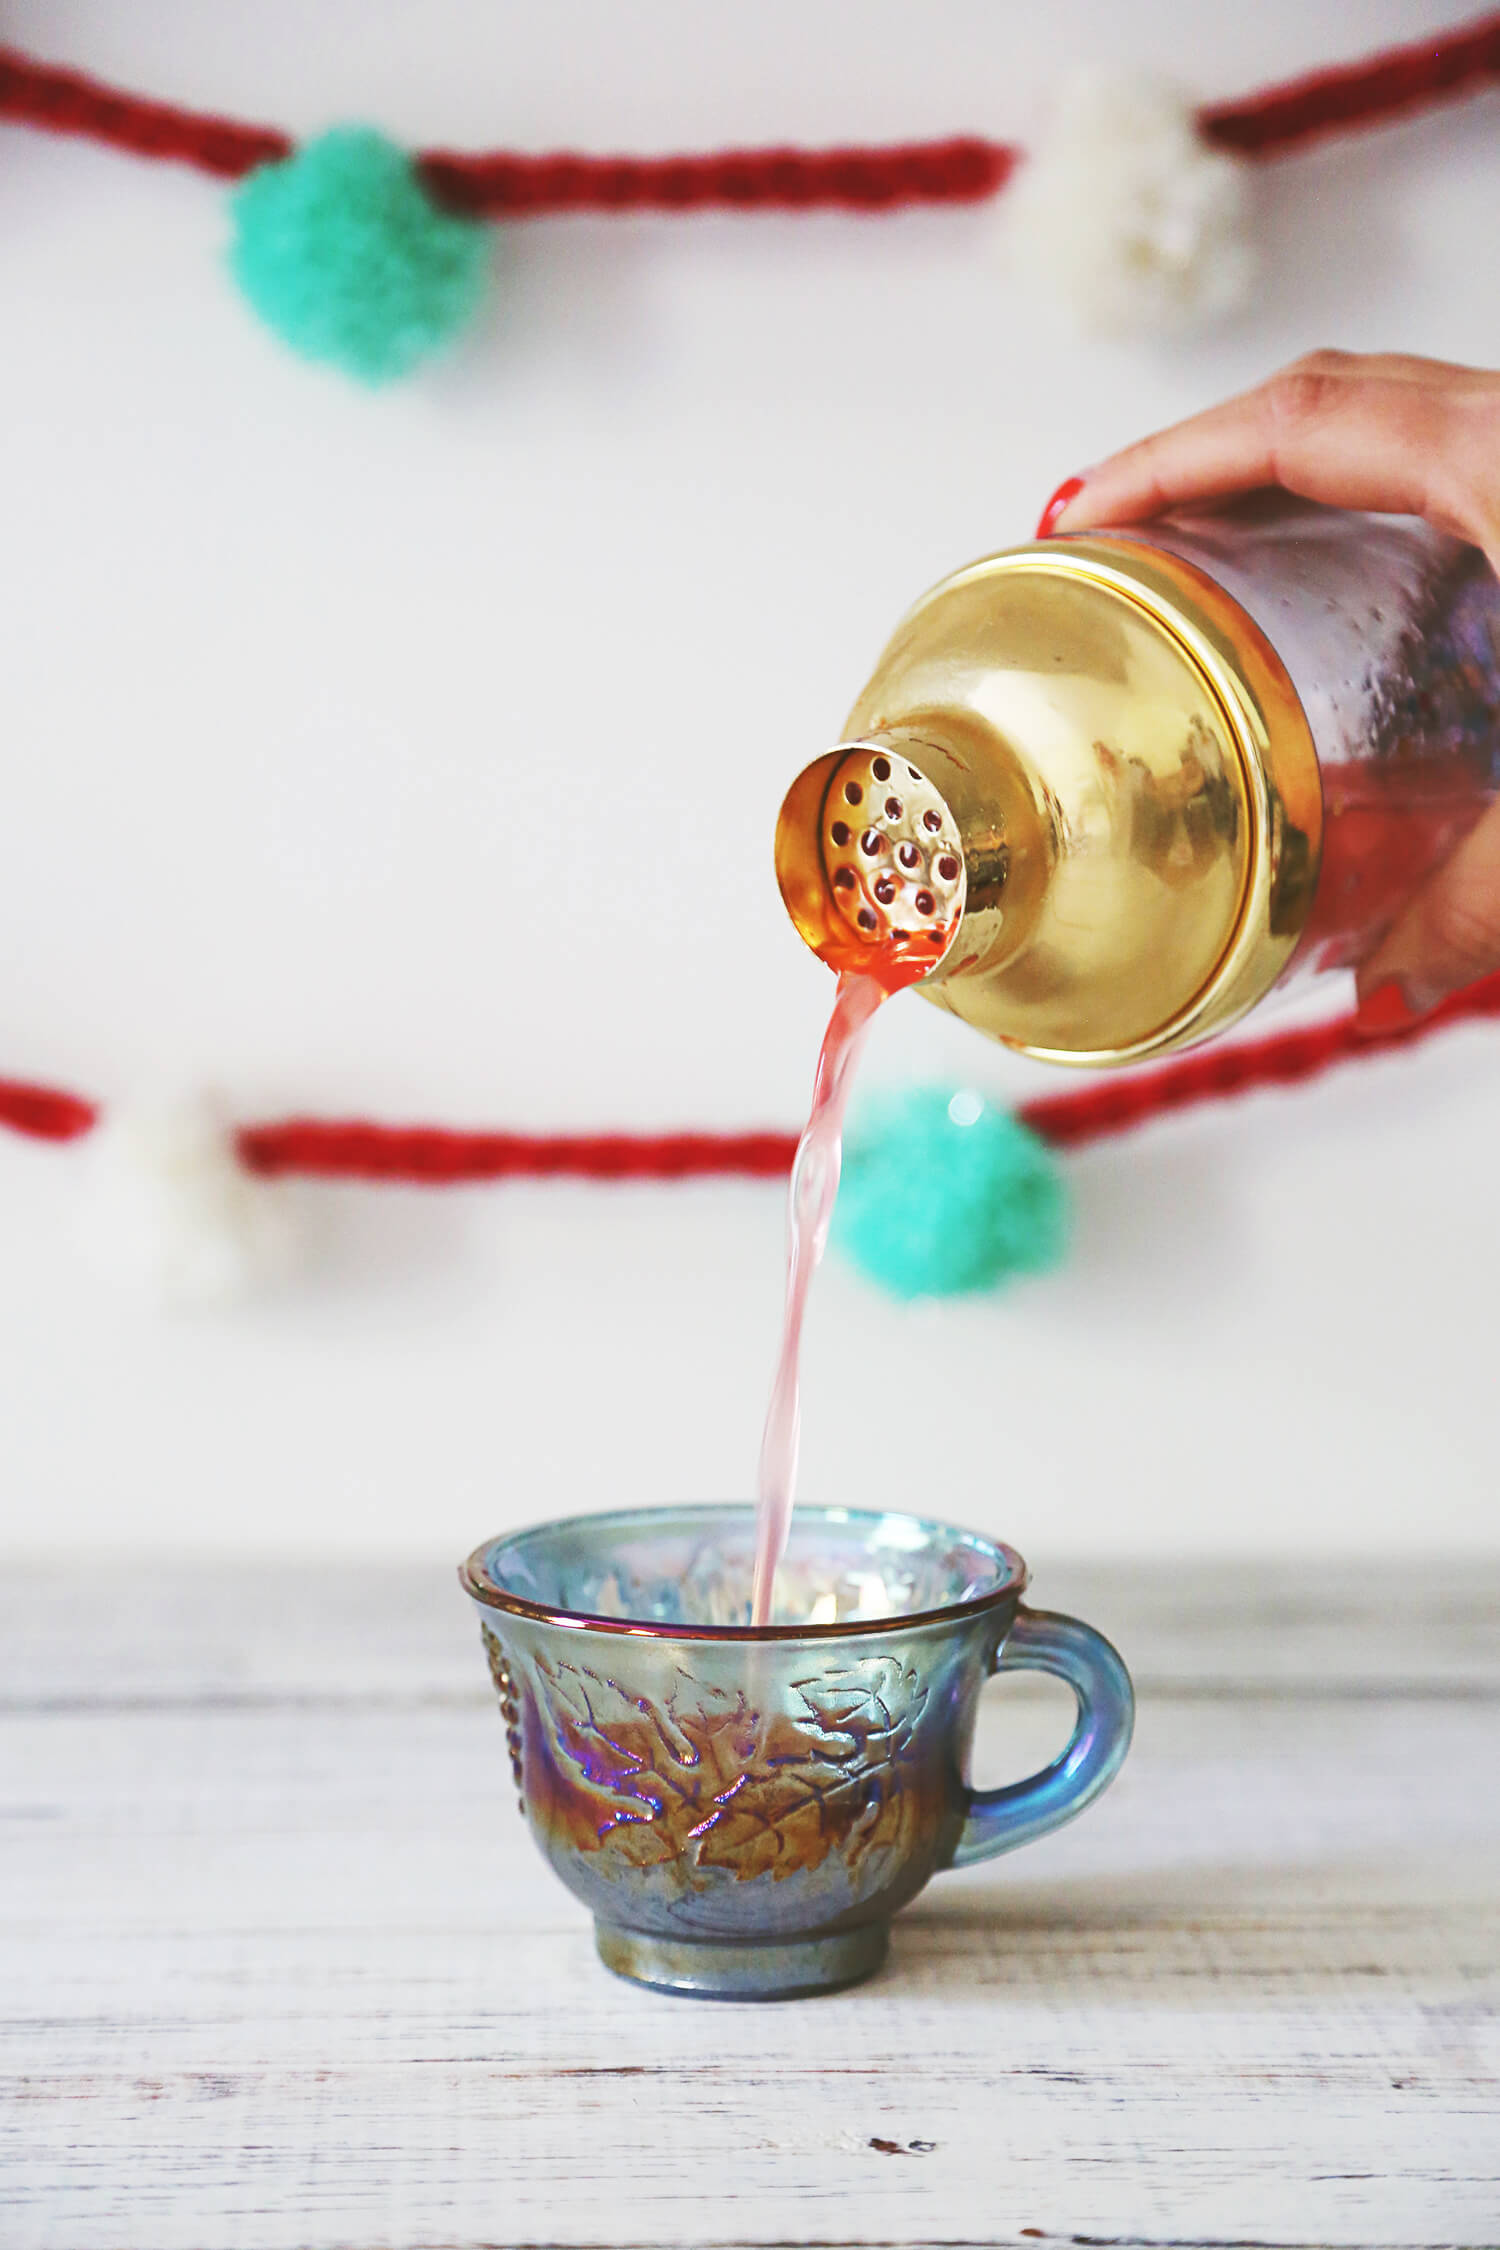
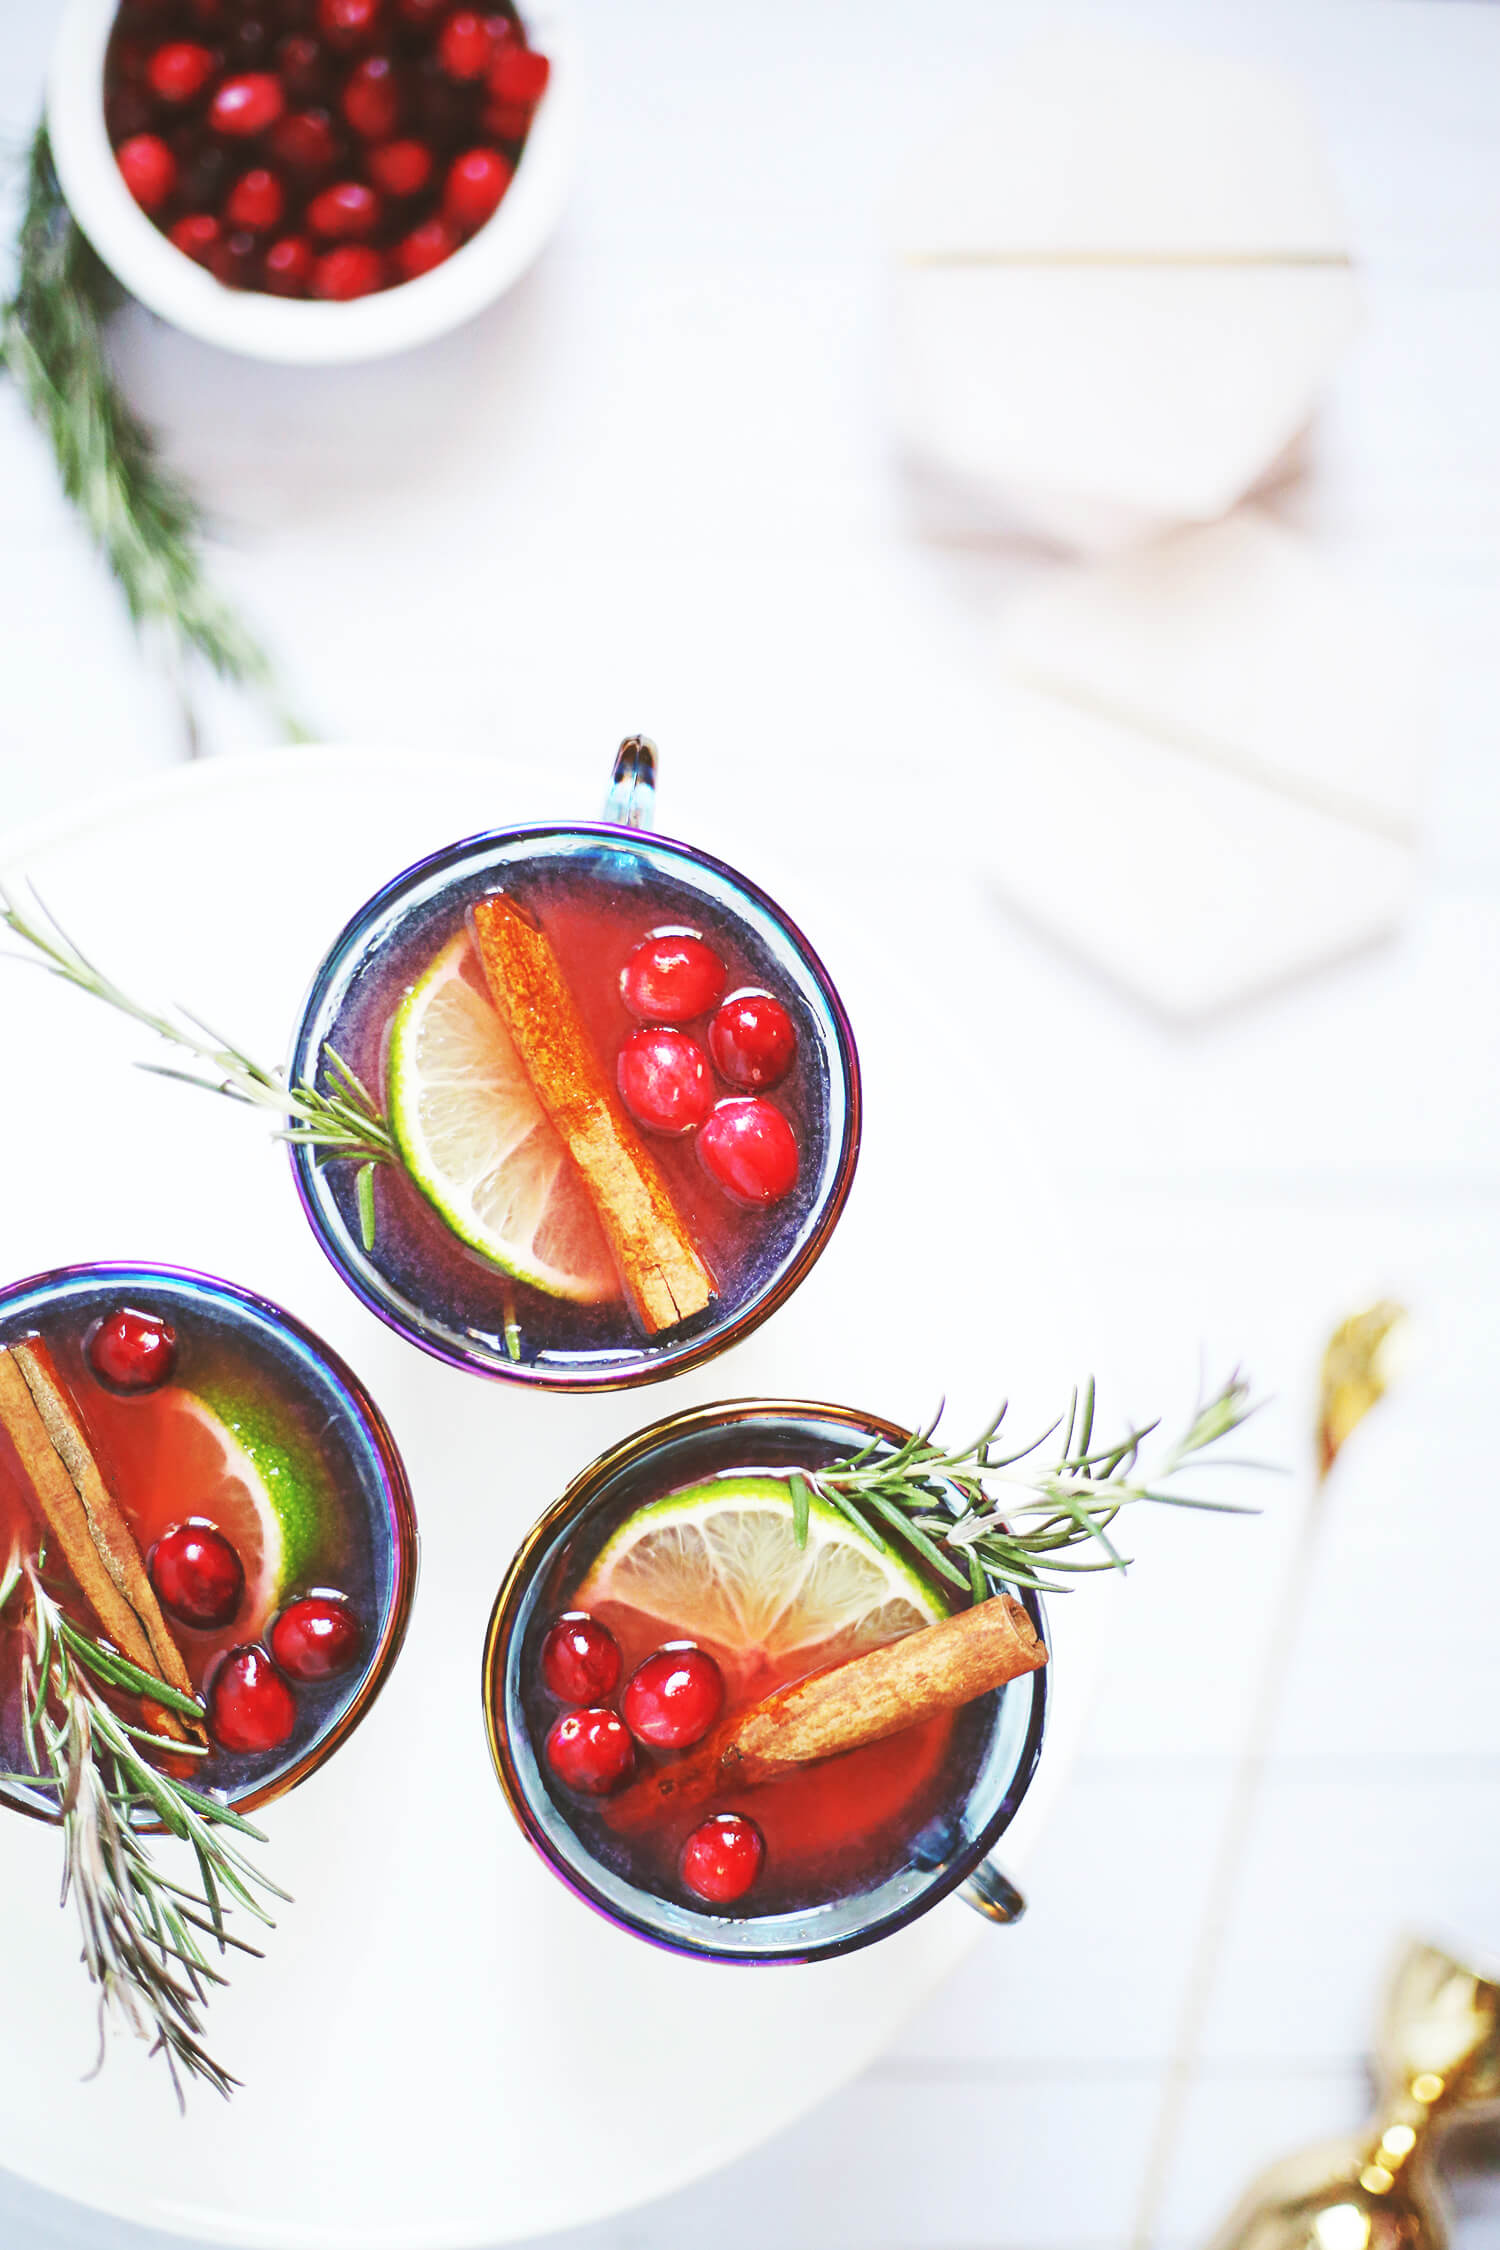
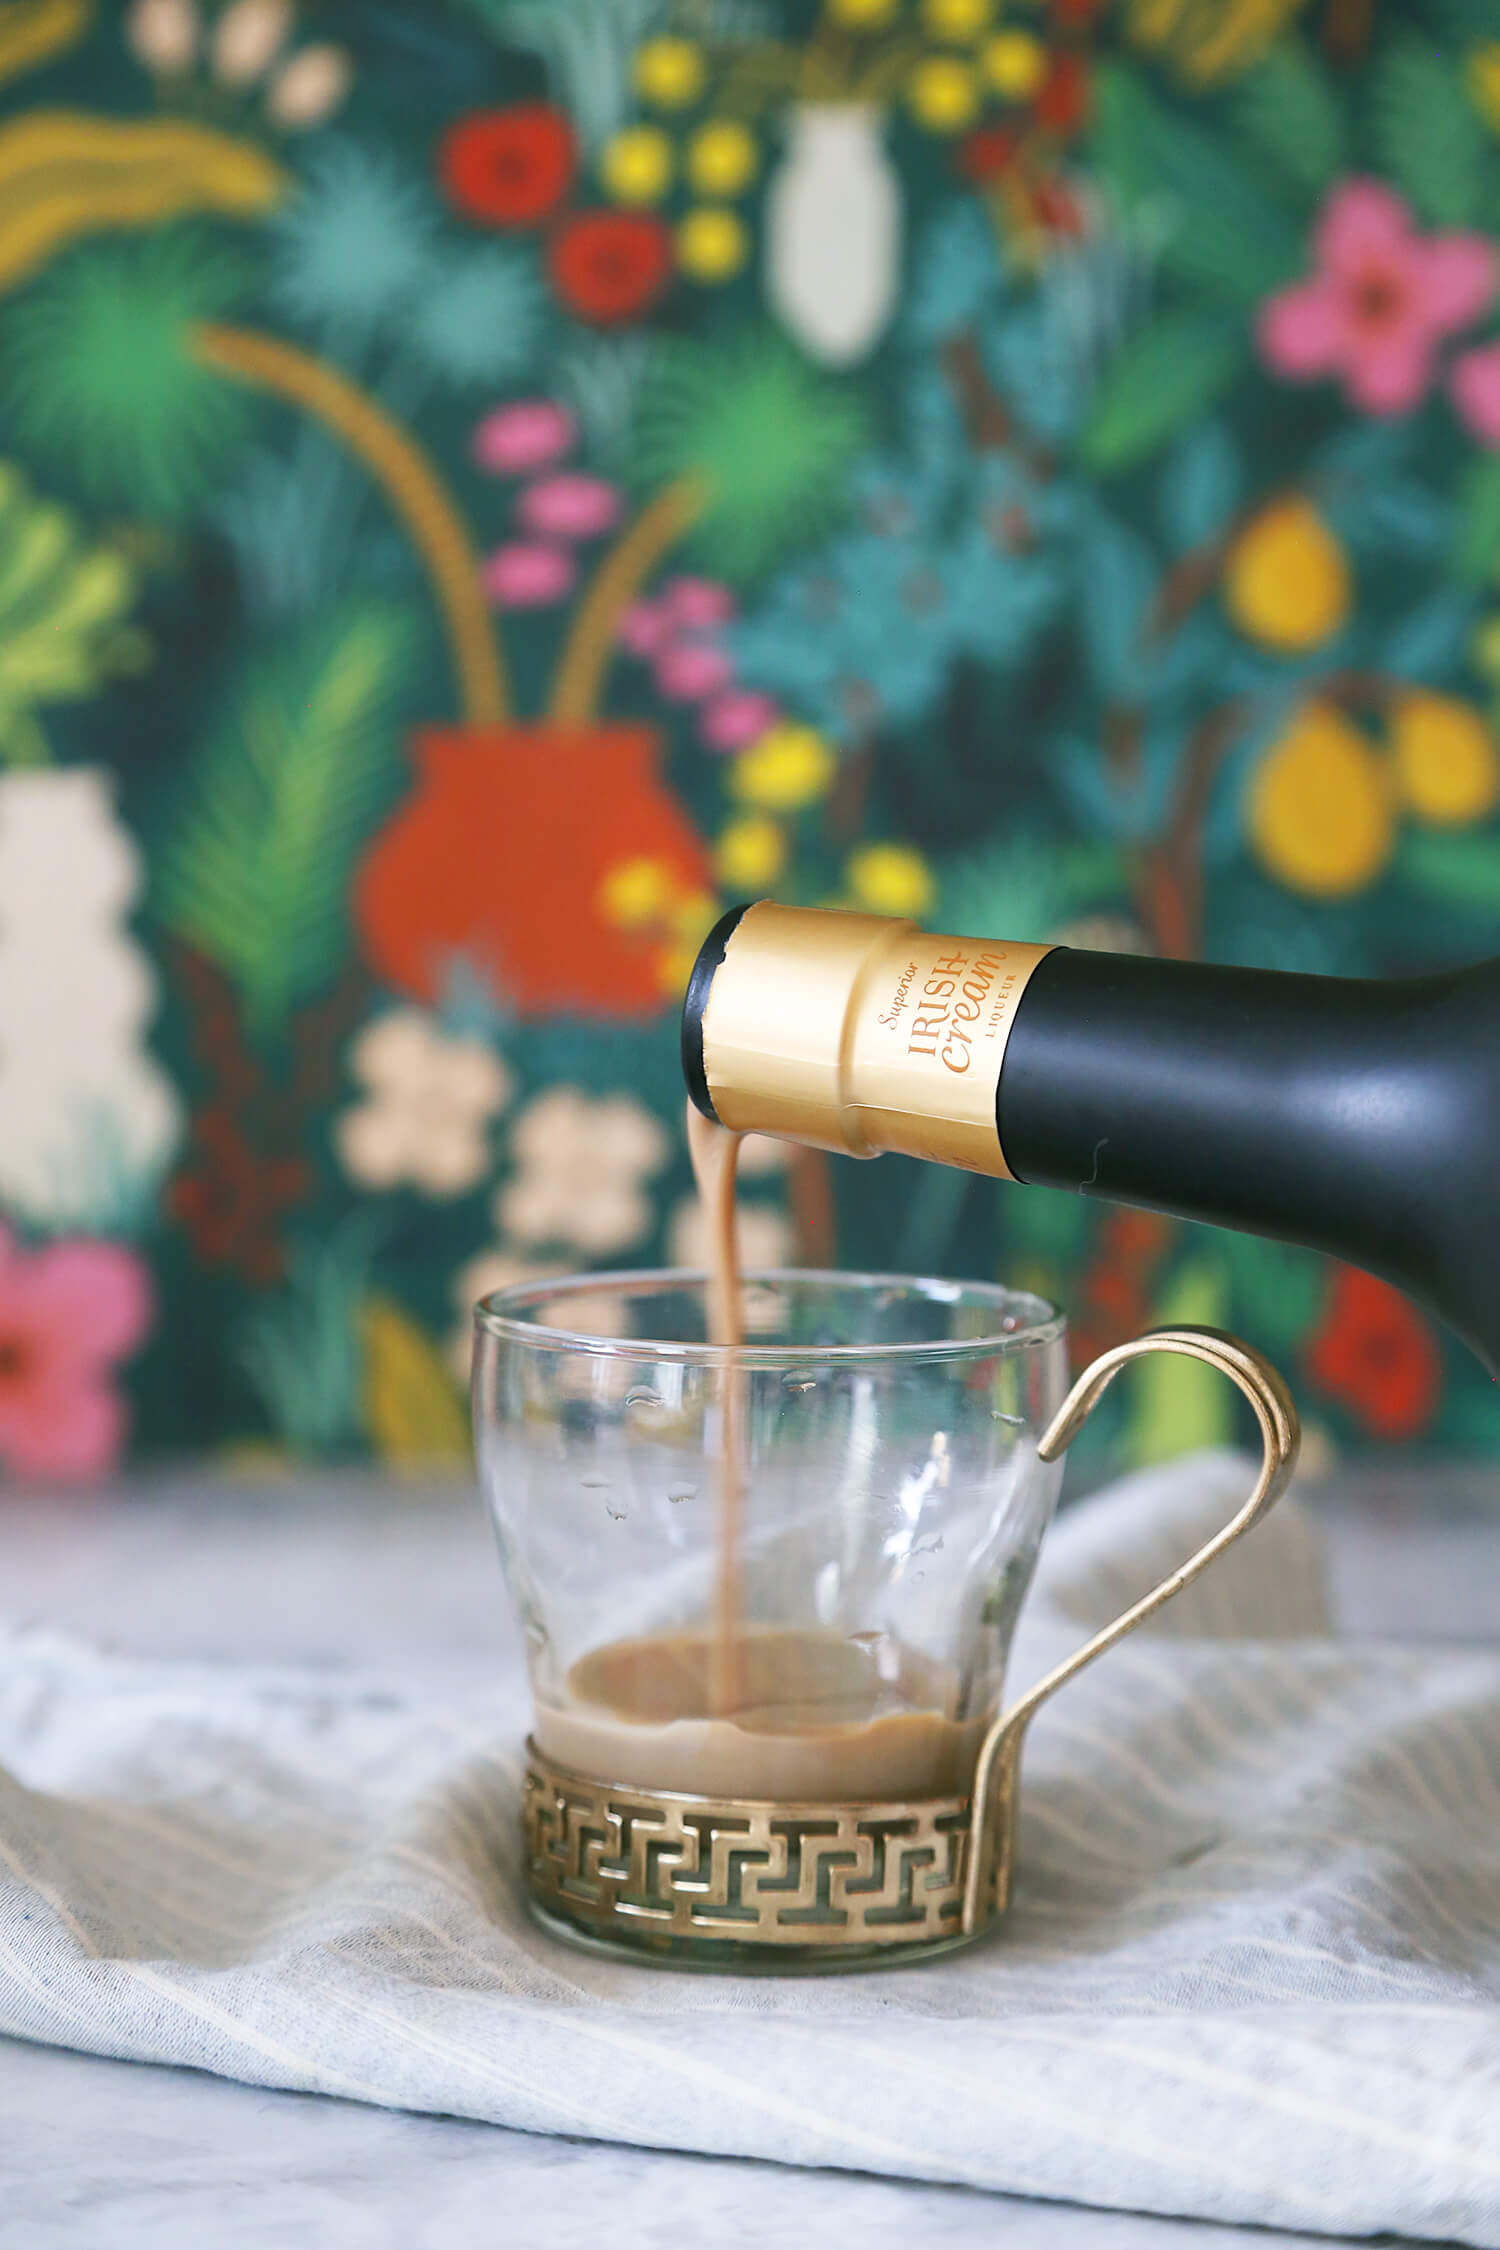
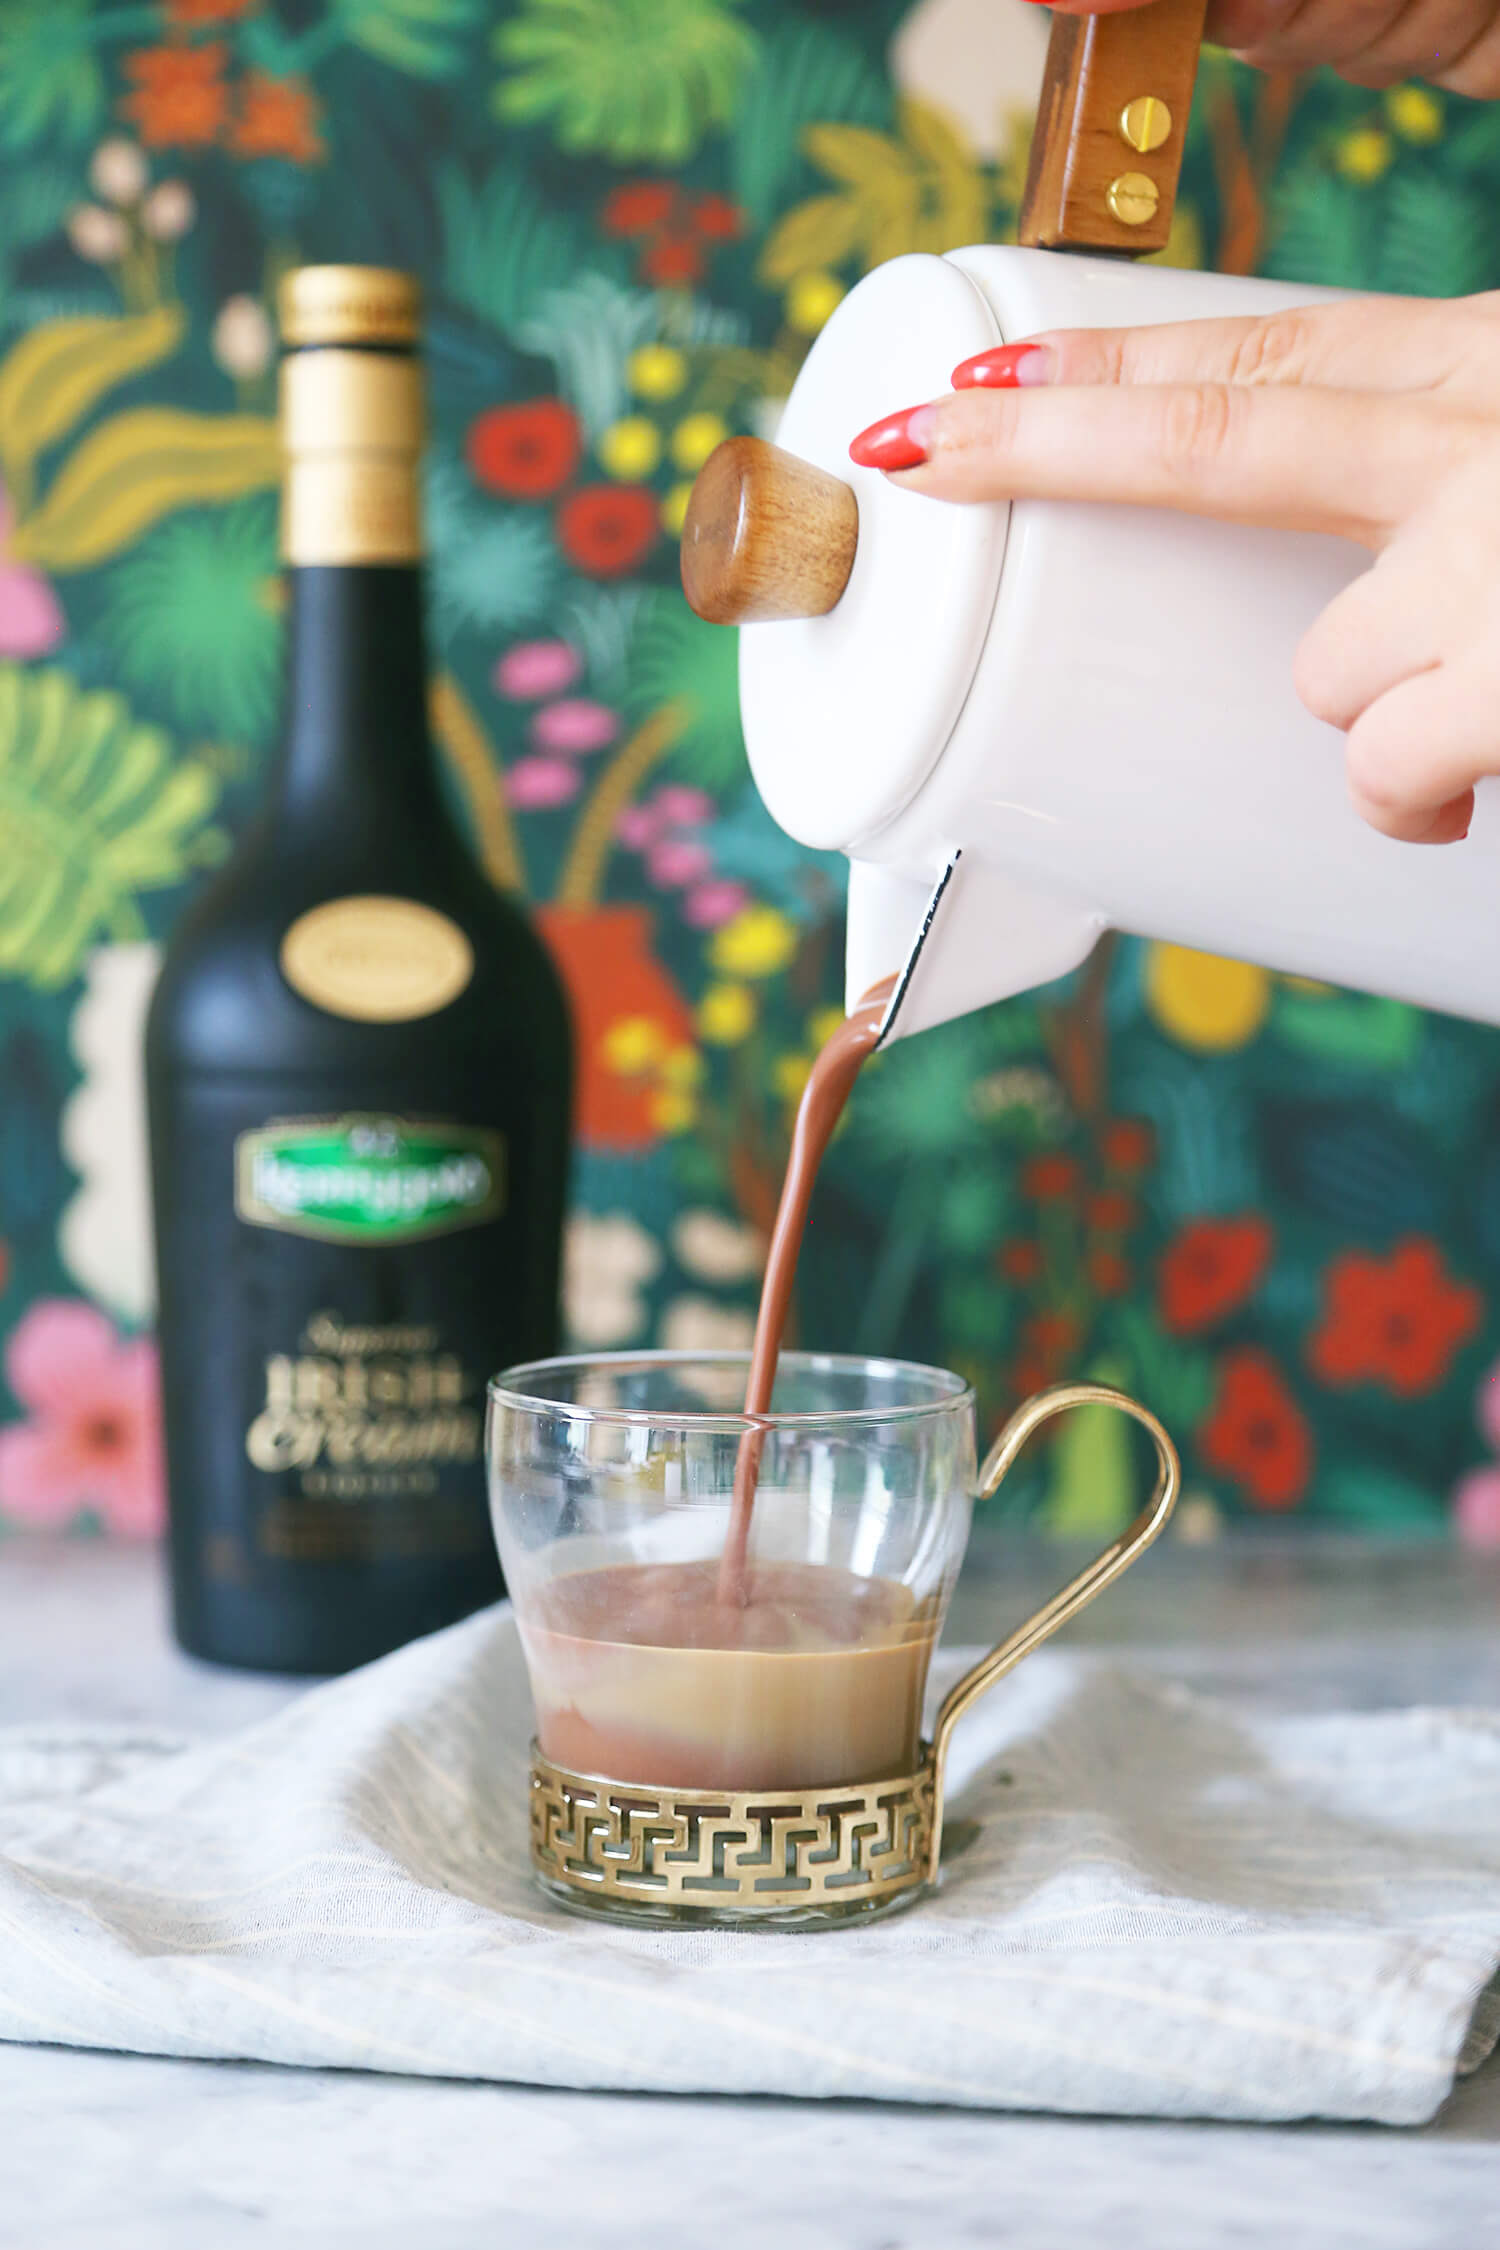
I don’t like to add booze to the hot chocolate mix. Since it’s hot it can burn the alcohol off. It’s nice to put out a few bottles that go best with hot chocolate. Guests can pick their favorite spirit and mix it to their own taste. It also allows the hot chocolate to be non-alcoholic. Hello children, non-drinkers, and pregnant ladies! They all need a holiday treat too! My favorite spirits to leave out on my Holiday Hot Cocoa Bar are:

  • Irish cream (like Kerrygold)
  • Licor 43
  • whiskey (bourbon, rye, or Irish)
  • rum (spiced or dark)
  • brandy (American, French, or Spanish)
  • sherry (Pedro Ximenez)
  • creme de cacao (I love Tempus Fugit)
  • coffee liqueur
  • amaretto or biscotti liqueur (Faretti)

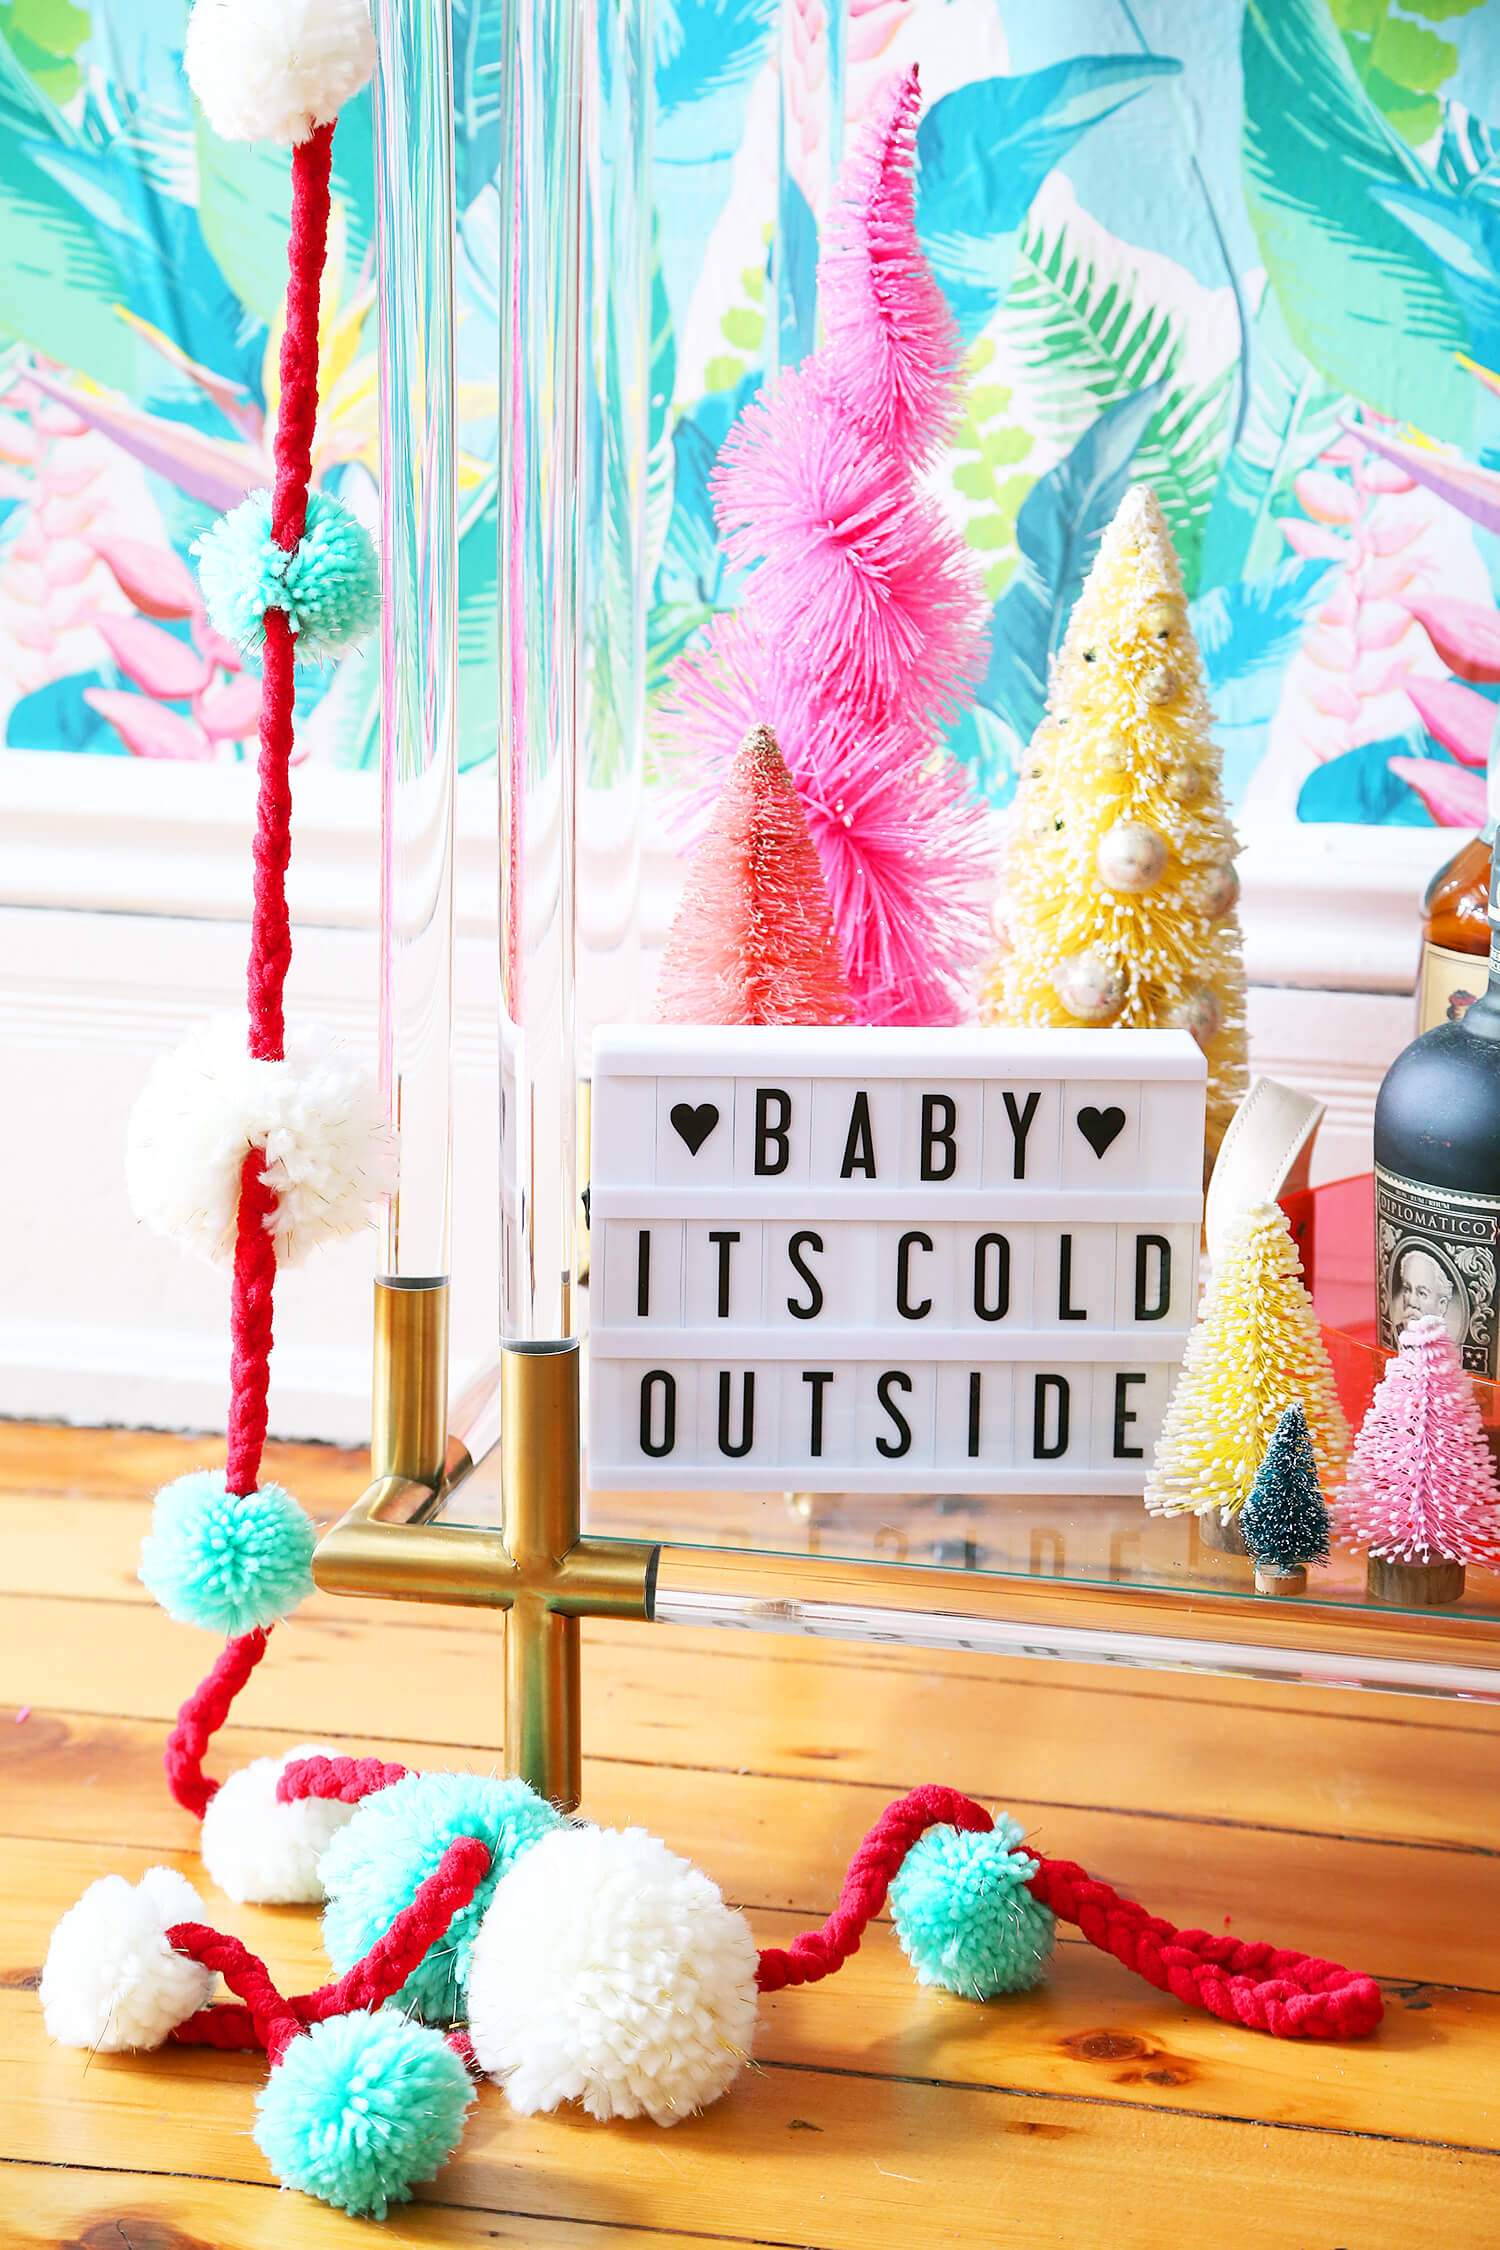
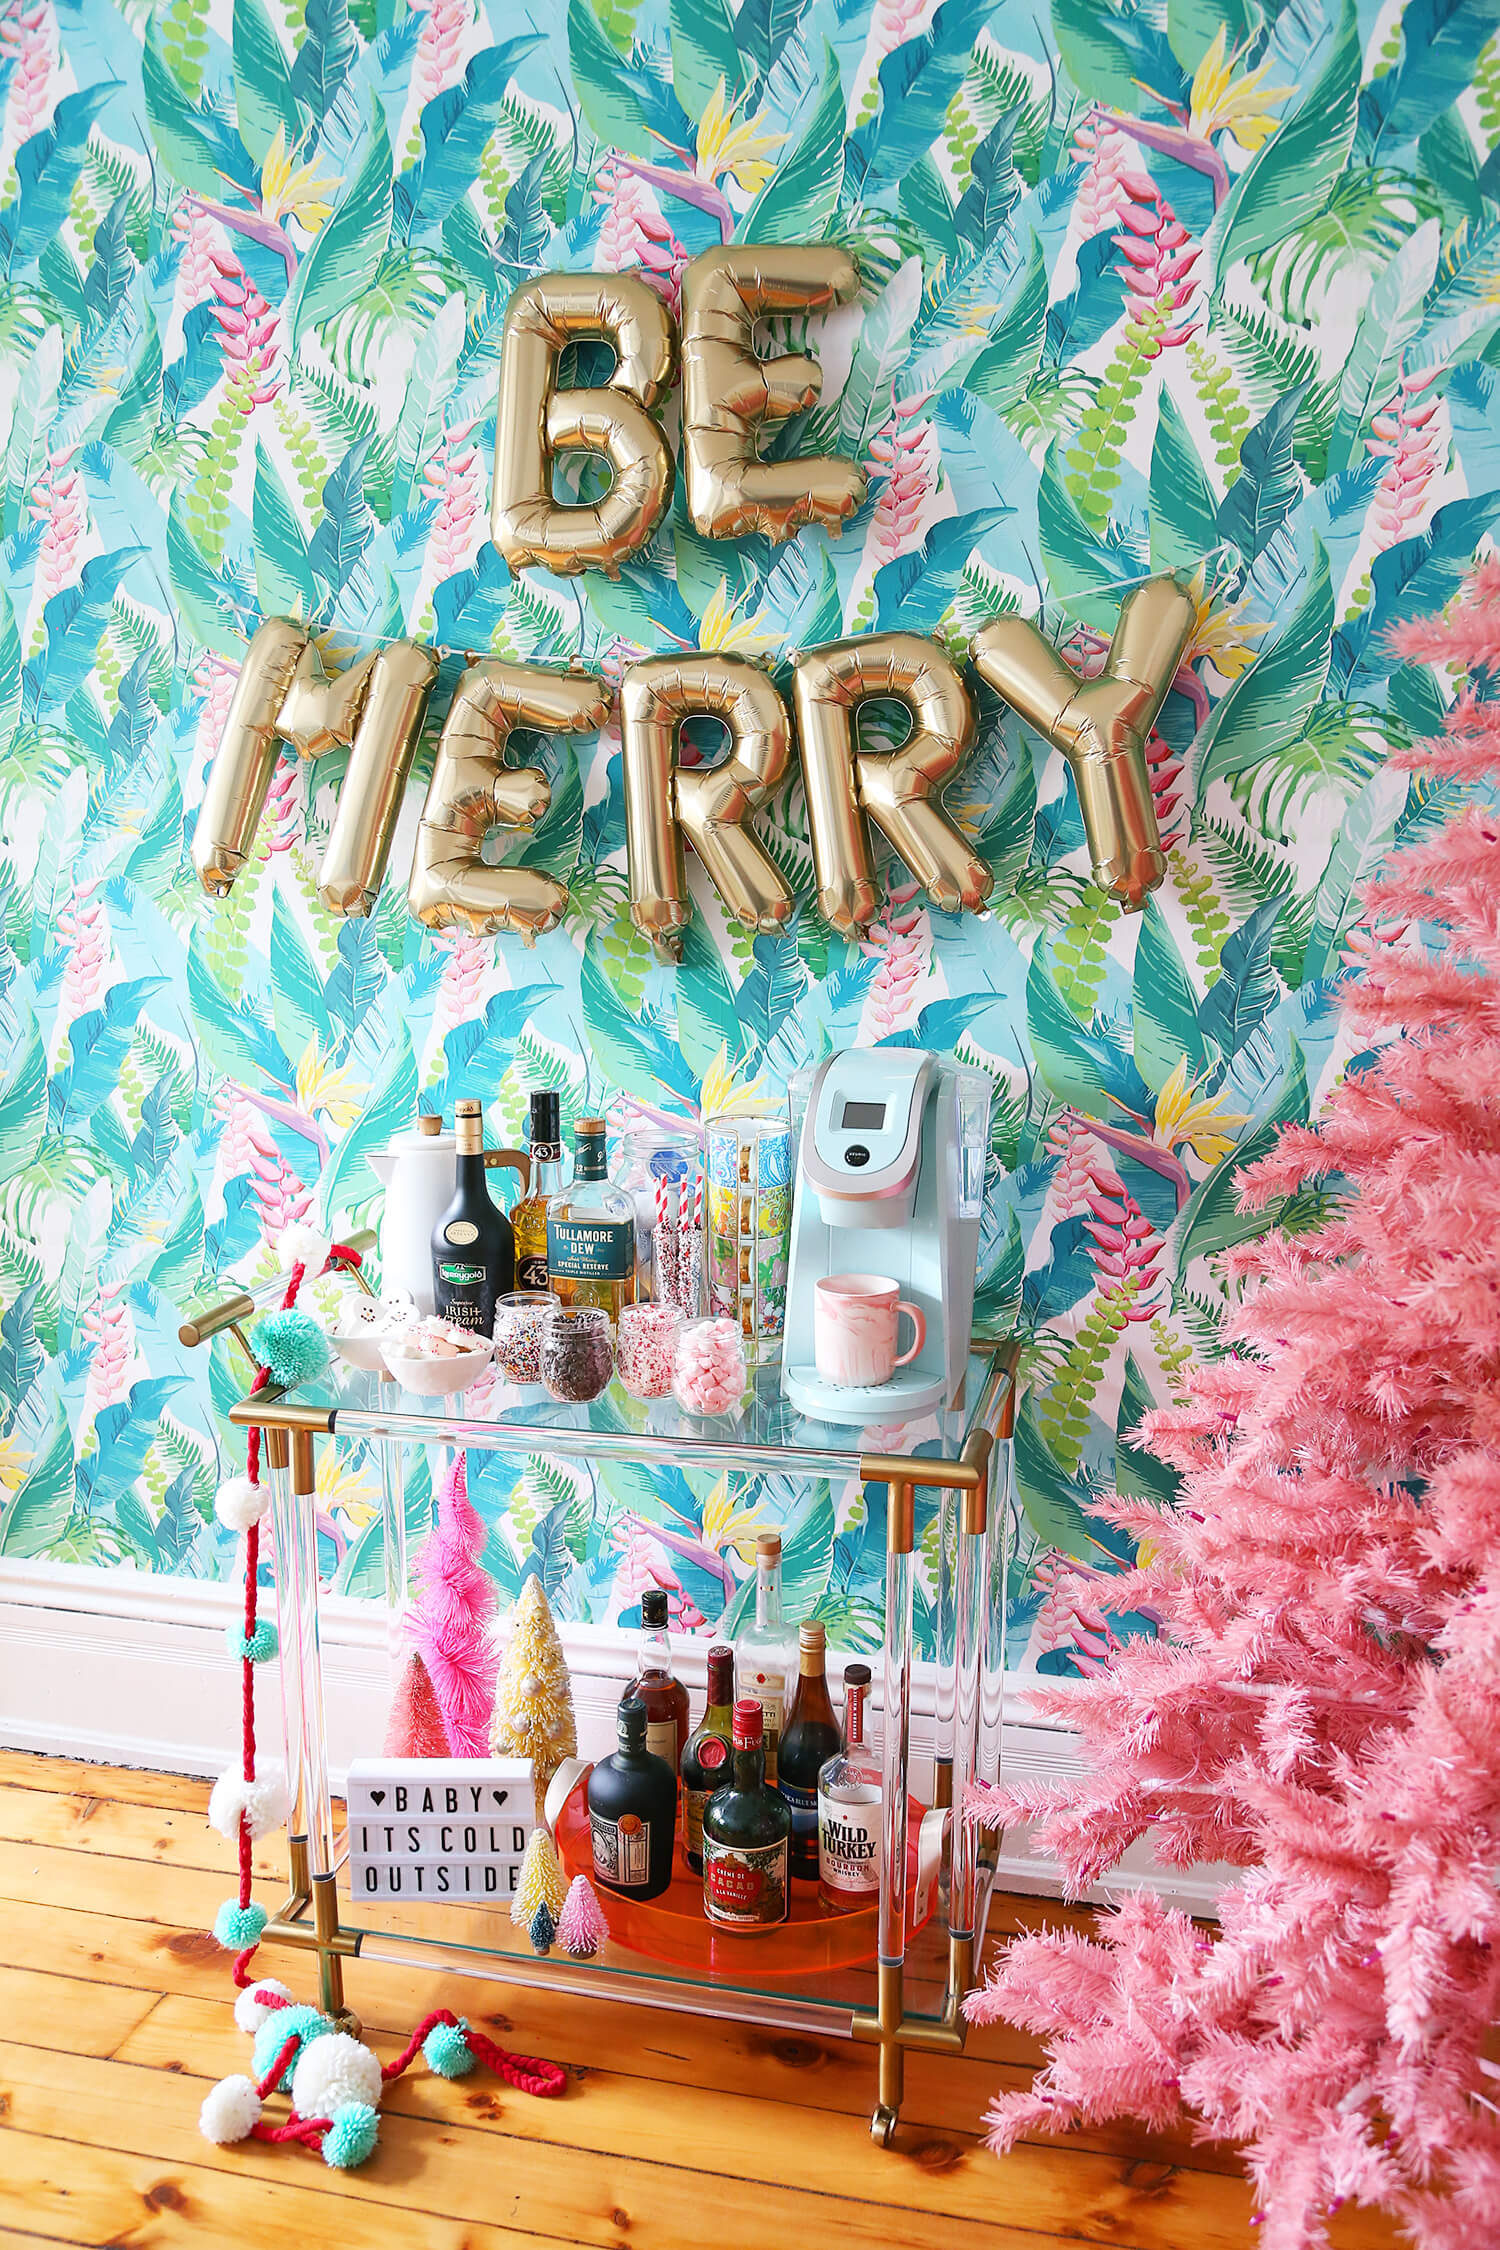
This is an easy and delicious treat when you’re having holiday guests over. It takes the pressure off of you while you’re entertaining and guests get to make their own delicious wintery treat! I hope you consider putting a Holiday Hot Cocoa Bar together for your festivities. Don’t forget to include some fun holiday decor as well!

Be Merry Balloon Banner / Hot Cocoa Pot / Pink Marble Mugs / Bottle Brush Trees from Target and Homegoods / My Cinema Lightbox / Pink Tree

Filed Under: Bar Cart Style, Entertaining, Holiday Cocktails, Home Entertaining, Hot Cocktails, Winter Cocktails Tagged With: bar cart, bar cart essentials, craft cocktails, dessert, easy entertaining, holiday cocktails, home bar, home entertaining, hot chocolate, hot cocktails, winter cocktails

Easy 3 Ingredient Cranberry Gimlet

December 1, 2017 by Natalie 1 Comment

The best part about Thanksgiving I think is the leftovers. Pilgrim sandwiches, tiny feasts, pie for breakfast, and post-holiday cocktails. For the third Thanksgiving in a row, I’ve made my Cranberry Harvest Punch and it’s always a hit! I had leftover cranberry spiced syrup so I made this Easy 3 Ingredient Cranberry Gimlet.

I love using cranberries in cooking, baking, and cocktails during the holiday season. Cranberries have such a short season that I usually freeze a few bags to last me the rest of the winter. After December it’s really hard to find fresh ones. You can consider this a warning. You’re welcome!

Cranberry Gimlet, serves 1

2 oz. gin
1 oz. lime juice
3/4 oz. spiced cranberry syrup (recipe here)

After making your syrup let it cool completely. Add all your ingredients to a cocktail shaker with ice and shake. Strain into your desired serving vessel. Usually, a gimlet is served up in a coupe glass but you can serve it on ice in a double rocks glass as well. I used these festive carnival punch glasses from my punch set. Garnish with fresh cranberries, rosemary, lime wheel, and a cinnamon stick. I’m a big fan of the elaborate garnish!

The cranberry syrup is super easy to make and tastes amazing! I love using it in replacement of simple syrup like I did here with this Easy 3 Ingredient Cranberry Gimlet. You can also use it in a daiquiri, tom collins, or any other classic cocktail that calls for simple syrup. This means the possibilities are endless! Also, if you have any leftover cranberry sauce please feel free to add a barspoon. I love adding jam or preserves to cocktails to add flavor and texture.

You can make this Easy 3 Ingredient Cranberry Gimlet to order or batch it if you’re having company. I love easy recipes that double as large format drinks for the holidays. Just multiply the recipe by the number of drinks you want to make and serve it in a punch bowl or pitcher with some ice. Easy peasy lime squeezy.

Easy 3 Ingredient Cranberry Gimlet

Filed Under: Classic Cocktails, Gin, Gin Cocktails, Holiday Cocktails Tagged With: classic cocktails, craft cocktails, cranberry, easy entertaining, gin, gin cocktails, holiday cocktails, thanksgiving

Boozy Hot Chocolate

November 28, 2017 by Natalie 1 Comment

The history of hot chocolate dates back to Aztecs and Mayans, but it was the Spanish who first experimented with adding sugar and milk, in addition to a host of modifiers, including cinnamon, orange peel, and even ambergris, to spice it up. Spirited variations on the hot chocolate can take many forms. My favorite things to mix in Boozy Hot Chocolate is whiskey, rum, tequila, cream liqueur, vanilla liqueur, creme de cacao, coffee liqueur, or even sherry.

I created this Boozy Hot Chocolate variation with Kerrygold Irish Cream Liqueur to promote their Holiday Contest where those who enter the contest will be up for a chance to win a trip to NYC for St. Patrick’s Day complete with a cash prize and tickets to an exclusive, VIP event with Kerrygold Irish Cream Liqueur. Contestant’s cocktails will be judged, based on visual aspects, creativity, and overall execution. This contest will run from mid-November through the end of December, with the winner being announced in January. For more details on the contest and to enter, visit: www.kerrygoldirishcream.com/NYC. Rules and restrictions apply. US entrants only. Must be 21 years or older to enter.

Boozy Hot Chocolate, serves 1

1 oz. Kerrygold Irish Cream Liqueur

1 oz. Irish Whiskey

2 tablespoons unsweetened cocoa powder

1 to 2 tablespoons of sugar

pinch of salt

1 cup of milk

1/4 teaspoon vanilla extract

Whisk together the cocoa, sugar, salt, and about 2 tablespoons milk in a small saucepan over medium-low heat. Stir until all ingredients have dissolved and then whisk in the remainder of the milk. Heat over medium heat, stirring occasionally, until hot. Add the vanilla extract and whisk until completely incorporated.

Once the hot chocolate is prepared you can build your drink. Add the Kerrygold Irish Cream Liqueur and whiskey to your desired serving vessel. Pour the hot chocolate on top, stir, and garnish with marshmallows or whipped cream and a dusting of cocoa powder.

This recipe multiplies very easily in case you want to make a larger batch.  Add the hot chocolate and your spirits to an enamel pot or pitcher so that it stays warm for serving. This Boozy Hot Chocolate is a breeze to make and is sure to keep you nice and toasty on a cold day. I hope you try this one at home or come up with your own recipe. If you do don’t forget to enter the contest. I’d love to see you in NYC for St. Patrick’s Day. Happy sipping and good luck! xo

Filed Under: Hot, Sponsored, Sweet, Whiskey, Whiskey Cocktails, Winter Cocktails Tagged With: cocktails, craft cocktails, dessert, holiday cocktails, hot chocolate, hot cocktails, Irish Whiskey, Kerry Gold Irish Cream Liqueur, Whiskey, winter cocktails

Holiday Bar Gift Guide

November 26, 2017 by Natalie Leave a Comment

Now that Thanksgiving is over we can talk about Christmas. I’ve had my eyes on a few of these items for quite awhile. I thought I’d share a Holiday Bar Gift Guide in case you were looking for something for that special someone. You know, that someone that likes pink, gold, and all things boozy! Maybe some of this stuff is on my wishlist too. I hope you took advantage of some Black Friday deals and went shopping for small business Saturday. I’m looking forward to all the sales and shopping this month.

Links 1. Bar Tool Set 2. Mixing Glass 3. Cocktail Pins 4. Infusion Kit 5. Confetti Cocktail Shaker 6. Pineapple Barspoon 7. Unicorn Bottle Stopper 8. Copper Tumbler 9. Decanter Tags 10. Decanter 11. Pink Tray

Links 12. Cocktail Kit 13. Art of the Bar Cart 14. Margarita Glasses 15. Cocktail Picks 16. Decanters 17. Pineapple Bottle Stopper 18. Portable Wine Glass

The best part of this Holiday Bar Gift Guide is that almost everything is under $30 with the exception of the decanters. I’m looking forward to putting together more of these gift guides. If you’re looking for more ideas follow my Boozy Gifts board on Pinterest. I hope you had a great Thanksgiving and holiday weekend! Cheers! xo

Filed Under: Bar Cart Style, Gift Guide Tagged With: bar accessories, bar cart, bar cart essentials, bar tools, gift guide, gifts, holiday, home bar

Rosemary Gin and Tonics with Infused Ice

November 20, 2017 by Natalie 2 Comments

Hey there everyone! I’ve been working my little behind off and I’m getting ready to host my first Thanksgiving. Let’s talk about STRESSED. Luckily I’ve teamed up with Zevia to bring you some cocktail recipes with their non-alcoholic mixers. First up are these Rosemary Gin and Tonics with Infused Ice.

Zevia is a line of zero calorie, refreshing and delicious beverages. Zevia is sweetened with the plant-based sweetener stevia, which means no artificial sweeteners, and no sugar. It is also Non-GMO Project Verified, gluten-free, Kosher, vegan and free of caramel color. Zevias mixers are simple, delicious, and the perfect compliment to any cocktail. I wanted to make something that was no fuss because that equals no stress! These Rosemary Gin & Tonics with infused ice are the perfect answer to easy entertaining this Thanksgiving.

Rosemary Gin and Tonic

2 oz. rosemary infused gin

1 can of Zevia tonic water

rosemary and cranberry infused ice cubes

Infusing the gin is easy. Simply add your desired amount of gin to a container with a few sprigs of rosemary. Infuse for 1 hour or until the desired level of taste is achieved.

To make your ice cubes add cranberries and rosemary to a large ice cube tray and fill with filtered water. Freeze for 5-6 hours but overnight is always best.

To make your cocktail place your infused ice in a glass, pour the gin and then add Zevia tonic water.

I love using infused ice in drinks. It’s a really simple detail that will certainly wow your guests. The great part about infusing ice is that you can make a bunch ahead and simply pop them out of the freezer when needed. Same thing goes for infusing the gin. Infuse as much as you need in advance and you have a delicious 2 ingredient cocktail with the most beautiful garnish. Easy peasy. There’s so much to do when you’re entertaining so I hope these Rosemary Gin and Tonics with Infused Ice will take a little work out of making cocktails. Happy Thanksgiving everyone!

Filed Under: Entertaining, Fizzy, Gin, Gin Cocktails, Holiday Cocktails, Home Entertaining, Sponsored Tagged With: classic cocktails, easy entertaining, fall cocktails, gin, gin cocktails, holiday cocktails, home entertaining, sponsored

One Room Challenge Final Reveal of The Hallway Refresh

November 15, 2017 by Natalie 42 Comments

I am beyond excited to be showing you the One Room Challenge Final Reveal of The Hallway Refresh. Honestly, I almost didn’t survive this 6-week design challenge. After a few breakdowns and some tears, I think I can finally laugh about it. Despite some ups and downs with the light fixture and not getting a product on time, we pulled through and I am SO happy with the final results!

Originally I picked the hallway because the design process had already started in the rest of the rooms of the house. The hallway was neglected and kind of sad and dingy looking. When the One Room Challenge came back around I took it as my chance to force myself to fix up this space. I’m so glad I did because I think it is now my favorite area of the house. Is it weird if I just hang out in the stairwell?

In case you missed any of my previous posts about the One Room Challenge, I put together a few before and after comparisons for quick reference. Taking a look at all the before photos is recommended to fully appreciate the results of the One Room Challenge Final Reveal of the Hallway Refresh.

By far painting, the stairs is the biggest upgrade to this space. When we looked at the apartment the stairs and banister were actually brown, having never been renovated since probably the 1970s. When we moved in the banister was white and the stairs were painted a mustard yellow. This was definitely an improvement but the paint job wasn’t that great. I’m sure they were just rushing to get it done but the sight of it really bothered me. Now the stairs are so colorful and bright. The sun from the skylight reflects off of the stairs and brings a lot more light to the bottom hallway as well. Looking at the staircase instantly puts me in a better mood. How can you not be happy looking at a rainbow of pink?

The other goal of redoing this space was to brighten up the bottom hallway. It is the only area in the whole house with no window, therefore, it is the darkest. I picked a light and airy wallpaper for the accent wall and created a landing area. I bought this bench, this coat rack, and added baskets. Now we can hang coats, put down our bags, and store shoes. I’m really happy with this upgrade because it so much better looking but it is also so much more functional. I’m glad that the light fixture worked out in the end because it was so important to the design. It also gives off so much more light than the old fixture on top of also being way better looking. Thanks for all the support while I figured out how to install it!

The last problem I encountered was the macrame plant hangers did not get delivered on time. This really bothered me because they were the first things I ordered 6 weeks ago. I went back to my original plan of DIYing plant hangers out of twine instead. The stairwell wall gets so much light which is why it was important to incorporate plants here. I love how easy the plant hangers were to make and the contrast of the twine against the white wall. I wish I had stuck with that plan instead of causing myself so much stress. In the end, I’m happy with how this wall came out. There are never enough plants.

I needed art for the top of the stairwell and Ethan made this abstract painting that came out so good! I’m completely in love with it and so happy that we decided to do that last minute.

I could go on and on about how happy I am with the turnout of the One Room Challenge Final Reveal of the Hallway Refresh. I’ve listed all the room sources below as well as links to each week of the One Room Challenge. A huge thank you to the One Room Challenge for letting me be a guest participant, Ethan for putting up with all my craziness and my friend Thaddeus Rombauer (who is an amazing photographer) for helping me photograph the space. Be sure to head over to the Calling it Home website to check out all the other One Room Challenge guest participants room reveals today and also yesterdays One Room Challenge participants reveals.

Thanks for following along on this crazy journey! I hope you enjoyed the way the Hallway Refresh came together. I’d love to hear your thoughts in the comments below.

Wallpaper / Bench / Coat Rack / Light Fixture / Paint / Flower Pots / Baskets / Rug / DIY Plant Hangers

Week 1 / Week 2 / Week 3 / Week 4 / Week 5 / Week 6


Filed Under: Design, DIY, Home Decor Tagged With: at home, design, hallway refresh, Home Decor, interior design, one room challenge

Thanksgiving Fall Tablescape Ideas

November 15, 2017 by Natalie

Every year it always surprises me how quickly it goes from Halloween to Christmas. Even in retail stores, they seem to totally skip over Thanksgiving all together. It makes the time move too fast and I wish it would slow down so we could enjoy each holiday just a little bit longer. Thanks to Kate Aspen I’m showing you some Thanksgiving Fall Tablescape Ideas that are easy, beautiful and sure to impress your holiday guests.

Beautiful doesn’t even do this tablescape justice. I have thoroughly impressed myself! This is the first holiday that I live in a space big enough to entertain in so I’m super excited. For the table, I wanted it to have lots of colors but still be seasonally appropriate. I picked up some bundles of small pumpkins at my local grocery store and painted them with acrylic paint I already had. I wanted to do somewhat of an ombé look for the pumpkins so I did hot pink, light pink, coral, orange, and yellow. Then I accented them with these Kate Aspen gold glitter pumpkin votive holders. They’re so cute and sparkly and look perfect next to the painted pumpkins.

Since a lot of my table accessories were gold I wanted a pop of color for the place settings. I used white and gold-rimmed dinner plates with vintage green and gold-rimmed appetizer plates and white and gold bread plates. The green plates accent the greenery in the centerpiece as well very nicely. I picked up the foliage from a local flower shop and the bundle was only $5. Super affordable and really worthwhile to make a memorable tablescape. Underneath I layered two different table runners to add more color and texture. You can use a tablecloth and runner or even placemats.

I used white napkins with gold polka dots and these really cute Kate Aspen pumpkin napkin rings. Are you sensing a theme here? I also used these super cute gold pumpkin place card holders. Here is where I wish I excelled in cute penmanship. My handwriting has been epically bad my whole life. In college, my drafting professor used to give me special assignments where all I had to do was practice my block lettering inside these elaborate shapes. All that did was train me to only know how to write in architecture handwriting. Years later it’s just morphed into me writing messy in all caps. We can’t be good at everything, can we?

No holiday dinner is complete without some wine. Using something as simple as decorative bottle stoppers like these pumpkin ones make them fit in with your table decor. I always like to have a variety of wine available because everyone has different taste. I’m usually a white wine drinker but having another bottle of red on hand is always good. I absolutely adore these cheers stemless wine glasses. They’re perfect for any occasion.

I’m so happy that I got to share my Thanksgiving Fall Tablescape Ideas with you. It was really easy to put together and styling your table makes a huge impact for entertaining. All of the things included in my Thanksgiving Fall Tablescape Ideas are super affordable as well which is a huge plus! Decorating and hosting can get pricey during the holidays so it’s great to find ways to still get festive on a budget. If you’re still planning your Thanksgiving table make sure you head over to the Kate Aspen website and check out all their party favors and tabletop decor.

I had so much fun styling this table and I can’t wait to host my first Thanksgiving. I’d love to hear whats on your Thanksgiving table. Let me know is the comments below! If you need more inspiration I’ve pinned all of these items plus more inspiration on my Tablescape Board and Thanksgiving Ideas Board on Pinterest. Cheers everyone!

Filed Under: DIY, Entertaining, Home Decor, Home Entertaining, Sponsored Tagged With: easy entertaining, Home Decor, home entertaining, kate aspen, sponsored, tablescape, thanksgiving

One Room Challenge Week 6 of the Hallway Refresh

November 9, 2017 by Natalie 14 Comments

One Room Challenge Week 6 of the Hallway Refresh is going so much better than last week. I’m so happy to be in the home stretch of the challenge and for the stress to be over! Thank God for that extra week or else my Hallway Refresh project would have been a complete flop. Today I’m sharing what’s complete and what needs to be finished before the final reveal shoot on Monday.

The wallpaper came last week and I installed it on Sunday. It came out better than expected and I am completely in love with it. I wanted to go with another tropical/botanical print but was nervous it would clash with the living room wallpaper but it totally doesn’t! It’s neutral enough that it blends between the living room and kitchen. It’s crazy how a simple upgrade can really make an impact and brighten up a space. This is the darkest area of the house and my main goal was to make it feel lighter. I think I’ve accomplished it.

The coat rack was hung on Monday which I thought was going to be the easiest part of finishing that wall but I was wrong. We decided to hang it with anchors but hit a stud while drilling. So, we didn’t need anchors apparently. I’m very happy with how the dark wood and gold stand out on the wallpaper. The chandelier is up and working and an electrician is coming tomorrow to do final repairs. That light has caused me the most stress so I will be happy when that problem is over. If you didn’t read last weeks nightmare post then you can read it here.

The bench is in its forever home. I did really love it in the living room too. I’m on the hunt for something similar to replace it as a coffee table. Loving how it serves as extra storage plus a landing area.

I decided to swap out that jute rug for something less busy. It was clashing with the wallpaper too much and I just wanted something simple. Luckily I had this faux fur rug in my office that I’m using instead. I put the jute rug in there, so no money was lost. Bonus! I do wish Phil was still here to photobomb my One Room Challenge posts. He loved fuzzy rugs too.

The only big project left to do for the One Room Challenge Week 6 of the Hallway Refresh is the stairs which I will be tackling this weekend. I picked up the paint today and the colors are even better than the swatches. Painting the stairs is going to transform this area into a bright, happy, and colorful place. Is it okay to hang out in the stairwell or is that weird?

I picked up some plants today to put inside the macrame for the stairwell wall. The macrame still hasn’t arrived though. I tracked it and it says “in transit to destination” so fingers crossed they come tomorrow. They will only take a few minutes to hang so I’m not that worried.

The One Room Challenge Week 6 of the Hallway Refresh has been a success and I can’t wait to show you how everything comes together.

Filed Under: Design, Home Decor Tagged With: design, hallway refresh, Home Decor, interior design, one room challenge

Pumpkin Butter Flip

November 8, 2017 by Natalie 8 Comments

Halloween might be over but we have until Thanksgiving to capitalize on all things pumpkin flavor. Recently I did an apple cider + pumpkin butter cocktail for my farmers market cocktail column on Chicpeajc and I thought why not use pumpkin butter in another drink? I came up with this Pumpkin Butter Flip to bring you a seasonal and creamy dessert cocktail. It’s so good it might rival pumpkin pie for dessert at your Thanksgiving dinner table.

A flip is a category of mixed drink. According to the Oxford English Dictionary, the term was first used in 1695 to describe a mixture of beer, rum, and sugar, heated with a red-hot iron. The iron caused the drink to froth, and this frothing (or “flipping”) engendered the name. Over time, eggs were added and the proportion of sugar increased, the beer was eliminated, and the drink ceased to be served hot.

The first bar guide to feature a flip (and to add eggs to the list of ingredients) was Jerry Thomas‘s 1862 How to Mix Drinks; or, The Bon-Vivant’s Companion. In this work, Thomas declares that “The essential in flips of all sorts is to produce the smoothness by repeated pouring back and forward between two vessels and beating up the eggs well in the first instance the sweetening and spices according to taste.”

With time, the distinction between eggnog (a spirit, egg, cream, sugar, and spice) and a flip (a spirit, egg, sugar, spice, but no cream) was gradually classified in America’s bar guides. In recent decades, bar guides have begun to indicate the presence of cream in a flip as optional.

Personally, I love a flip with a little cream in it. It mixes with the egg so well while adding a smooth and silky texture to the drink. Also, it tastes delicious!

Pumpkin Butter Flip

1 1/2 oz. spiced rum

1/2 oz. Faretti biscotti liqueur or amaretto 

1/2 oz. fall spice syrup

1/2 oz. heavy cream

1 heaping barspoon pumpkin butter

1 whole egg

pumpkin baking spice mix for garnish

In the larger side of your cocktail shaker add the whole egg and cream. Add the rest of your ingredients to the smaller side of your tin, pour into the large side and seal. Dry shake, add ice and shake again long and hard. Pour into a coupe glass and garnish with a dusting of pumpkin baking spice. Sip and enjoy!

I used my fall syrup in this cocktail and linked to the recipe above. You can also sub it out for regular demerara or simple syrup. I had it on hand and the flavors went so well with the drink it was a no-brainer to use it. The spiced rum contributes to the baking spice flavors of this Pumpkin Butter Flip but you can also use aged rum or even bourbon.

If you’ve never had Faretti Biscotti liqueur you are in for a treat. I use this in replace of amaretto all the time in cocktails. It’s sweet and delicate with hints of nuts, citrus, and anise. The liqueur is made in Northern Italy, near Lake Como, where delicious biscotti cookies are baked in rustic brick ovens. It goes great in coffee or as a little aperitif after dinner as well.

I love that this Pumpkin Butter Flip is reminiscent of eggnog but appropriate for the Fall and Thanksgiving. What will you be making for Thanksgiving dinner or dessert? This cocktail is definitely worth a try and consideration for your holiday menu. Cheers everyone! xo


Filed Under: Dessert, Fall Cocktails, Holiday Cocktails, Rum, Sweet Tagged With: classic cocktails, cocktails, craft cocktails, dessert, fall cocktails, holiday cocktails, pumpkin spice, rum, winter cocktails

Smoky Cinnamon Apple Cider Margaritas

November 3, 2017 by Natalie 2 Comments

After the week I had I definitely need a drink! I’m so happy to team up with Teroforma for this post to talk about one of their newest collections 1pt. 1pt is a collection of infusion blends and kits for alcohol and spirits. I’ve used the 1pt Master Kit to create these Smoky Cinnamon Apple Cider Margaritas and I’ll show you how easy it is to use and how wonderful the end result can be.

Whether you’re an experienced bartender or an at home enthusiast the 1pt Master Kit is a must-have. It comes with a beautiful high-durability lab glass infusion bottle that infuses 375 ml of liquid (half of a standard bottle of spirits). There’s a stainless steel infusion basket that holds the infusion blends which makes infusing so much easier. No mess and no fine straining! You also get a reusable, gold-finish, stainless steel tasting straw so that you can taste-test during the infusion process. The kit also includes a simple instruction guide, 7 blends variety pack and some cocktail suggestions to start you off in the right direction.

I knew I wanted to make apple cider margaritas this month and thought the cinnamon infusion would be a great addition to this cocktail. Using the infusion kit is super simple. The first step is putting your infusion blend into the infusion basket. It clips right back into the top of the bottle with a little push and then you pour your spirit directly into the bottle. Let the infusion sit for 6 hours or to taste. Of course with your fancy gold straw! 😉

Smoky Cinnamon Apple Cider Margarita, serves one

1 oz. cinnamon infused tequila

1 oz. mezcal

1 1/2 oz. apple cider

1/2 oz. lime juice

1/2 oz. agave nectar

First, rim your glassware with an equal part mixture of cinnamon, sugar, and salt. Add all of your ingredients to a cocktail shaker and shake with ice. Strain into a double rocks glass over ice and garnish with a slice of apple, lime wedge, rosemary sprig and a cinnamon stick.

These smoky cinnamon apple cider margaritas were even better than I imagined. Cinnamon goes so well with tequila and I really love the smokiness the mezcal provides the drink. If you want the drink the be less sweet than swap out the agave nectar for some Cointreau. The 1pt infusion kit was so simple to use and really streamlined the whole infusion process. I love that you only infuse a half a bottle of spirit and that I don’t have to fine strain. It makes the whole process more simple but most importantly delivers consistent results. If you want to try any of the Teroforma 1pt collection products you can use “arseniclace10″ when you checkout for 10% off orders over $20, valid through January 31, 2018 on Teroforma.com. Cheers and happy infusing! xo

Filed Under: Fall Cocktails, Sponsored, Tequila Tagged With: classic cocktails, cocktails, craft cocktails, fall cocktails, holiday cocktails, margarita, sponsored, tequila

« Previous Page
Next Page »

Primary Sidebar

Hello.

My name is Natalie Jacob and I'm a bartender, author and beverage + creative consultant drinking, honky tonkin and making a home in Nashville, TN. Learn more ->

Subscribe

Featured Posts

Home Tour on Apartment Therapy

Mod Cocktails Now on Pre-Order!

Mod Cocktails Now on Pre-order

Spicy Mexican Hot Chocolate

Spicy Mexican Hot Chocolate

Holiday Gifting and Punch with Chambord

Celebrate the Holidays with Chambord

Recent Posts

  • Celebrate the Holidays with Chambord
  • My Staycation at The Dive Motel
  • Kiwi Watermelon Margarita Popsicles
  • Easy 3 Ingredient Quarantine Cocktails
  • Creating My Outdoor Living Space

Blogroll

  • A Beautiful Mess
  • Apartment Bartender
  • Basil & Bubbly
  • Chat Chow
  • Craft + Cocktails
  • Drinking with Chickens
  • Holly & Flora
  • Palm Springs Style
  • Salt n Pepper Here
  • The Good Drink
  • Thirsty

Footer

Check out what’s happening on Instagram!

…
  • Email
  • Facebook
  • Instagram
  • Pinterest
  • Twitter

Copyright © 2025 · Foodie Pro & The Genesis Framework